
How to Shoot Light Trails
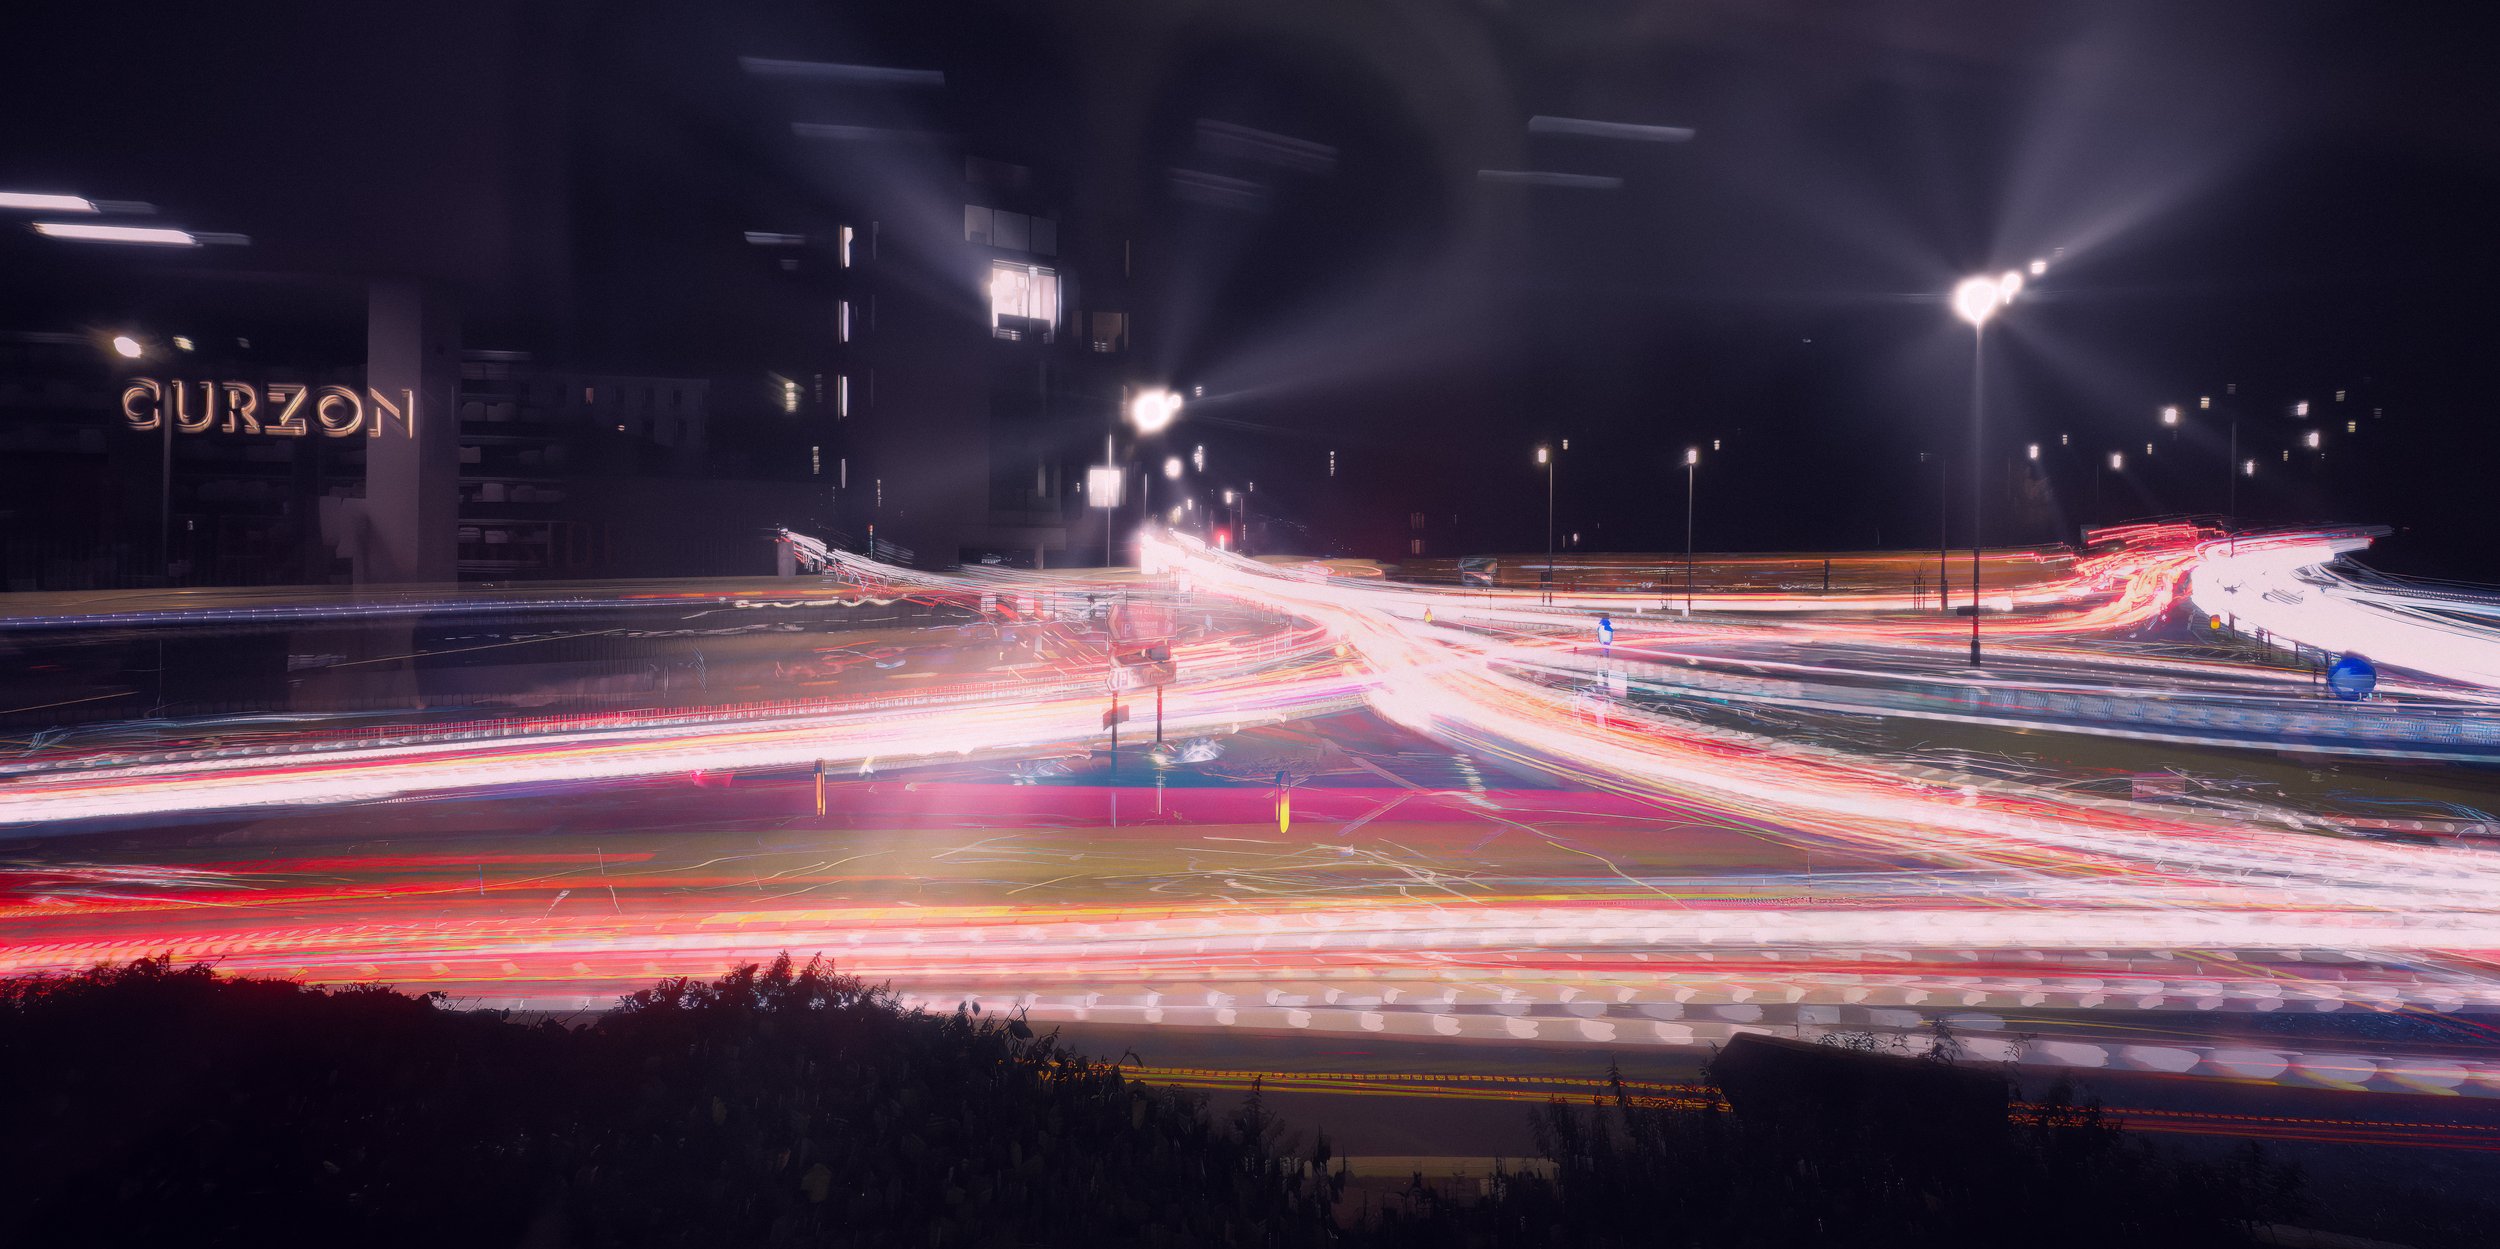
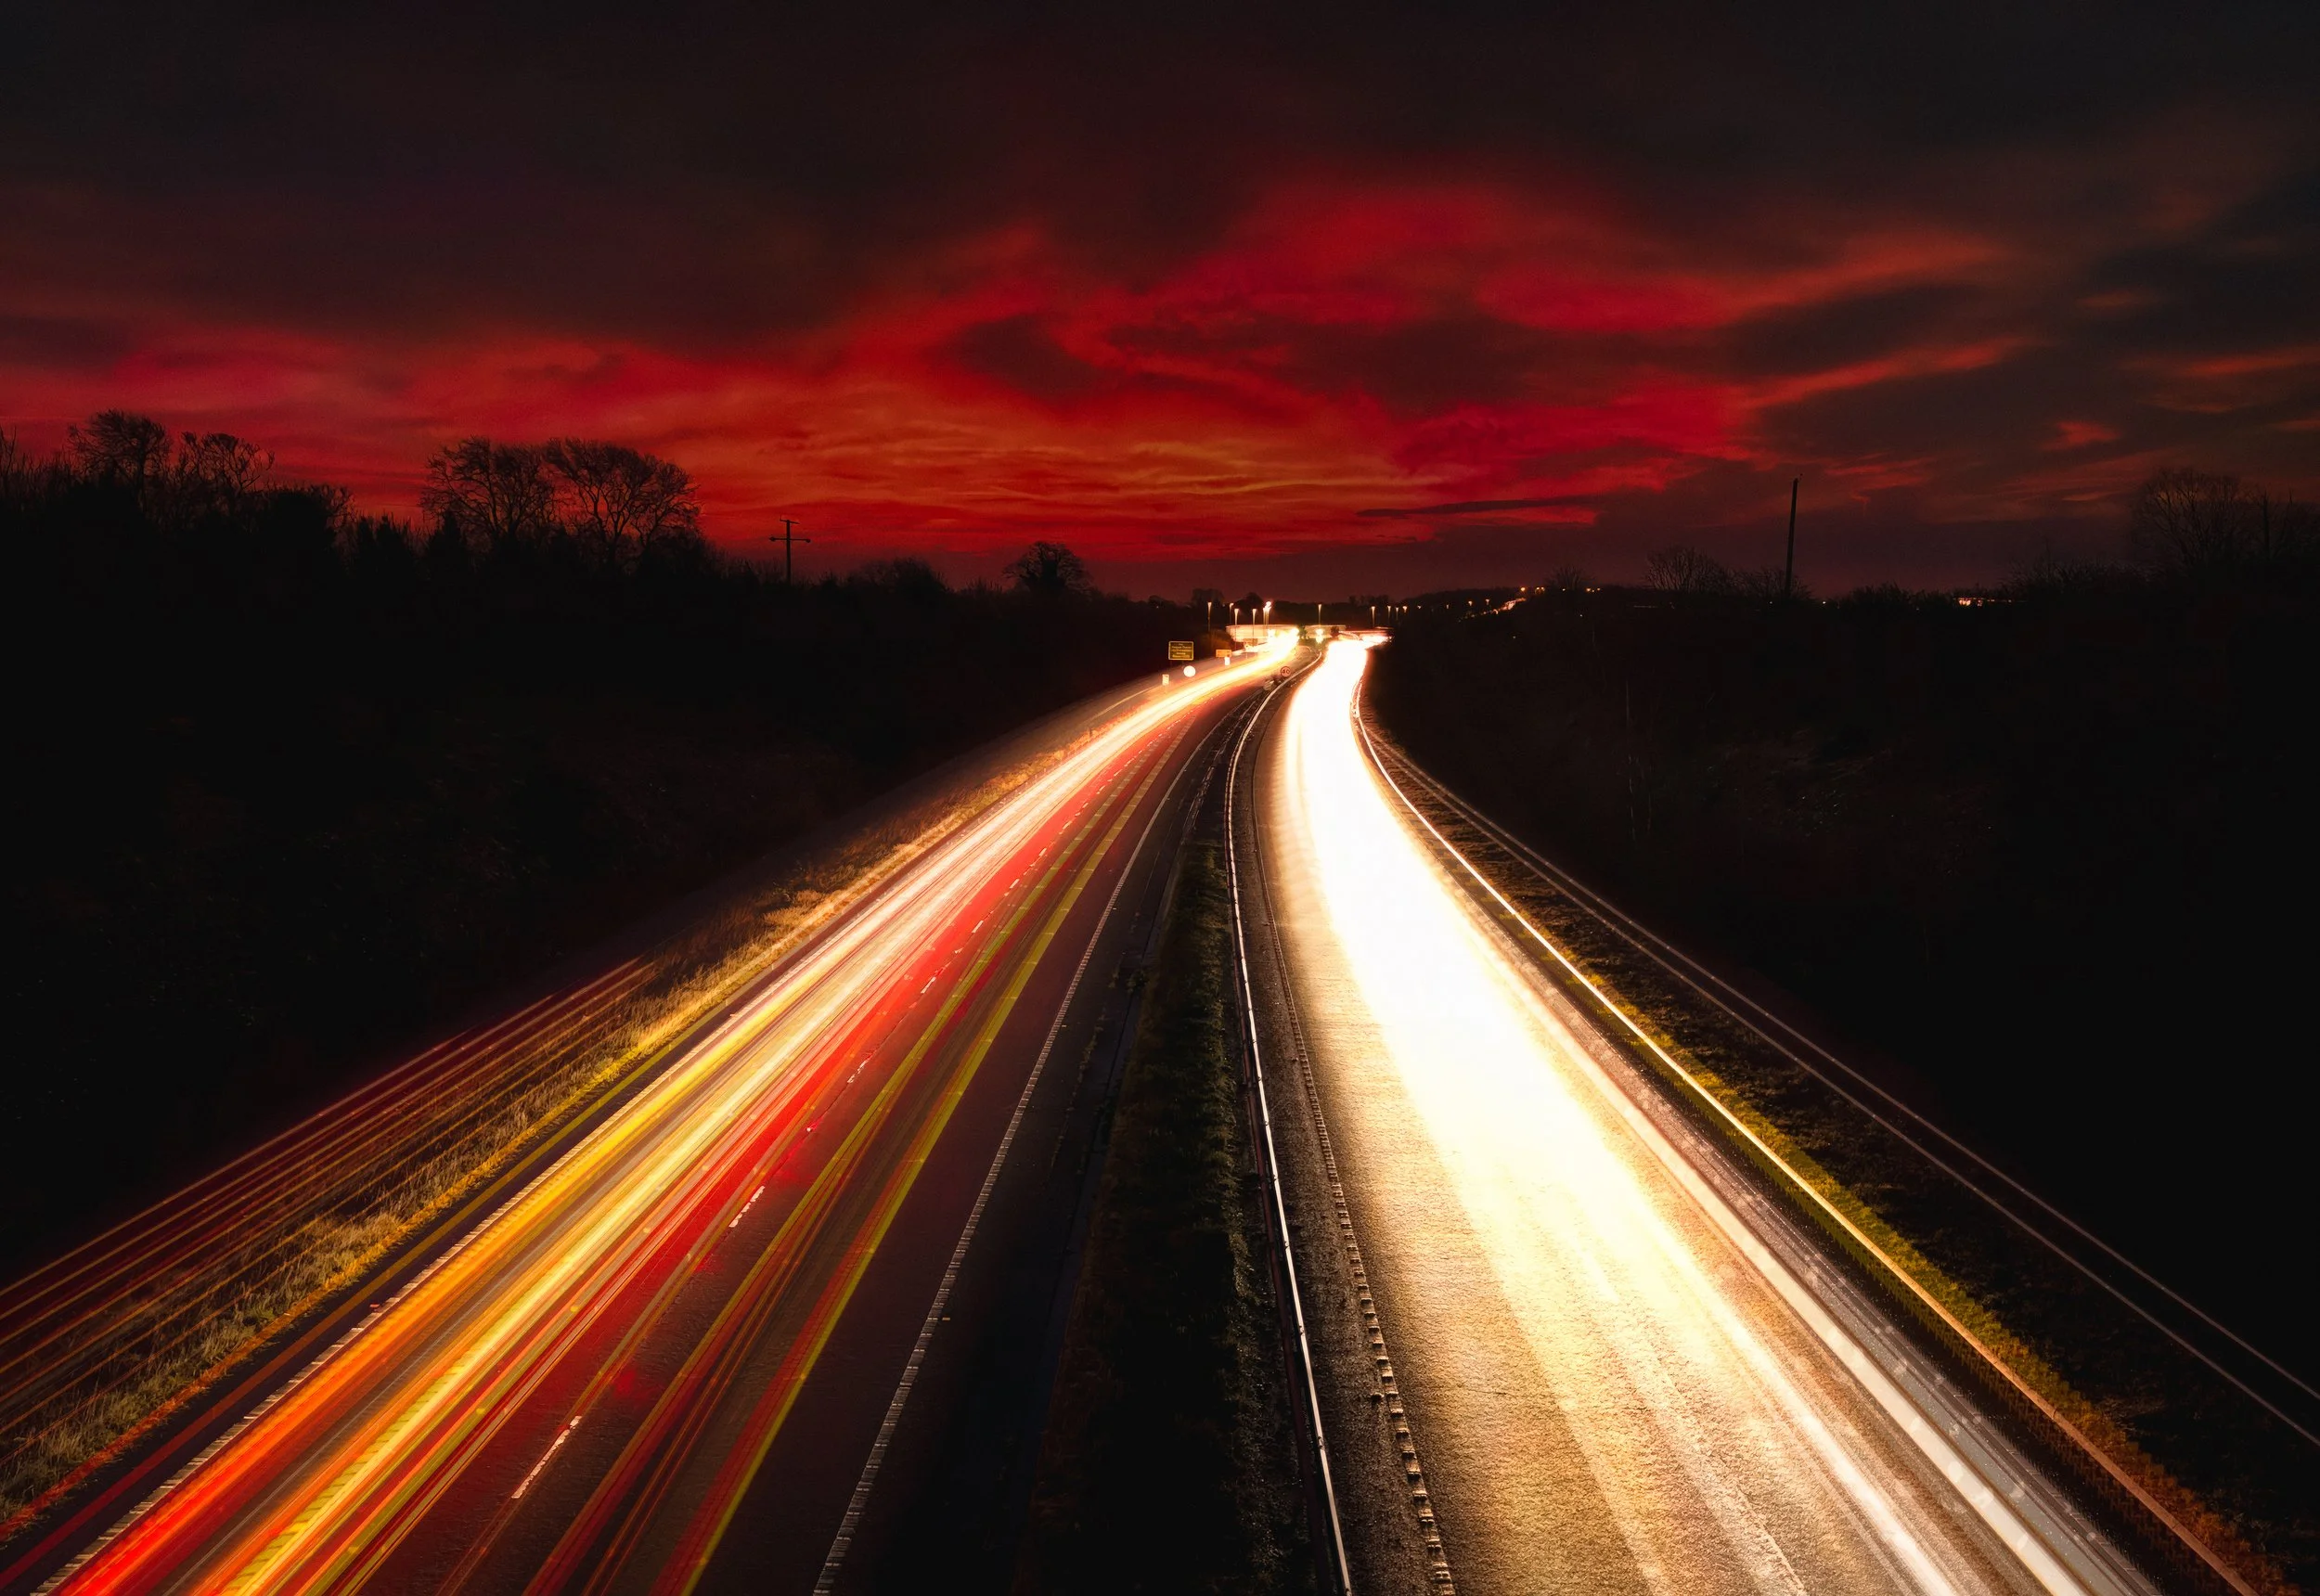
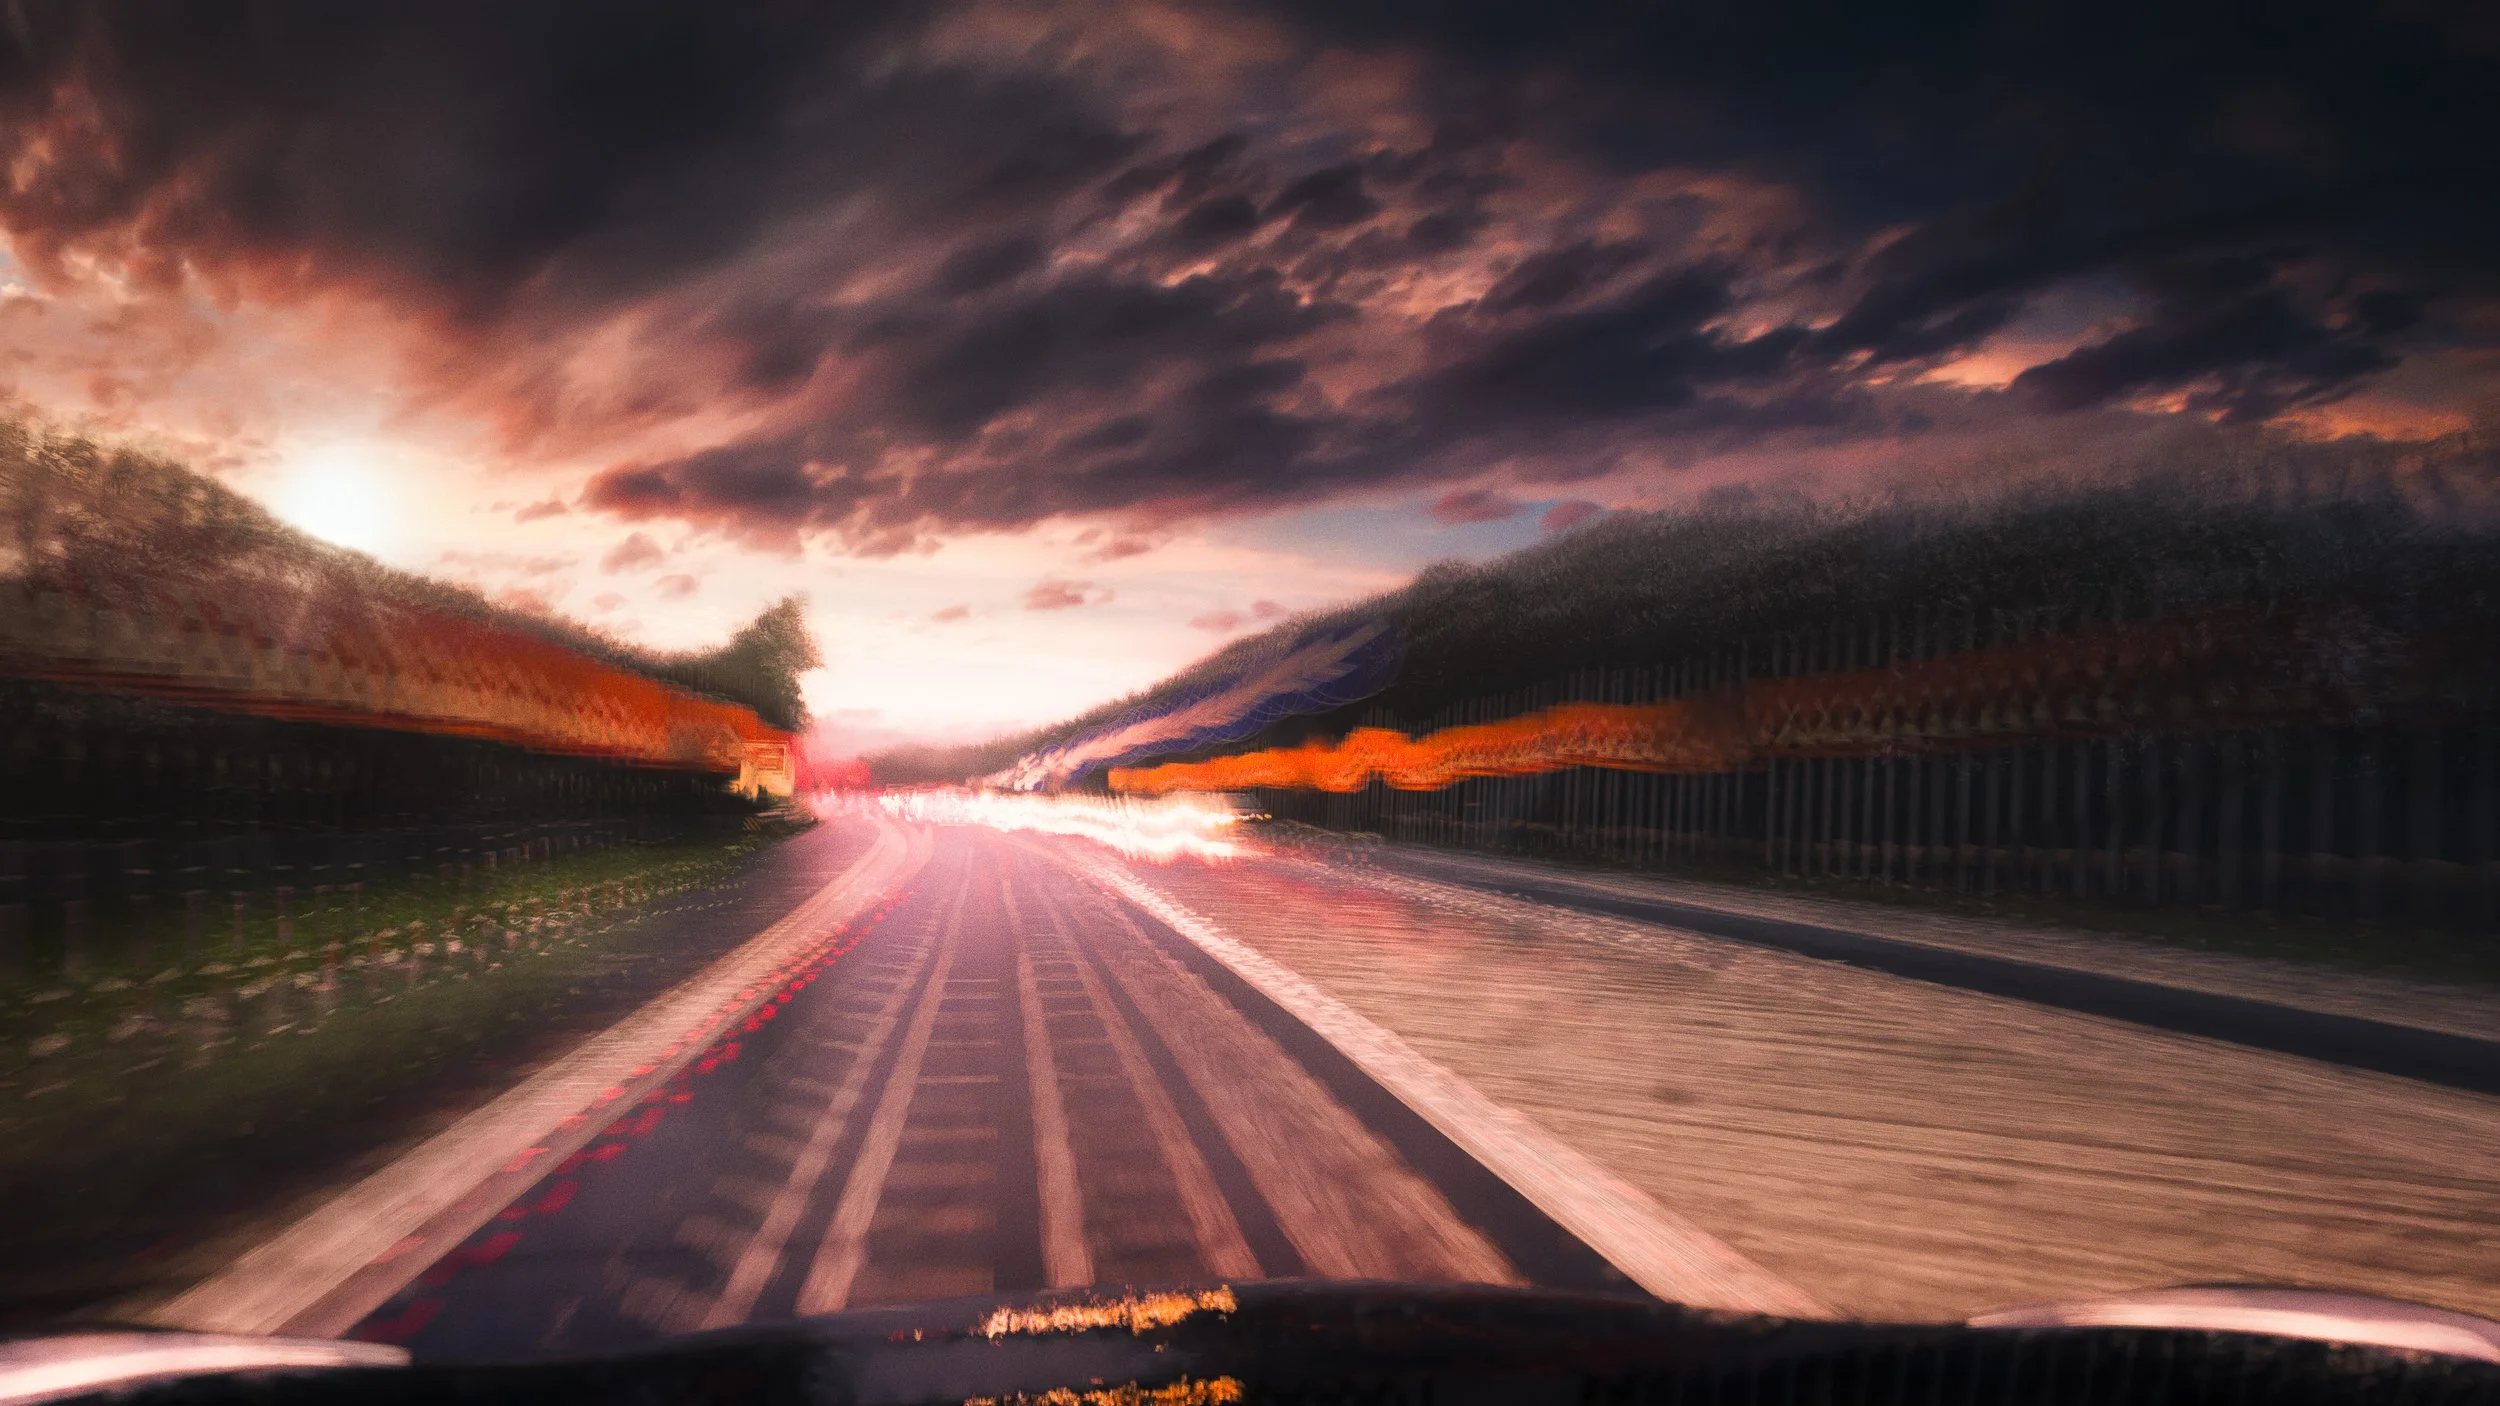
There is a particular pleasure in making a photograph that shows something your eyes are constitutionally incapable of seeing. Light-trail photography is one of those techniques. Hold a camera on a tripod at the side of a road after dark, open the shutter for ten seconds, and the car that passed through the frame has left behind a luminous golden river where its headlights were — a record not of a moment but of a journey, drawn in light directly onto the sensor. The car is long gone, but the photograph knows it was there. A Ferris wheel, given a sufficiently long exposure, resolves into a perfect circle of colour. A motorway junction becomes a looping calligraphy of red and white. The stars, given several hours, trace slow arcs across a polar sky. None of these things exist as fixed images in the world; the camera assembles them from duration.
The counterintuitive pleasure of the technique is that it inverts the usual logic of photography. Ordinarily, a long exposure is a problem — camera shake, subject movement, blur. Here, the longer the exposure, the richer the result. You are not trying to freeze anything. You are trying to accumulate. The dark background stays dark and sharp whilst the light sources, moving through the frame, deposit themselves onto the sensor as trails. The physics are wonderfully simple once you understand them, and the settings, once you have them dialled in, are not particularly demanding. What takes practice is finding the right location, arriving at the right time, and developing an eye for what will look interesting rather than merely luminous.
There is, in the interests of full disclosure, a certain amount of standing in the cold at eleven at night waiting for sufficient traffic. A flask of tea is not optional equipment. But the images that result — and they will result, with a little patience — have a quality that no other technique produces. This guide covers everything from the underlying physics to post-processing, and works for both dedicated cameras and smartphones.
The Physics : Why This Works
When a camera creates an image, the sensor is not recording a single frozen instant. It is integrating all the light that falls on it across the entire duration of the exposure. For a 1/500-second photograph of a stationary scene, this distinction is academic. For a ten-second photograph of a moving vehicle, it is everything.
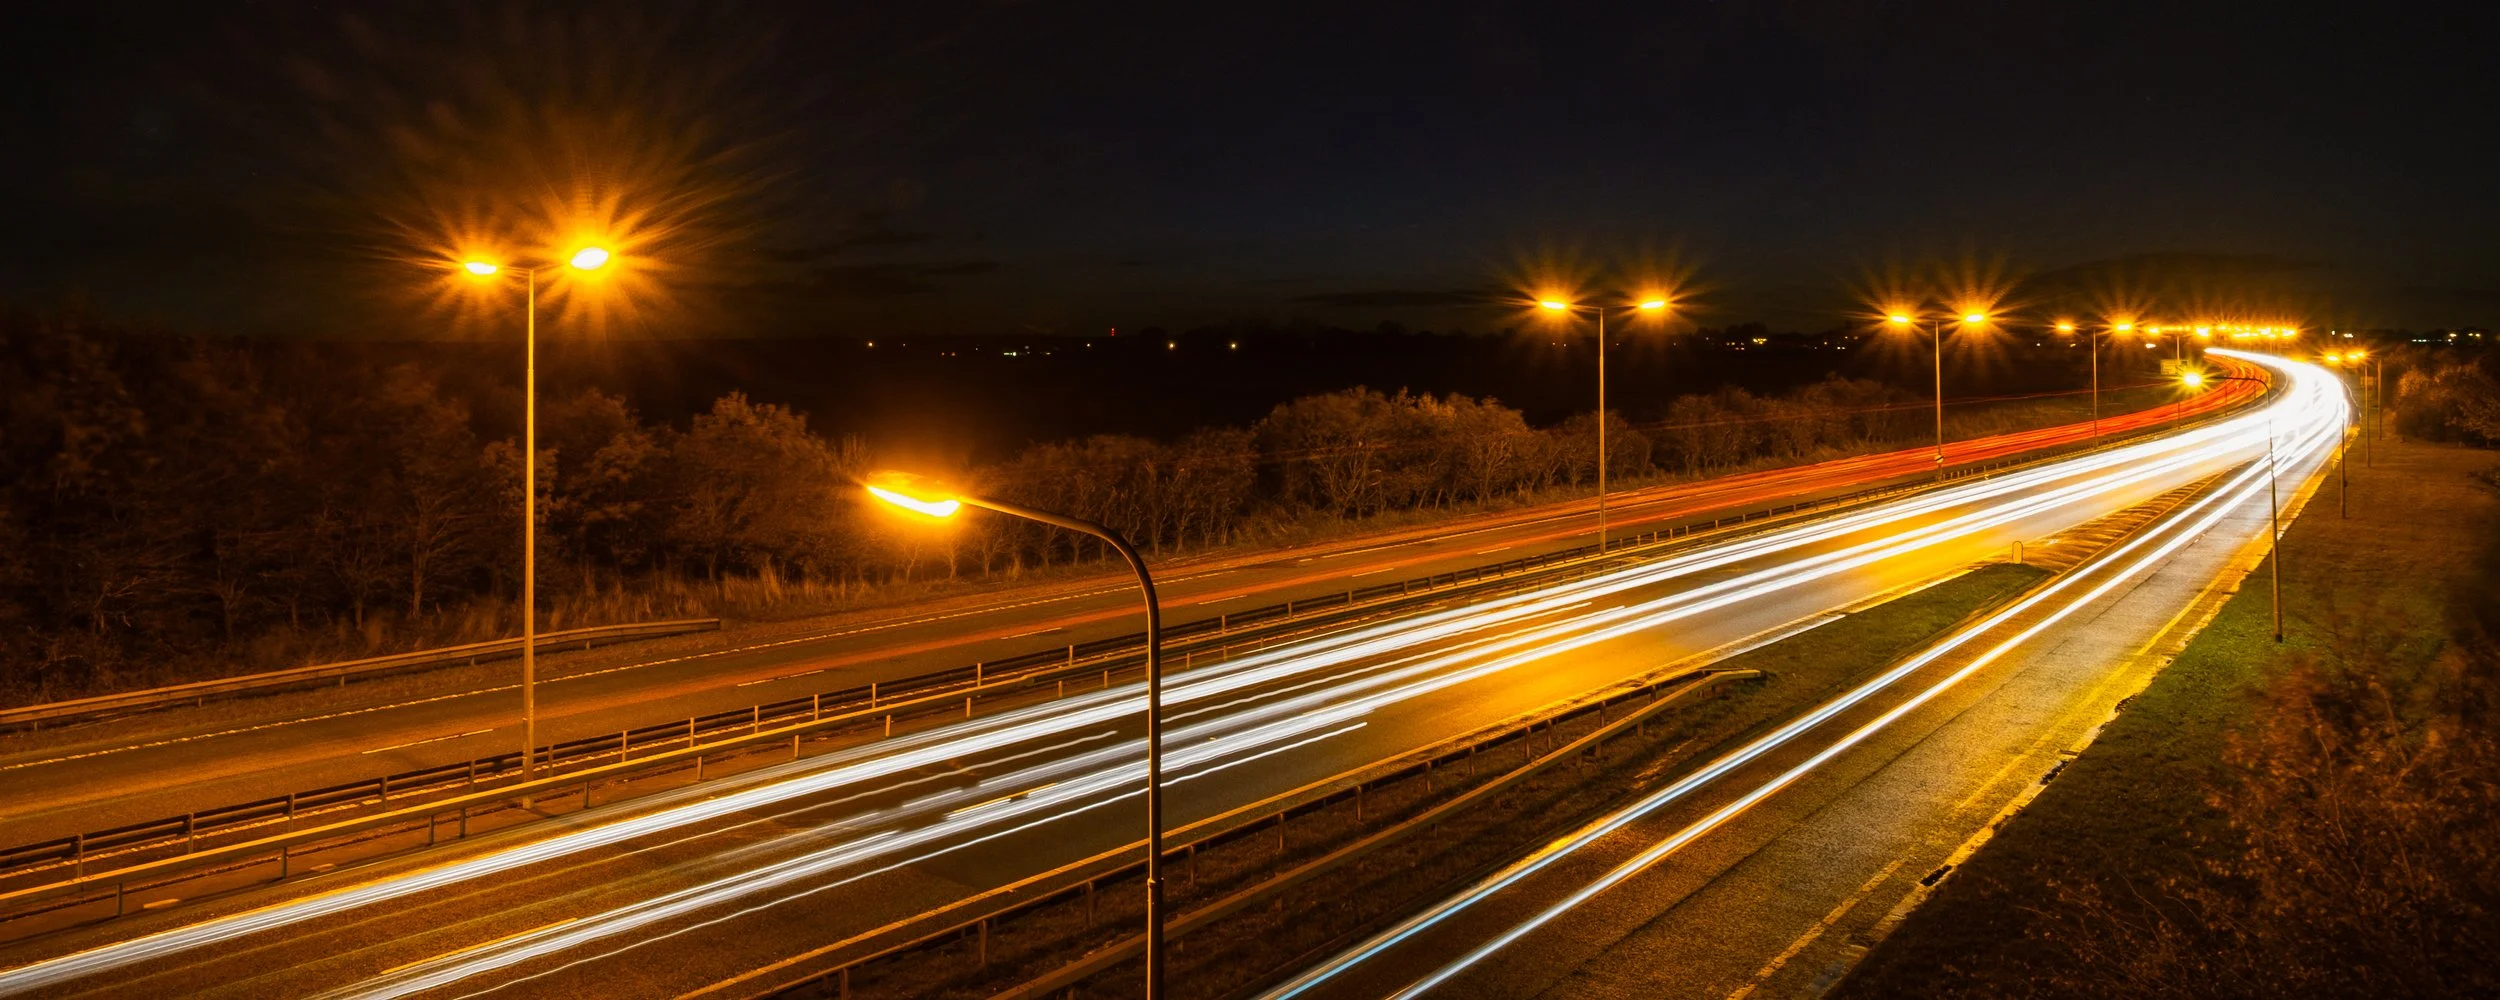
A light source moving through the frame during a long exposure draws a line across the sensor — literally tracing its path in photons as it travels. The sensor records the light source at every position it occupied during the exposure window, and since those positions form a continuous track, the result is a trail. The length of the trail depends on two things: how fast the source is moving, and how long the shutter is open. A car travelling at 30 mph for a four-second exposure moves approximately 53 metres. At typical shooting distances — a footbridge over a dual carriageway, say, at perhaps 15 metres above the road — that translates to a trail that runs the width of the frame. You can plan this. If you want longer trails, use a longer exposure or find a faster road. If you want distinct, separated trails from individual vehicles rather than a continuous smear of light, use a shorter exposure on a busy road.
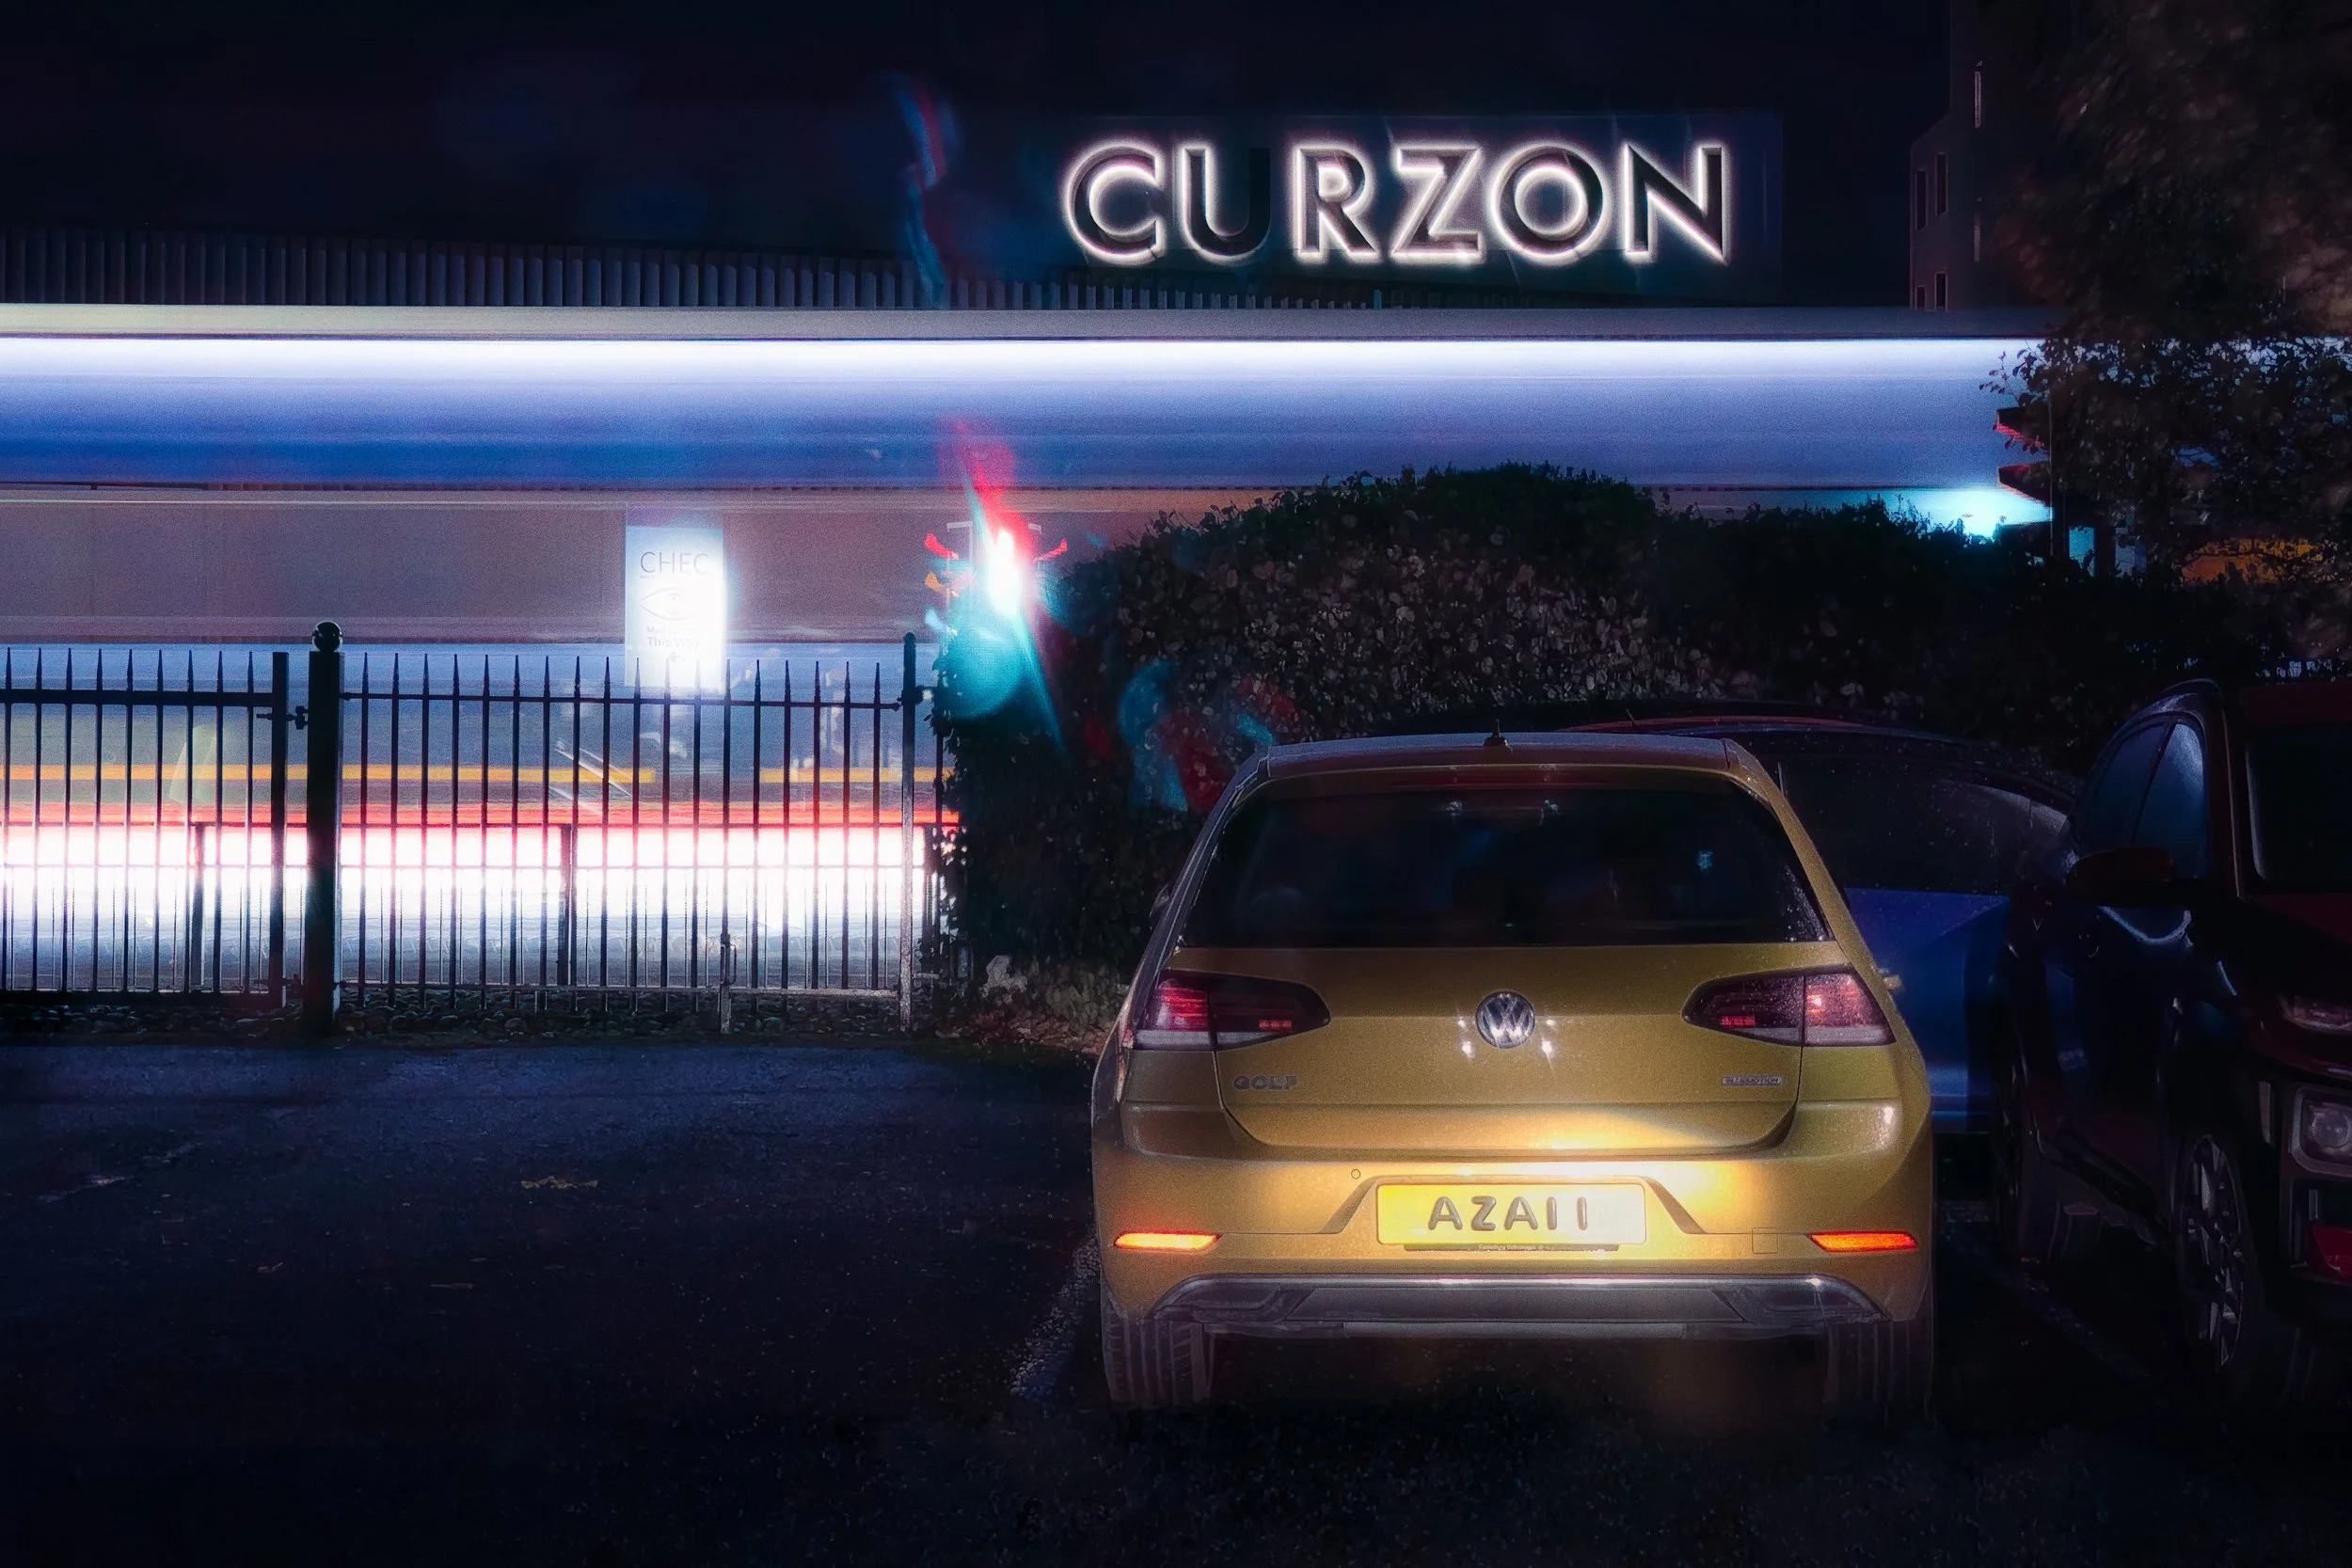
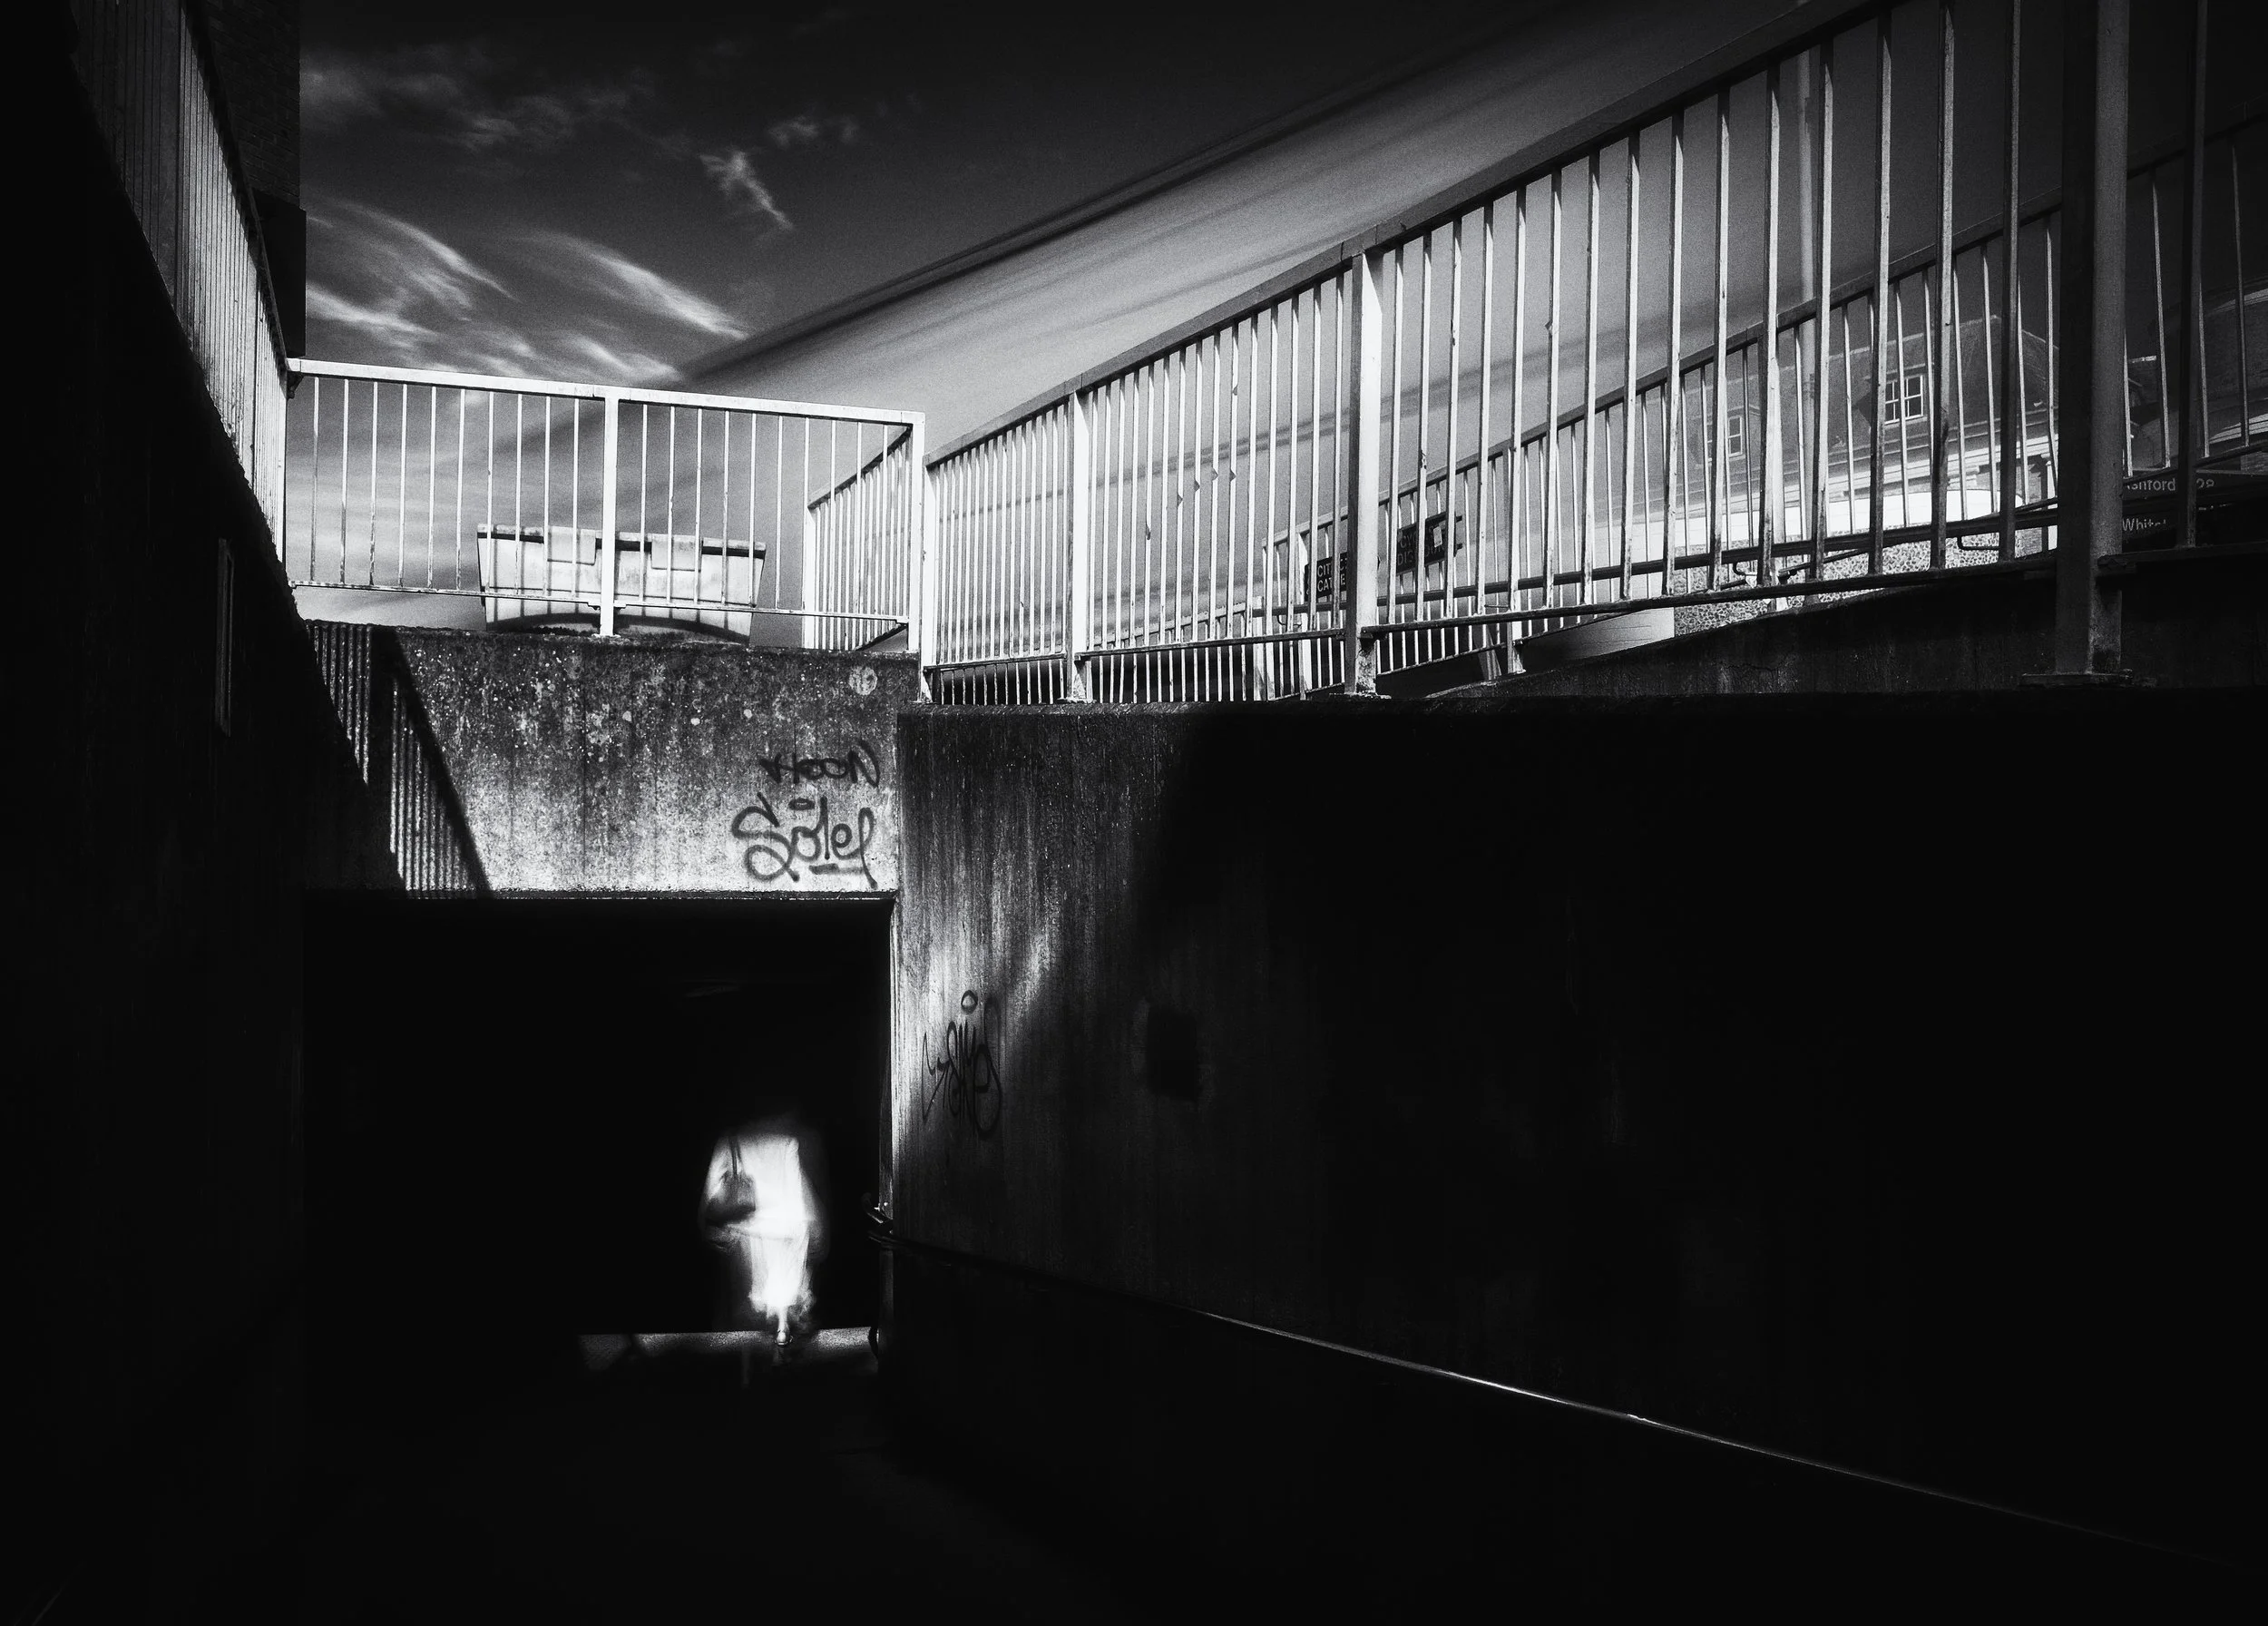
Now, an important distinction: it is not vehicles that create trails, but light sources. A self-luminous object — headlights, tail lights, a torch, a phone screen, a lantern — is substantially brighter than the background it moves against. It has enough intensity to register cleanly on the sensor even as it moves, and the background, being darker, does not accumulate enough exposure to become visible. The result is a clean, sharp-edged trail against a dark background. An illuminated but non-luminous object — a white van seen in reflected streetlight, a pedestrian's jacket — will behave very differently. It blurs, smears, and ghosts rather than trailing cleanly, because it is barely brighter than its surroundings and the contrast is insufficient for a clean trail. Stick to light sources.
Why darkness matters. In full daylight, a ten-second exposure would cause the entire frame to overexpose catastrophically — the sky, the road, the buildings, everything would burn to pure white. Darkness solves this by establishing a low ambient light level for the background. The background gathers so little light during the exposure that it remains dark and properly exposed. The light sources, being much brighter, accumulate quickly to a visible level. The balance between these two — bright enough trails, dark enough background — is what you are managing when you set the exposure.
The Exposure Triangle for Light Trails
The exposure triangle — the interdependent relationship between ISO, aperture, and shutter speed — governs how the sensor records light. For light-trail photography, each element has a specific role, and the priorities are slightly different from general photography.
ISO should be kept as low as possible — typically ISO 100, or the base ISO of your camera. The reasoning is straightforward: light trails are already bright; they are, after all, light sources. A high ISO will push those bright trails into overexposure, blowing them out to featureless white and destroying the colour and internal detail that make them interesting. It will also introduce digital noise into the dark background areas of the image, which is exactly where noise is most visible. Low ISO produces clean dark tones in the background and trails that retain their colour. On a smartphone, select the lowest available ISO in your manual or Pro mode.
Shutter speed is the primary creative control. For vehicle light trails in a typical urban setting — a road with moderate-to-busy traffic, shot from a reasonable distance — a starting point of eight to fifteen seconds is sensible. From there, adjust according to what you see. Shorter exposures (four to eight seconds) give you individual, distinct trails from single vehicles; useful on a busy road where a longer exposure would layer the trails into a continuous wash of light. Longer exposures (twenty to thirty seconds) capture multiple vehicles in a single frame and produce the layered, complex patterns that have become the classic light-trail aesthetic. For star trails, you are looking at a quite different scale: single exposures of thirty minutes or more, or sequences of shorter exposures stacked in post.
Aperture, on a dedicated camera, is doing two things simultaneously. A narrower aperture — f/8 to f/16 — allows a longer exposure without overexposure, and it also creates the starburst effect from point light sources: the diffraction of light around the aperture blades produces a radiating star pattern around bright sources such as streetlamps and traffic signals. To get a pronounced starburst, use f/11 or f/16. The trade-off is that you need a longer exposure to compensate for the reduced light, which is generally what you want anyway.
On a smartphone, the aperture is fixed — typically somewhere between f/1.5 and f/2.8 depending on the model — and cannot be changed. This means starburst effects are largely unavailable (the aperture is too wide, and the lens too small, for pronounced diffraction). It also means you cannot use aperture to control exposure; instead, you compensate with lower ISO and carefully judged shutter speeds.
Equipment : What You Actually Need
Tripod. This is not optional. It is not a nice-to-have. Any movement during a long exposure blurs the static elements of the scene — the buildings, the road surface, the sky — whilst simultaneously introducing jitter and discontinuity into the light trails themselves. The result is an incoherent mess that no amount of post-processing will rescue. Even a lightweight travel tripod is infinitely better than attempting to brace the camera against a railing. The specific attributes that improve stability are: a wider leg tube diameter (particularly in the lowest, most-extended section), fewer leg sections, overall mass, and solid locking mechanisms. A three-section carbon-fibre travel tripod at around a kilogram will do the job adequately; a heavier aluminium tripod is more stable still.
Smartphone mount. If you are shooting on a phone, you need a way to attach it to the tripod. Universal smartphone clamps with a standard 1/4"-20 thread are widely available and cost very little. Look for one with positive locking — a clamped mount that cannot gradually vibrate open during a thirty-second exposure. Many include a ball-head socket that allows precise rotation and tilt. If your tripod has a ball head, you can screw the clamp onto that.
Remote shutter release or self-timer. Pressing the shutter button with your finger, even on a firmly mounted phone or camera, introduces vibration into the system at the precise moment you least want it. The solution is either a two-second self-timer (which allows the vibration to dissipate before the exposure begins) or a Bluetooth remote shutter release (which eliminates contact entirely). The Bluetooth option is better if you are doing many shots; the self-timer is adequate if you are not. A two-second delay is the minimum; ten seconds is more forgiving.
Neutral density filters. Optional, but useful. An ND filter reduces the amount of light entering the lens without altering the colour balance, allowing you to use a longer exposure than the light level would otherwise permit. This is particularly valuable at blue hour, when the sky is still bright and a ten-stop ND filter might be the difference between a three-second and a thirty-second exposure. Clip-on ND filters designed for smartphones are available cheaply, though their optical quality varies considerably. For dedicated cameras, screw-in or square-filter ND filters are more reliable.
Power bank. Long exposure sessions deplete batteries quickly. In cold weather, battery performance drops sharply — a phone that shows 60% on a warm day may shut down mid-exposure at 0°C. Carry a power bank and keep the phone in a pocket between shots to maintain its temperature.
Warm clothing. Not equipment in the technical sense, but genuinely necessary. Standing still at night in autumn or winter, in the dark, waiting for traffic to clear so you can try a clean shot — this is cold work. Cold fingers make precise adjustments difficult and breed impatience, which is the enemy of good exposure decisions. Dress for the weather, not for how warm it seems at home before you leave.


When and Where to Shoot
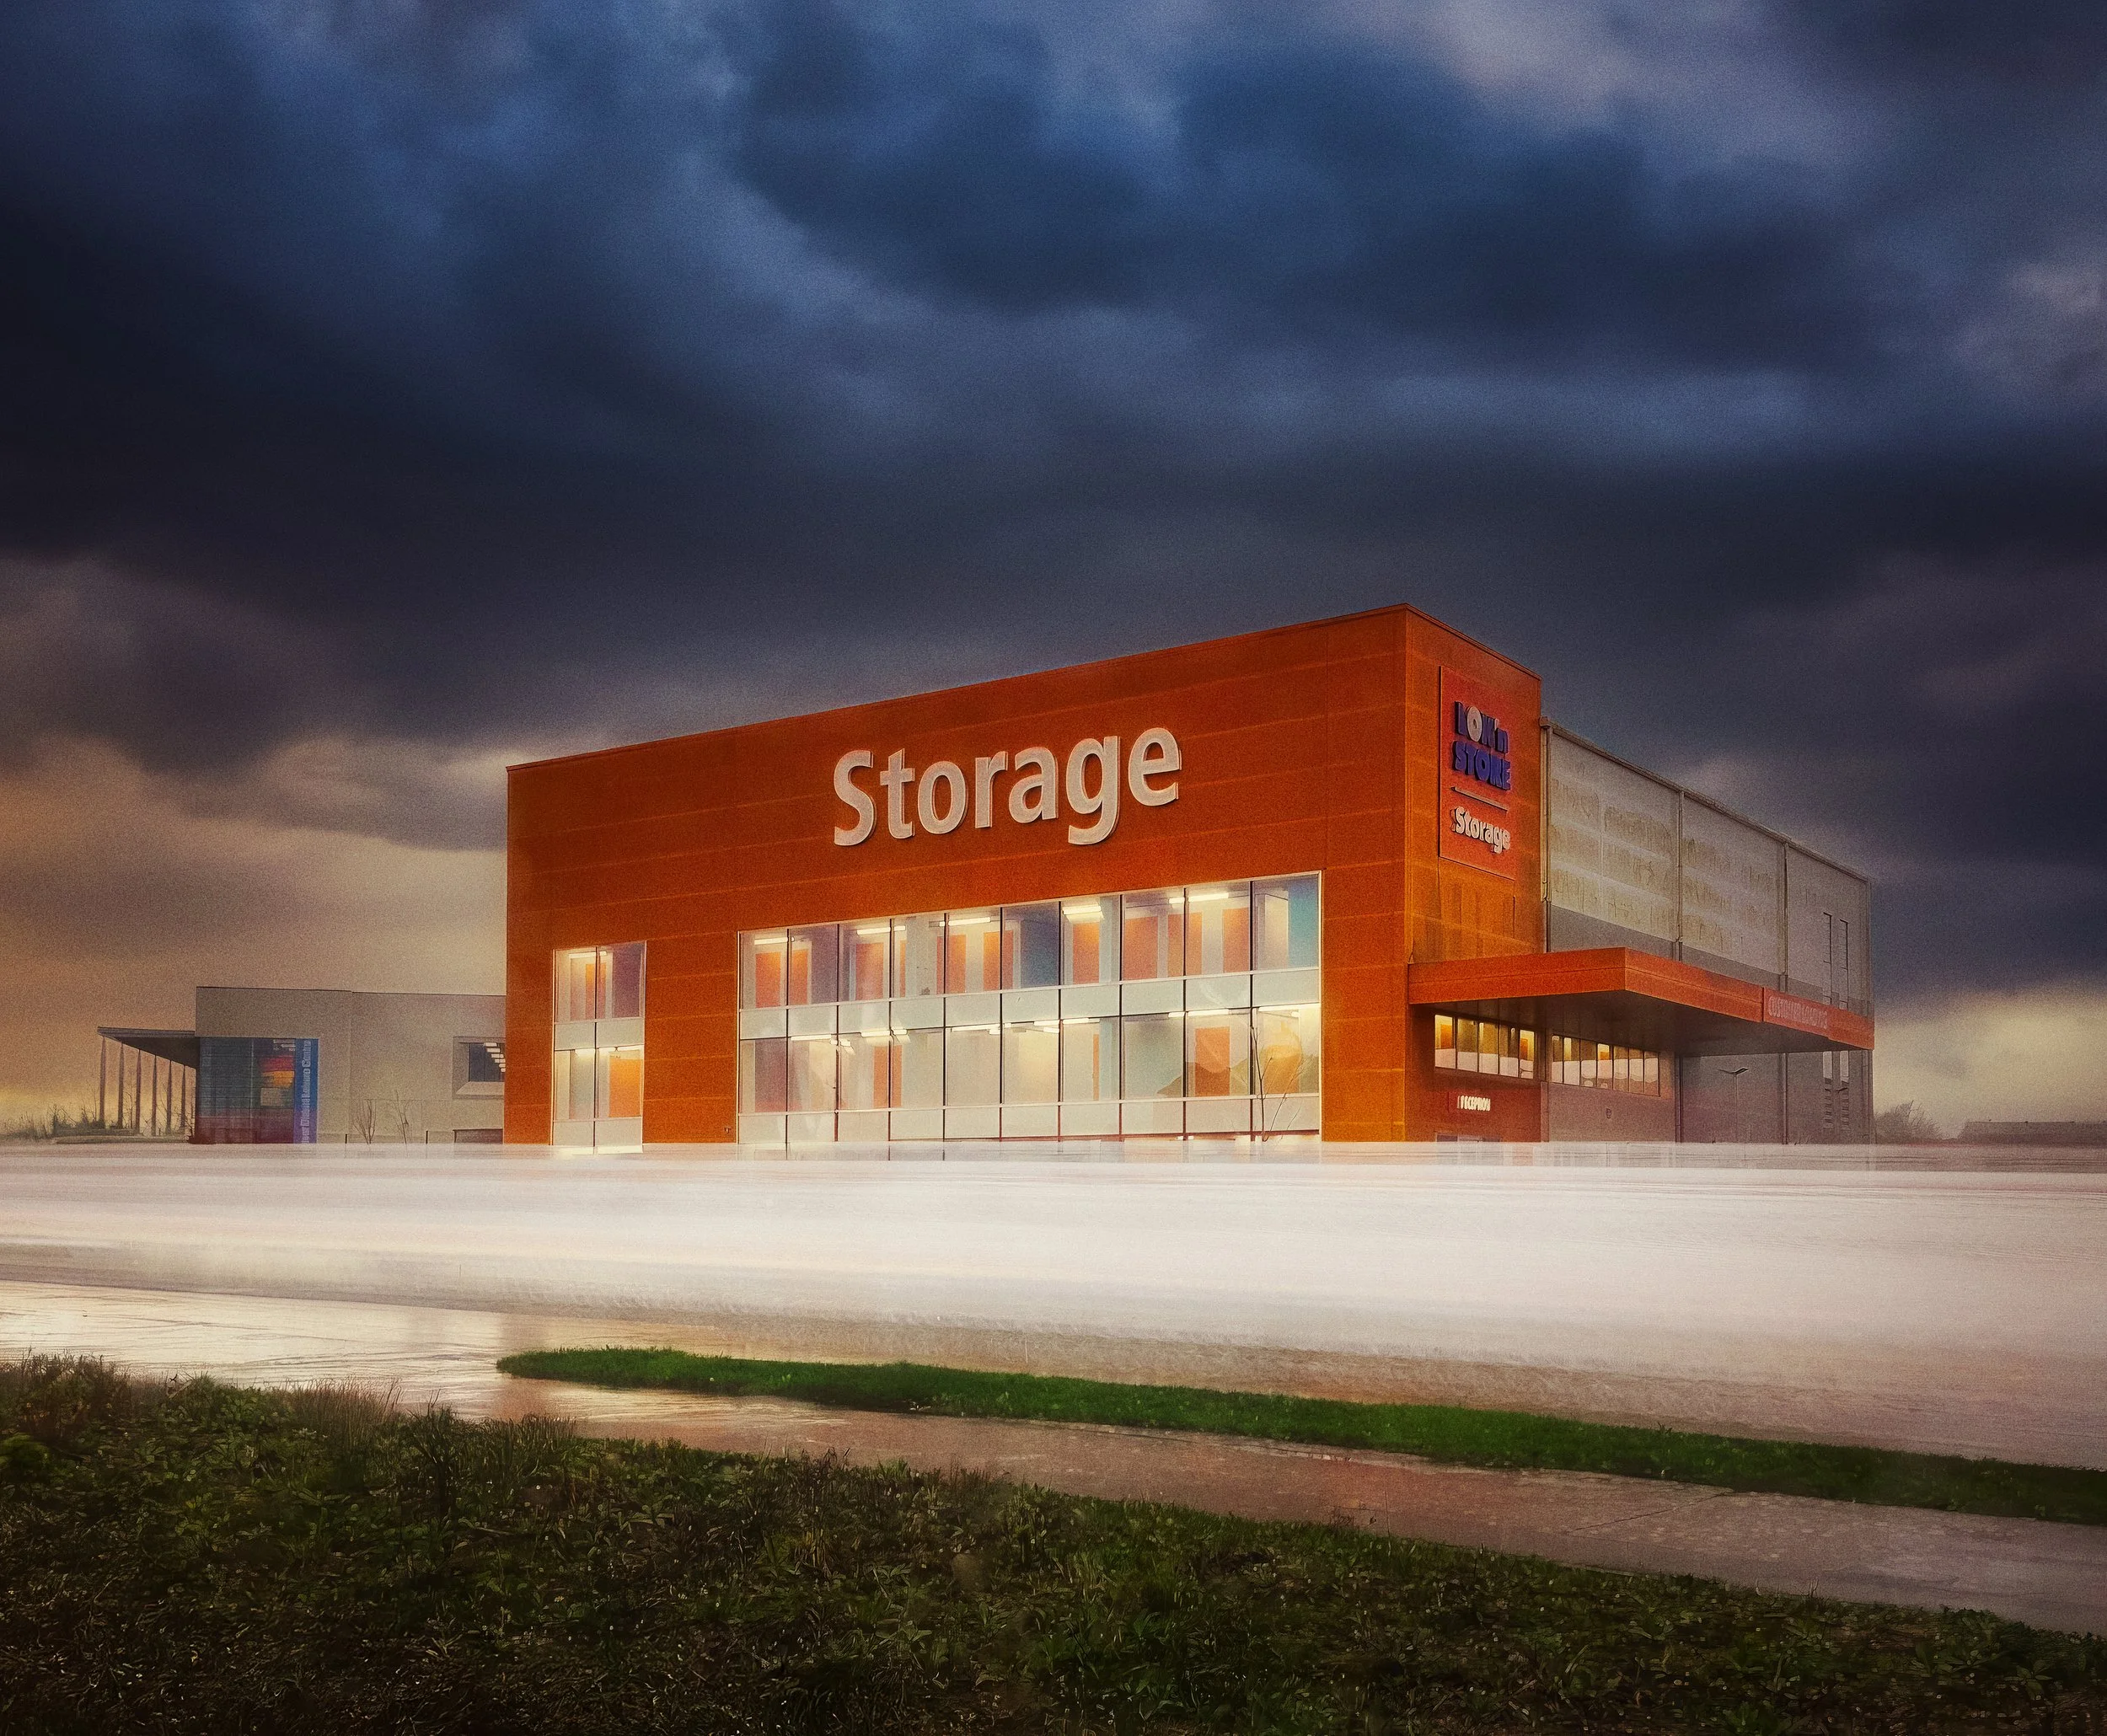
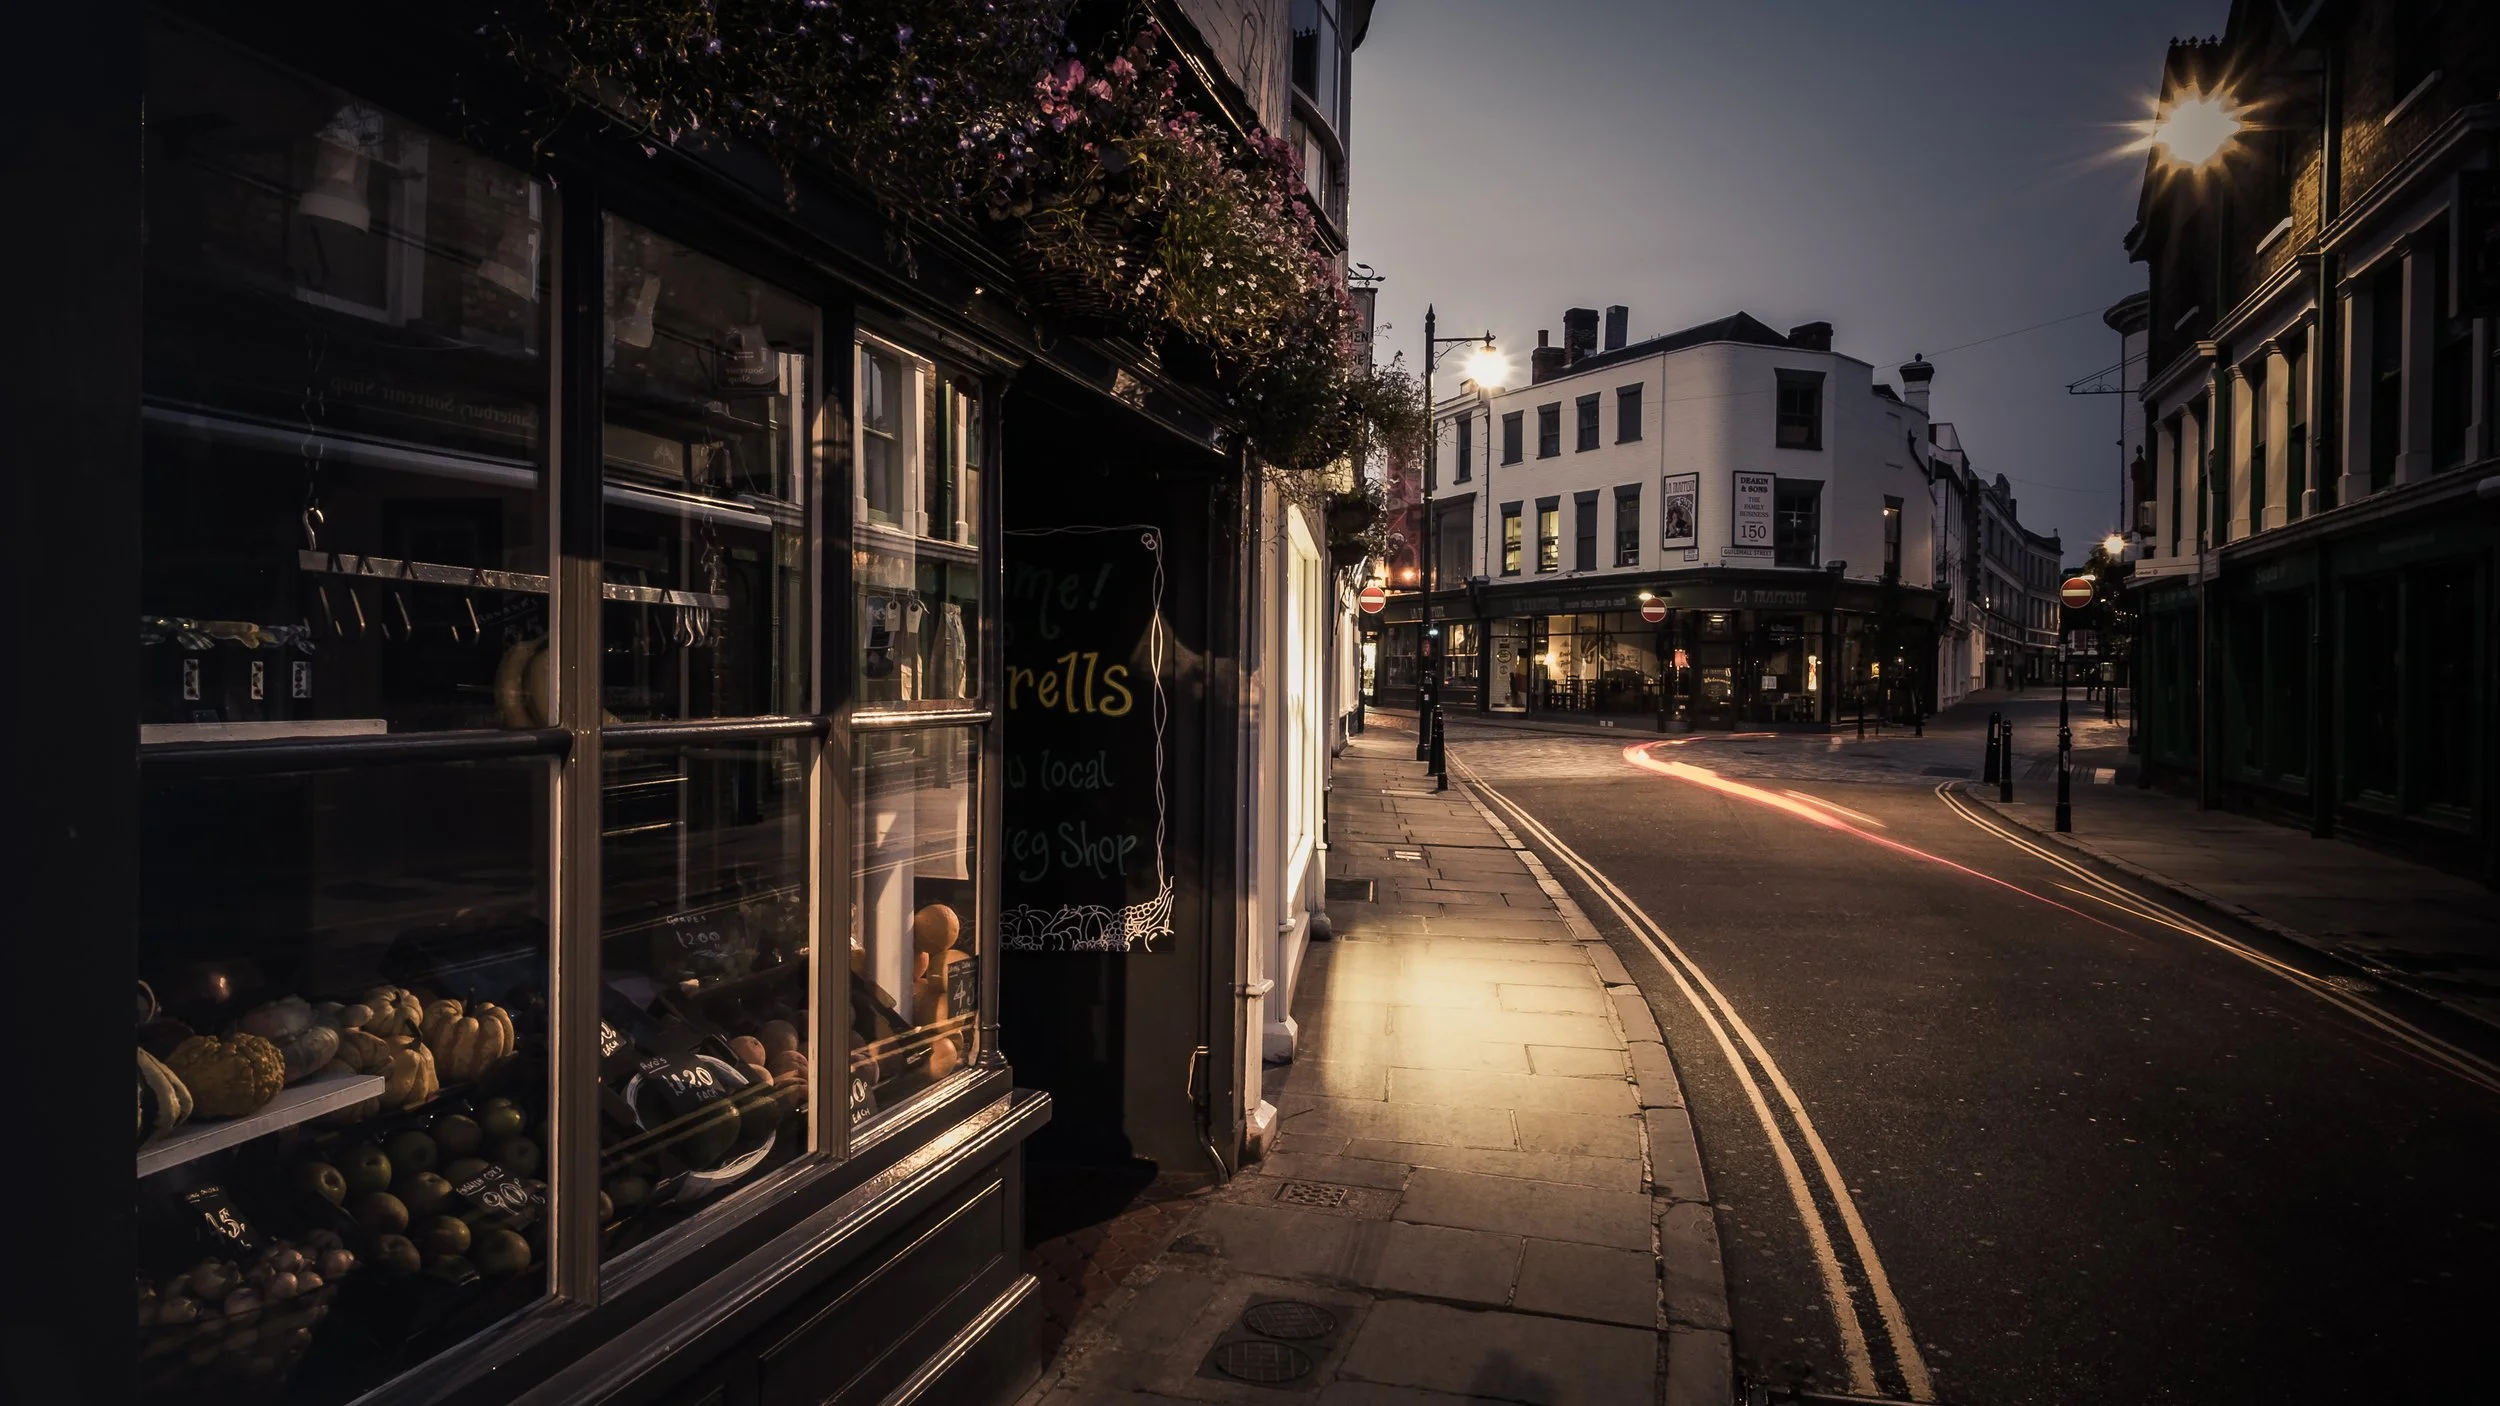
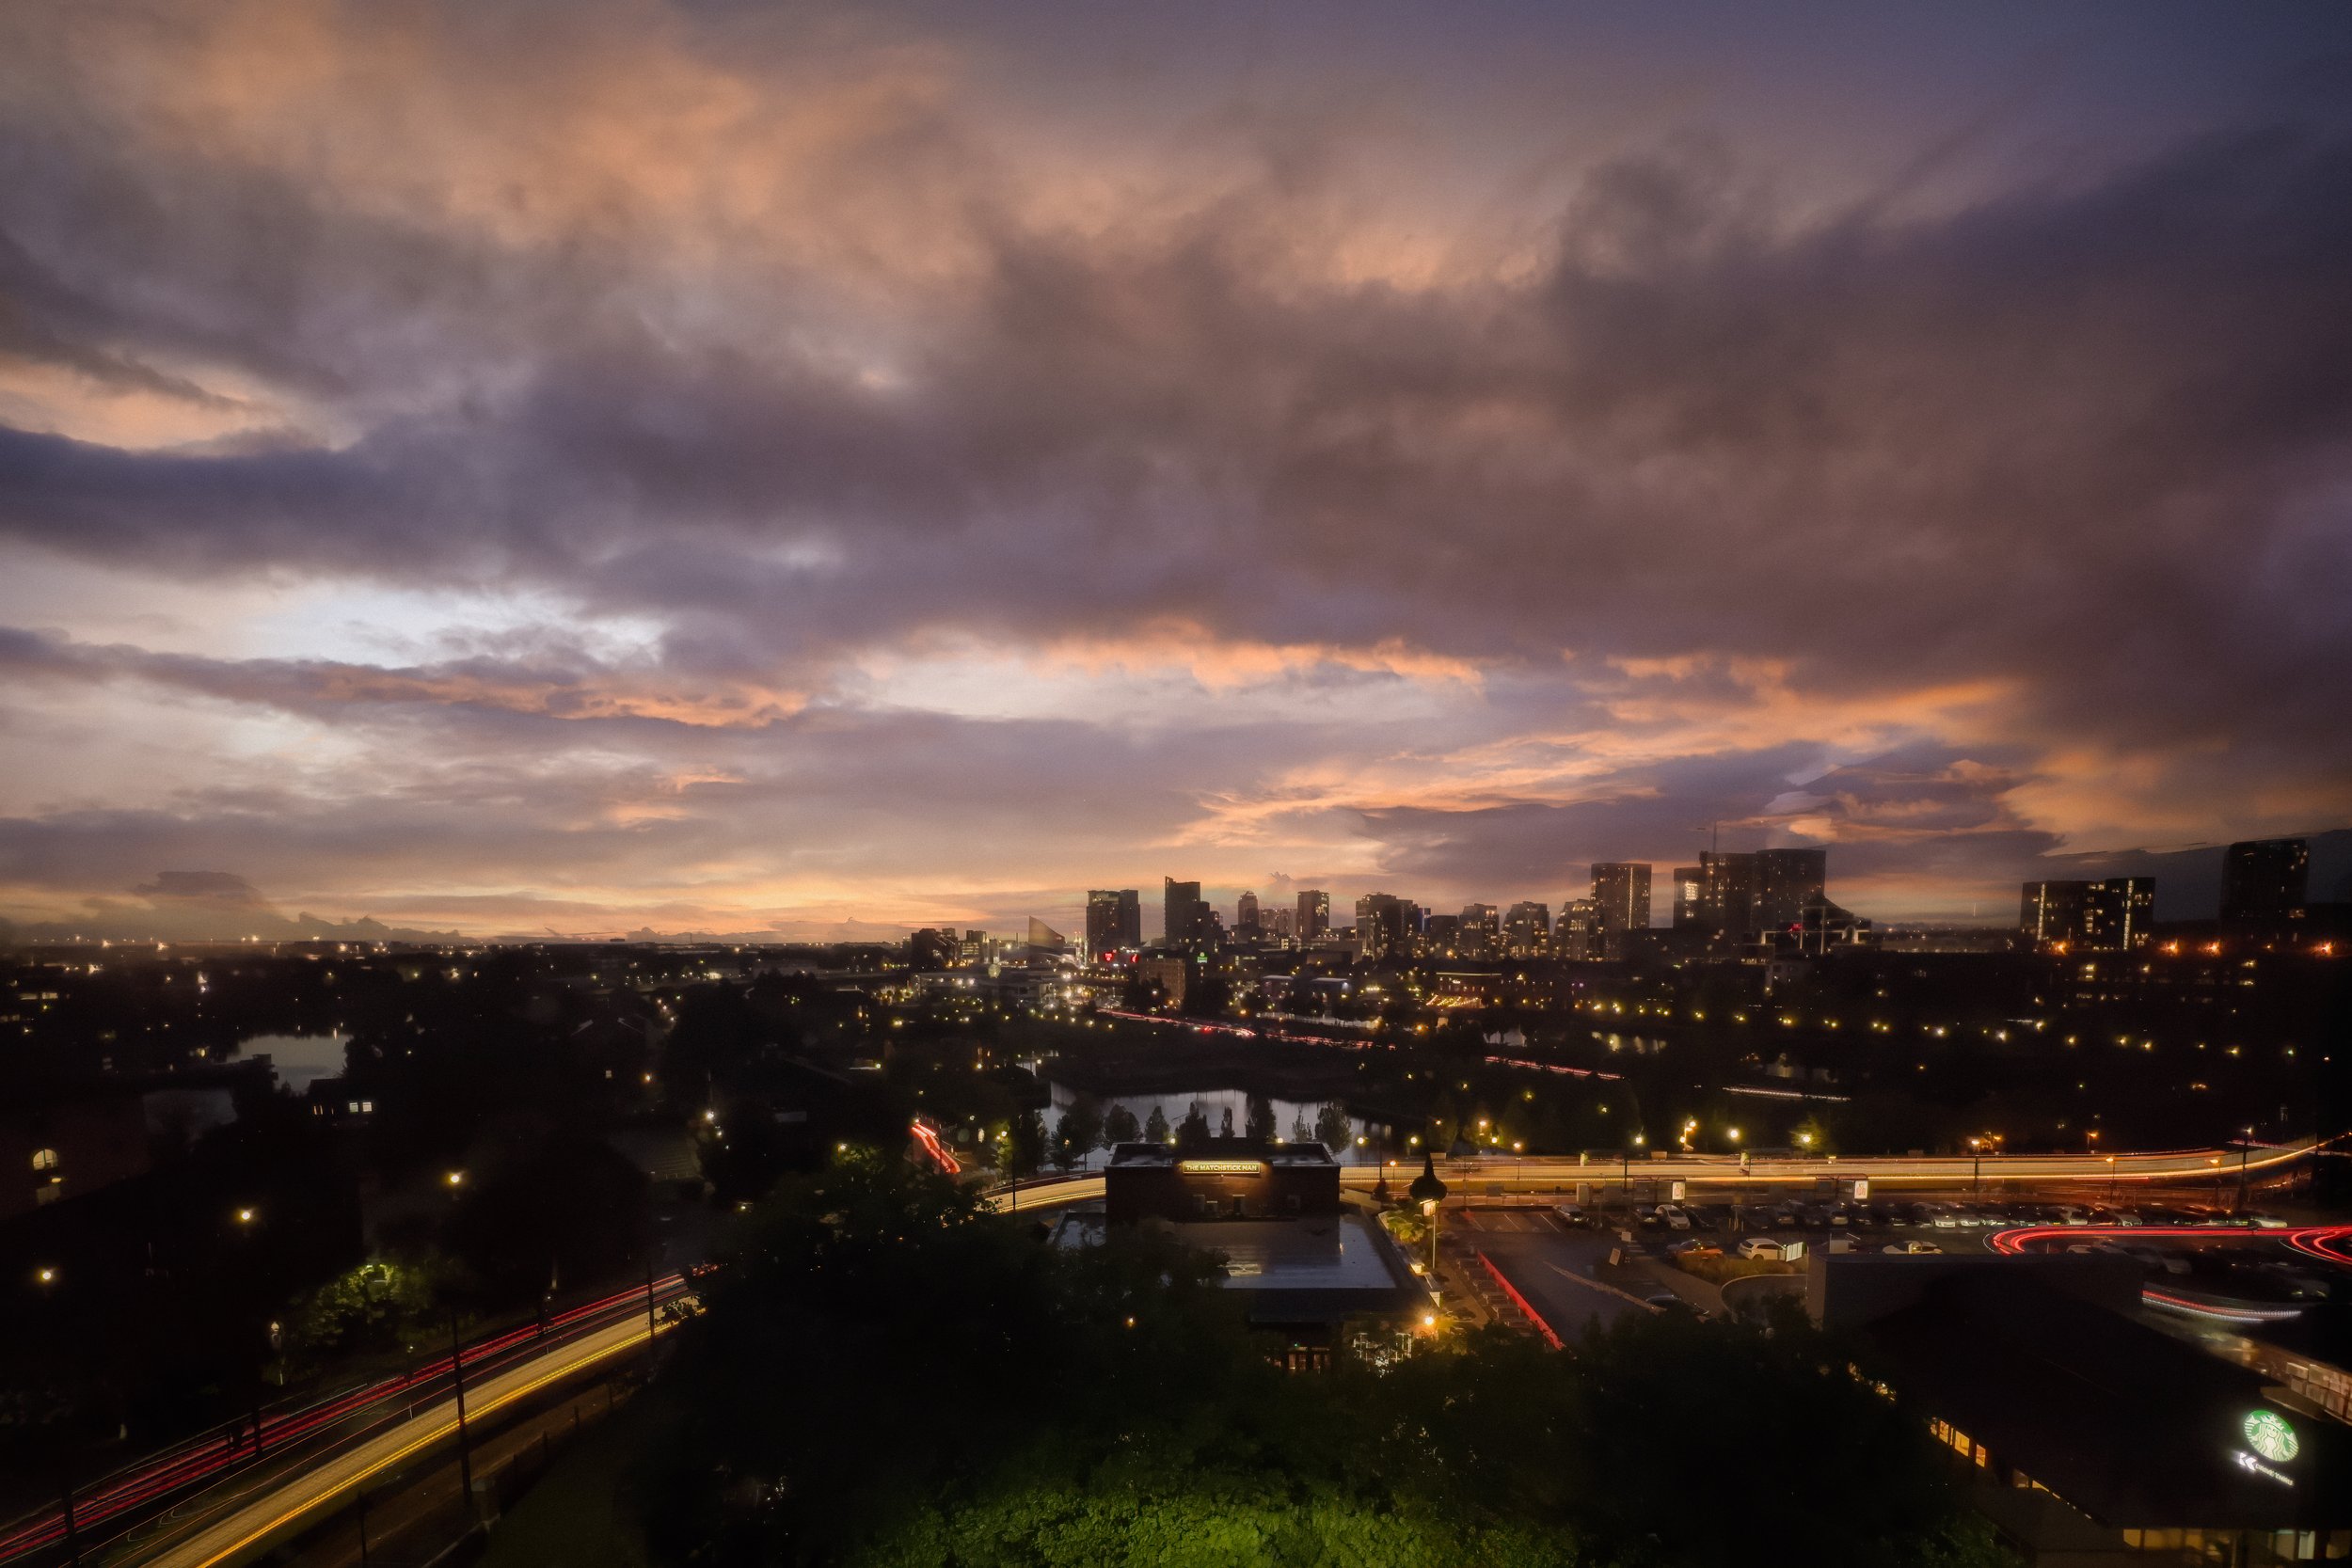
Blue hour is the optimum window for light-trail photography. It is the period of roughly twenty to forty minutes immediately after sunset (or before sunrise), when the sun has dipped below the horizon and the sky transitions through rich, saturated blues. During this window, artificial lights are fully lit, the sky is not yet black, and the balance between ambient and artificial illumination is at its most photogenic. The sky contributes colour and context; the trails provide movement; the architecture sits between them, readable and detailed. A plain black sky, whilst valid, gives you no background — just dark space, which is less interesting than a deep indigo or cobalt.
The window is short, and it shifts by several minutes each week through the year as the seasons change. At latitude 51°N in December, blue hour may be over by 4:30pm. In June, you will wait until nearly ten at night. Use a planning app — PhotoPills, The Photographer's Ephemeris, or simply a sunset time calculator with a thirty-minute offset — to arrive before it begins. You will not get a second chance that evening.
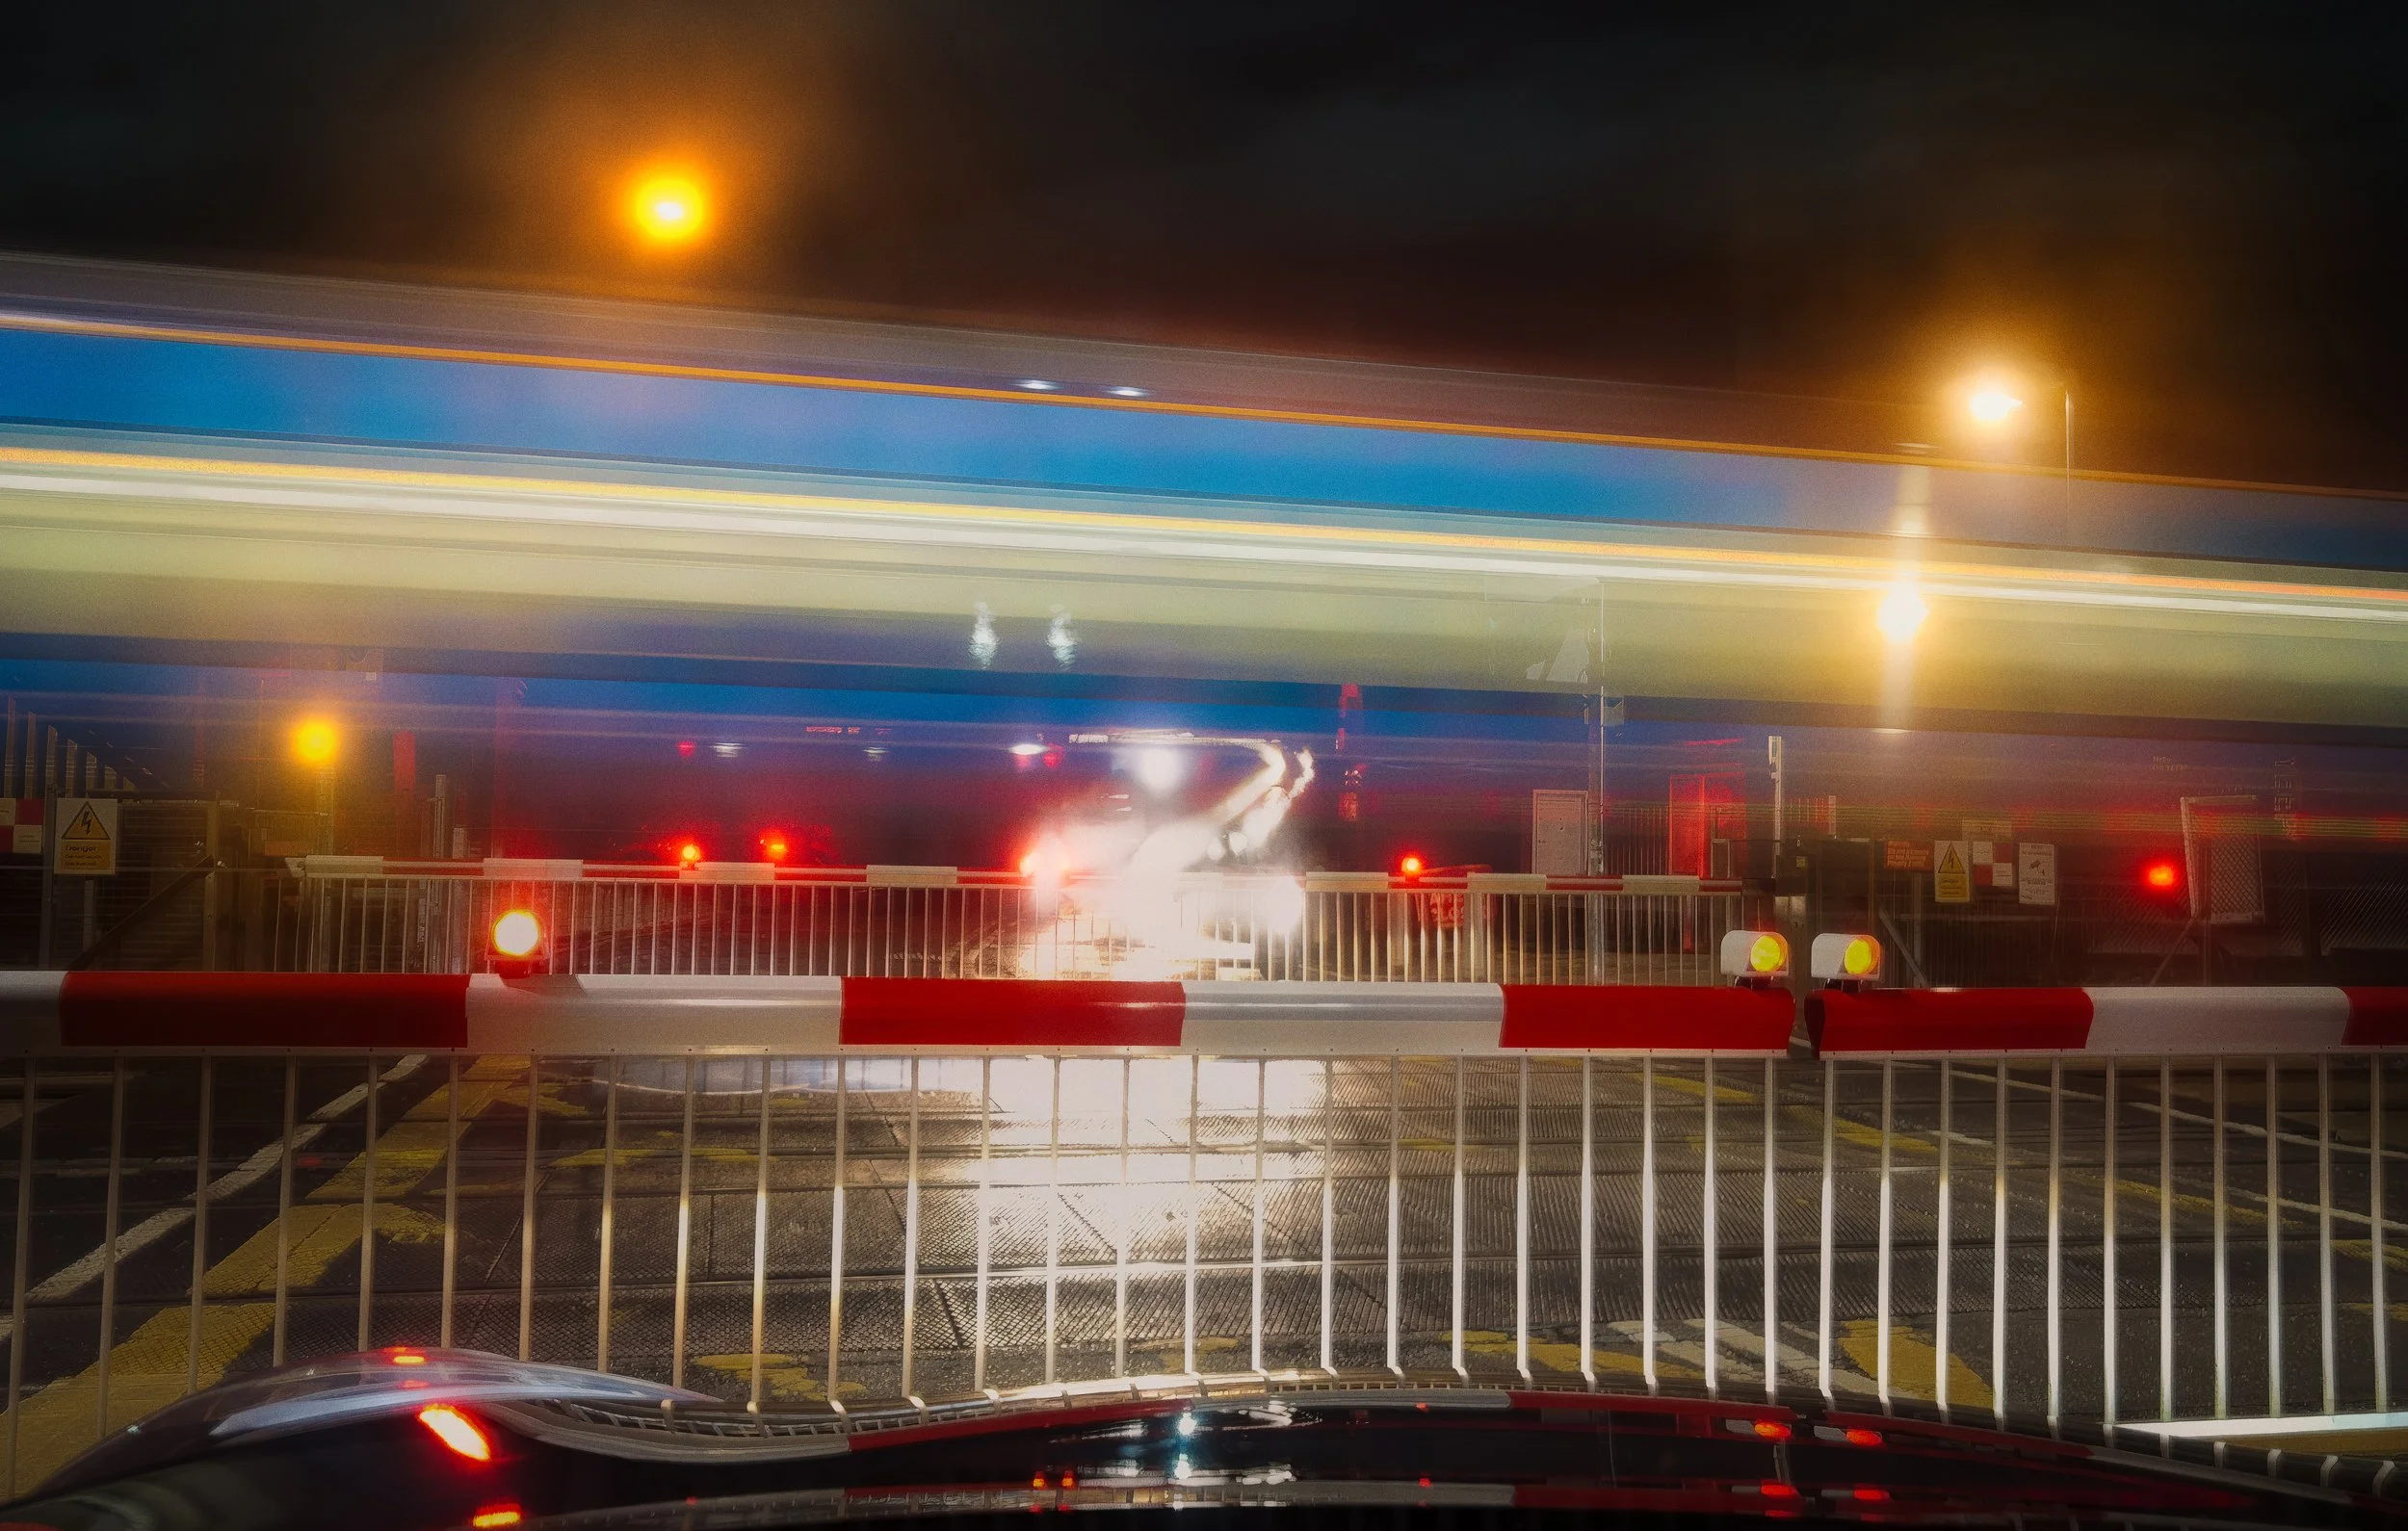
After dark is entirely valid, and in some locations preferable. A busy motorway junction photographed at midnight against a black sky can be a striking image. It simply lacks the tonal complexity of a blue-hour shot. The choice is aesthetic.
Location matters as much as timing. Some pointers:
Roads with regular, moderate-to-heavy traffic. Too little traffic and you will be waiting a long time for enough trails to build up. Too much and the trails merge into a uniform flood of light.
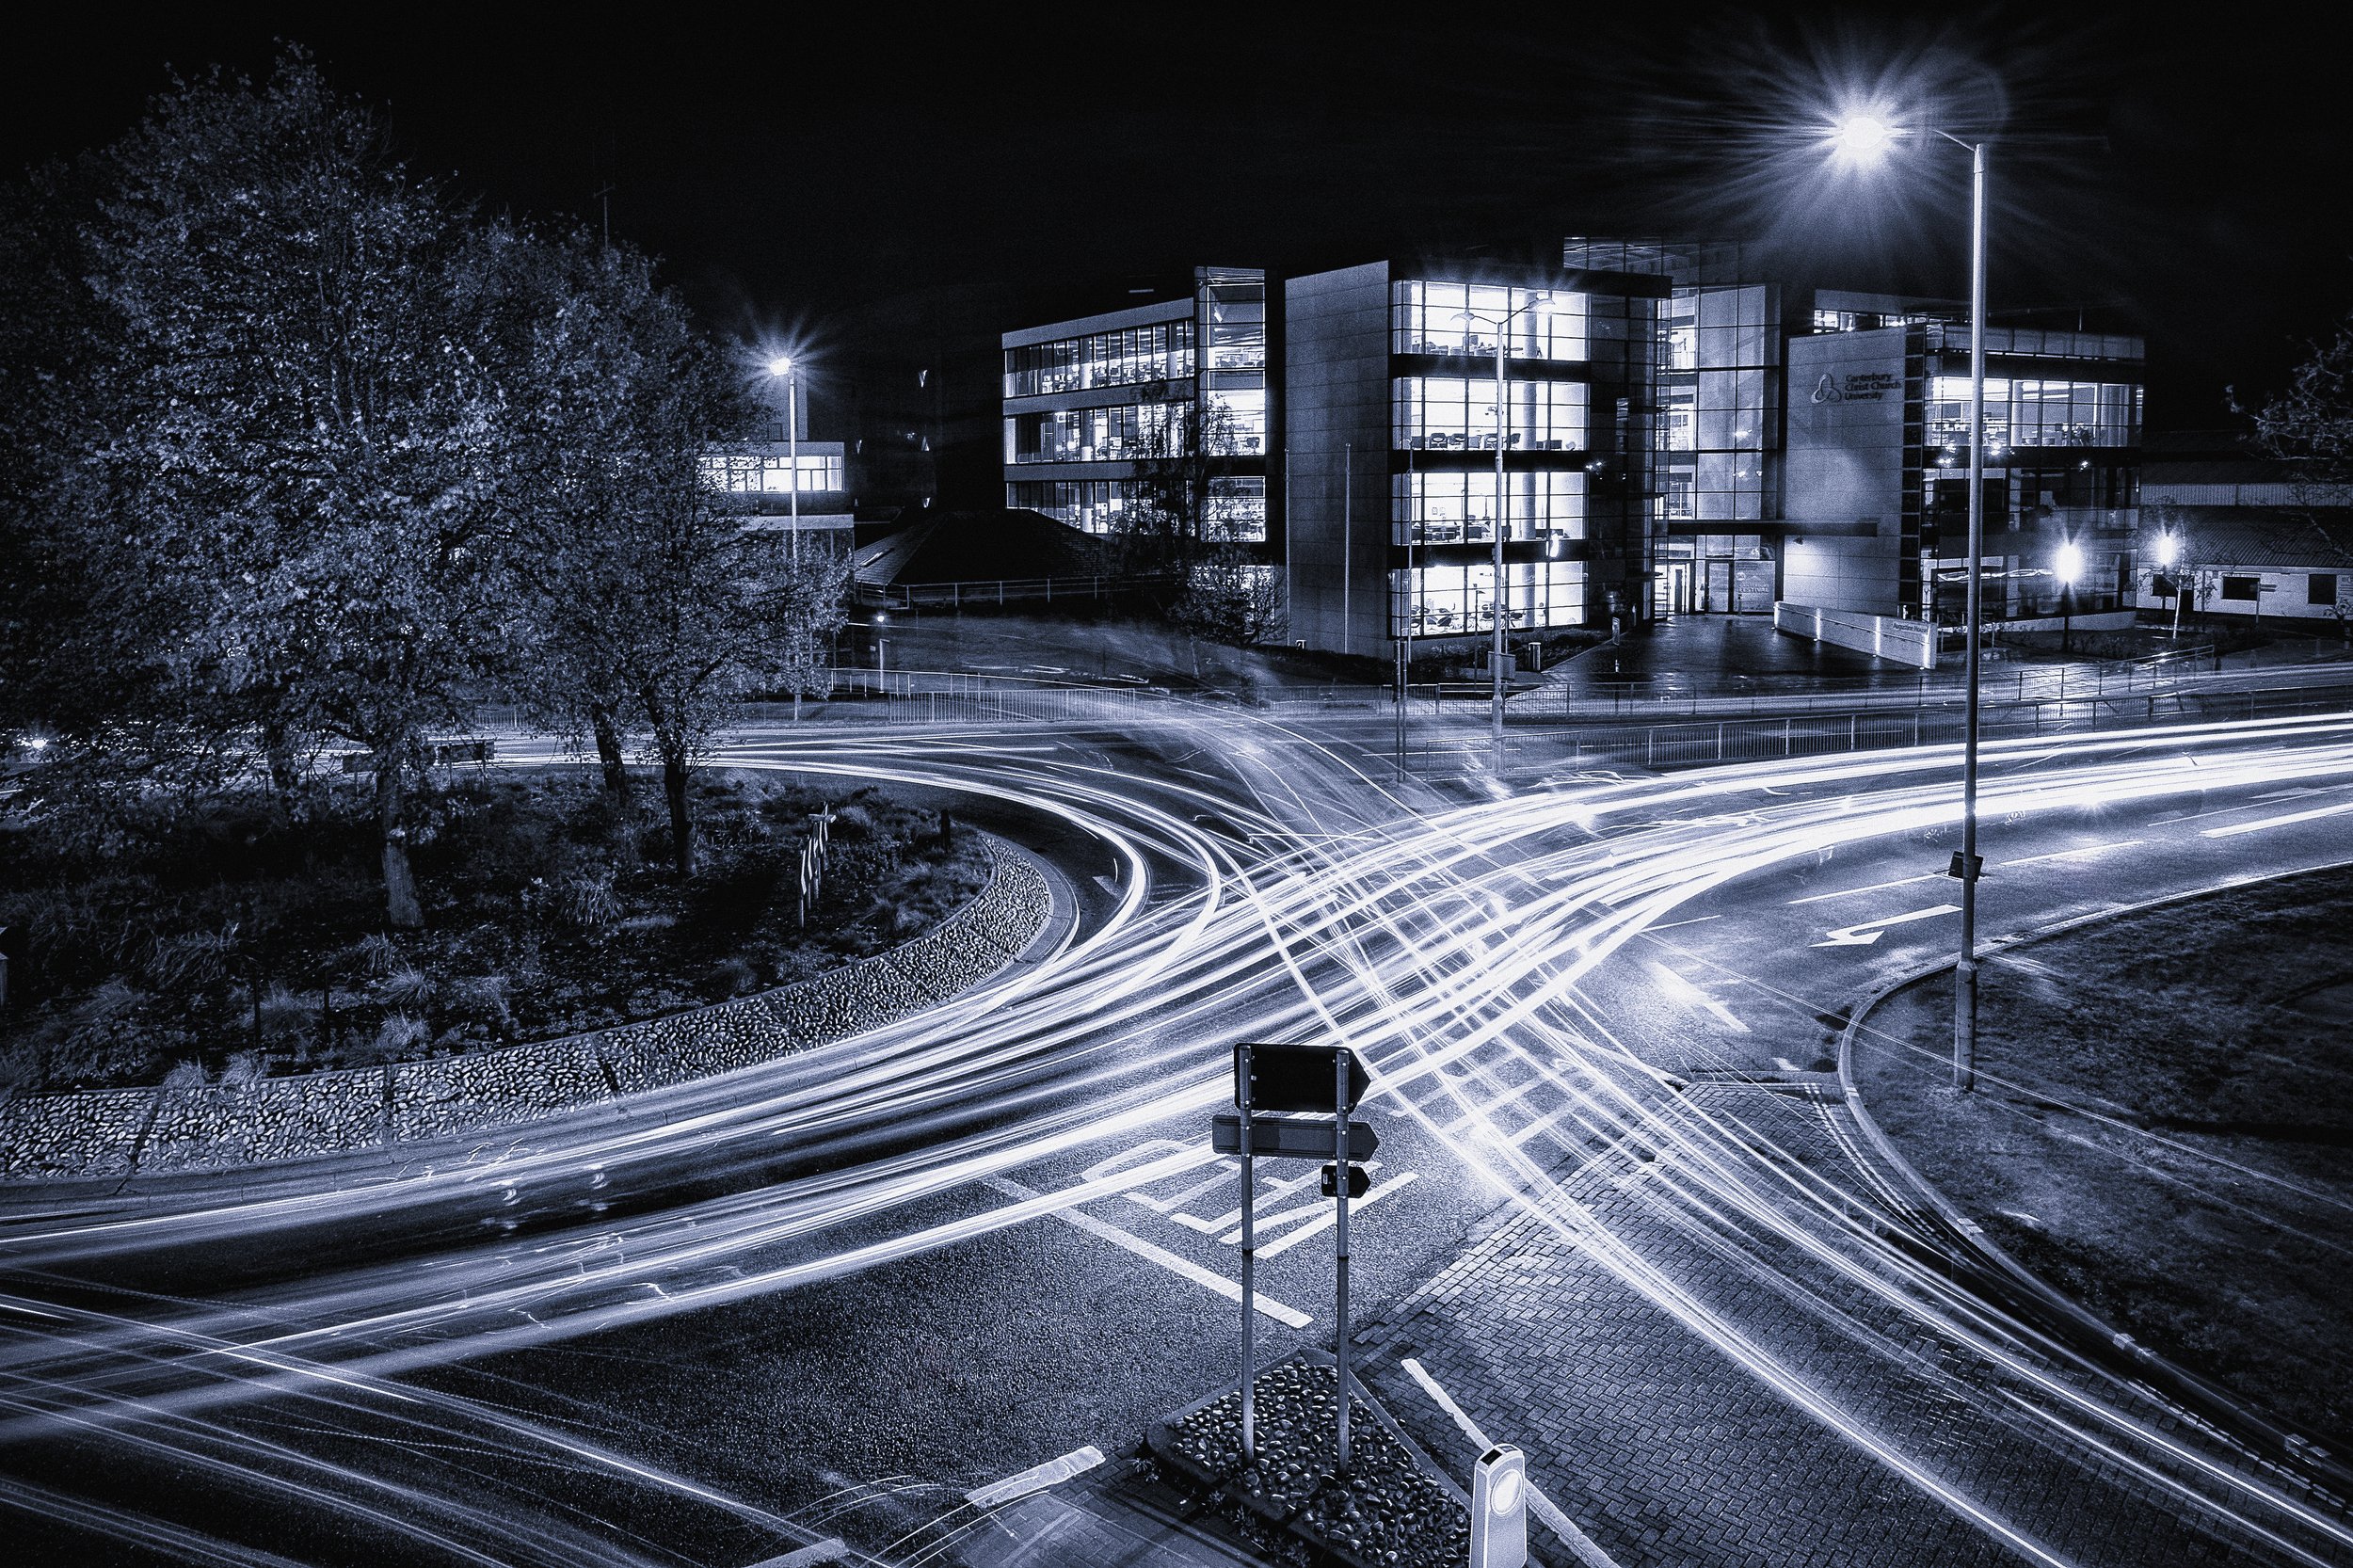
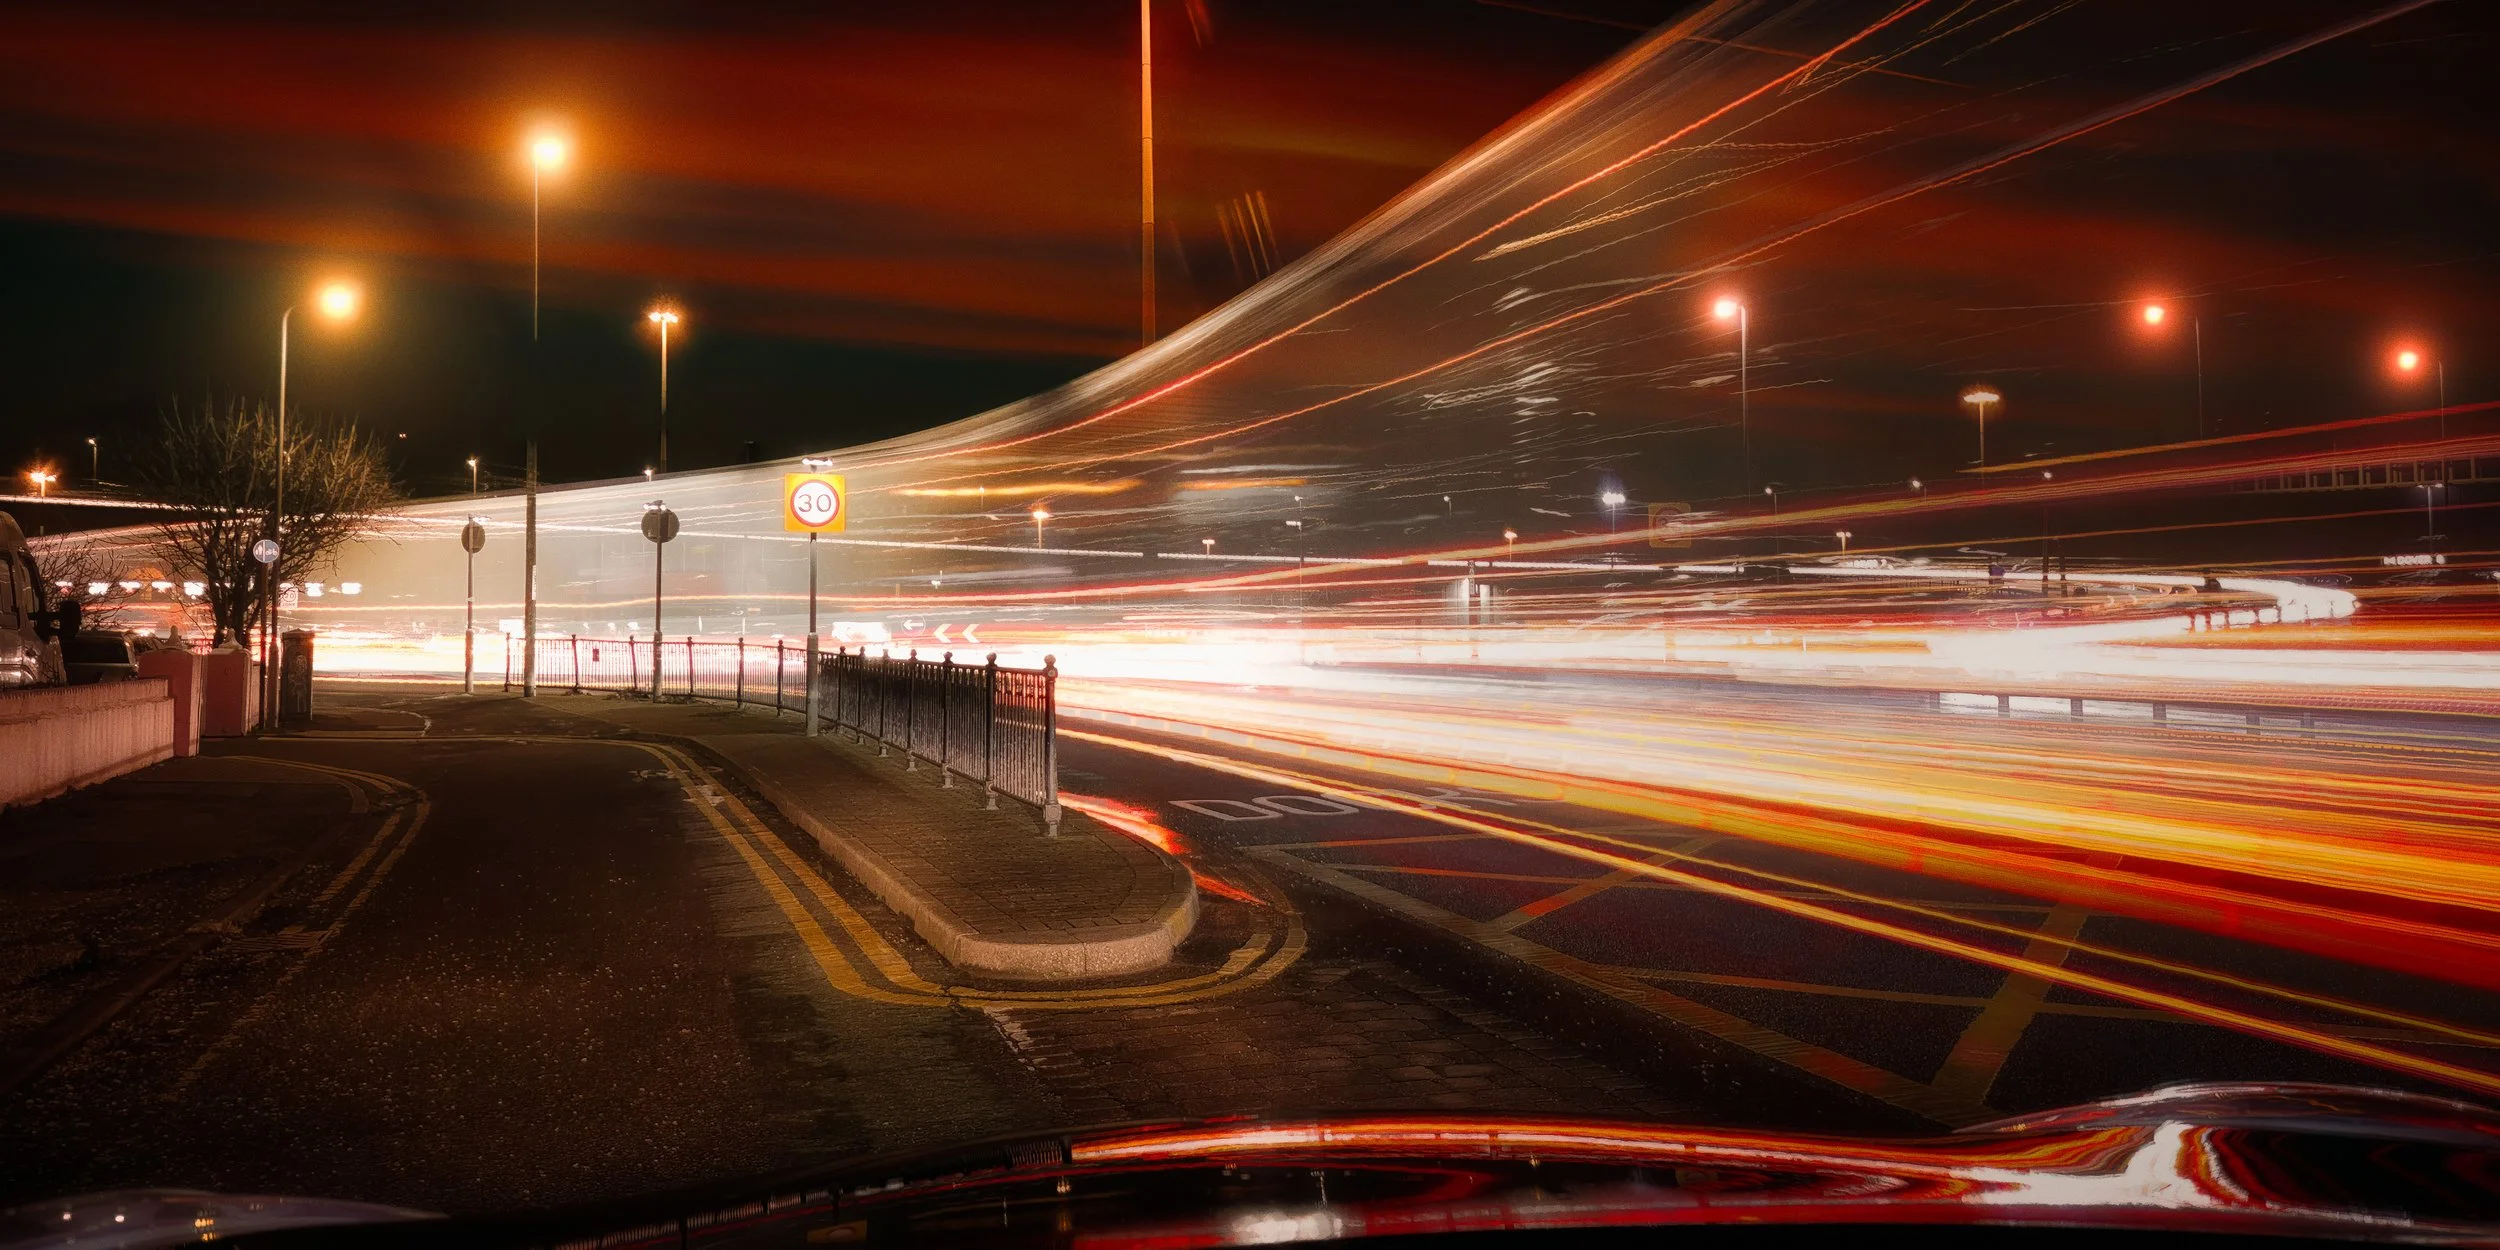
Roundabouts and junctions where vehicles turn — the curved movement produces arcs rather than straight lines, which are compositionally far more interesting.
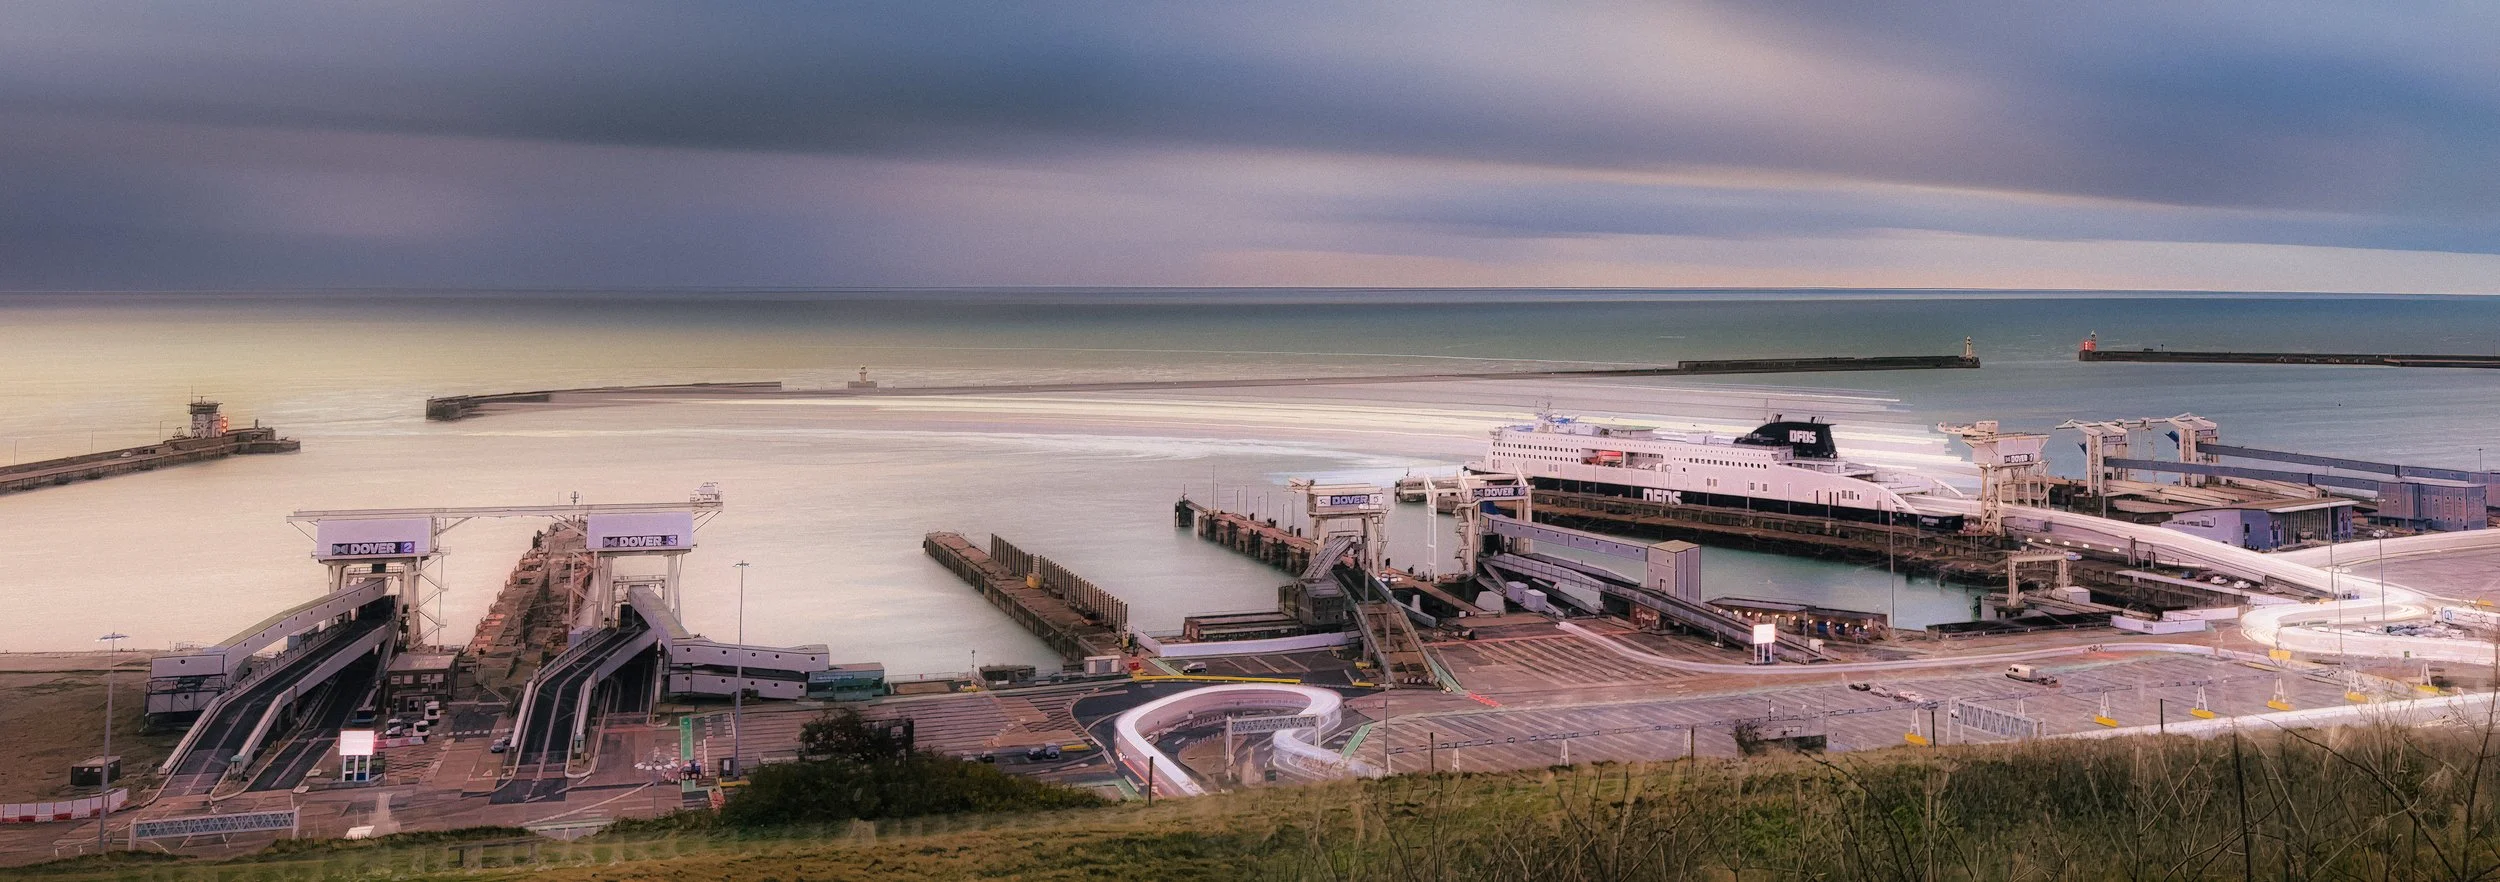
Elevated viewpoints: a footbridge over a road or river, a car park roof, a hillside overlooking a valley road. Looking down on the trails rather than across them gives you a cleaner composition and keeps you safely away from the traffic.
Cityscapes with multiple visible traffic routes — you get layered trails at different scales and depths.
Fairgrounds and funfairs for circular and orbital trails from rides.
Pre-scout locations in daylight. Finding out that your ideal footbridge has a fence that blocks the lower third of the view is better discovered at three in the afternoon than at nine at night.
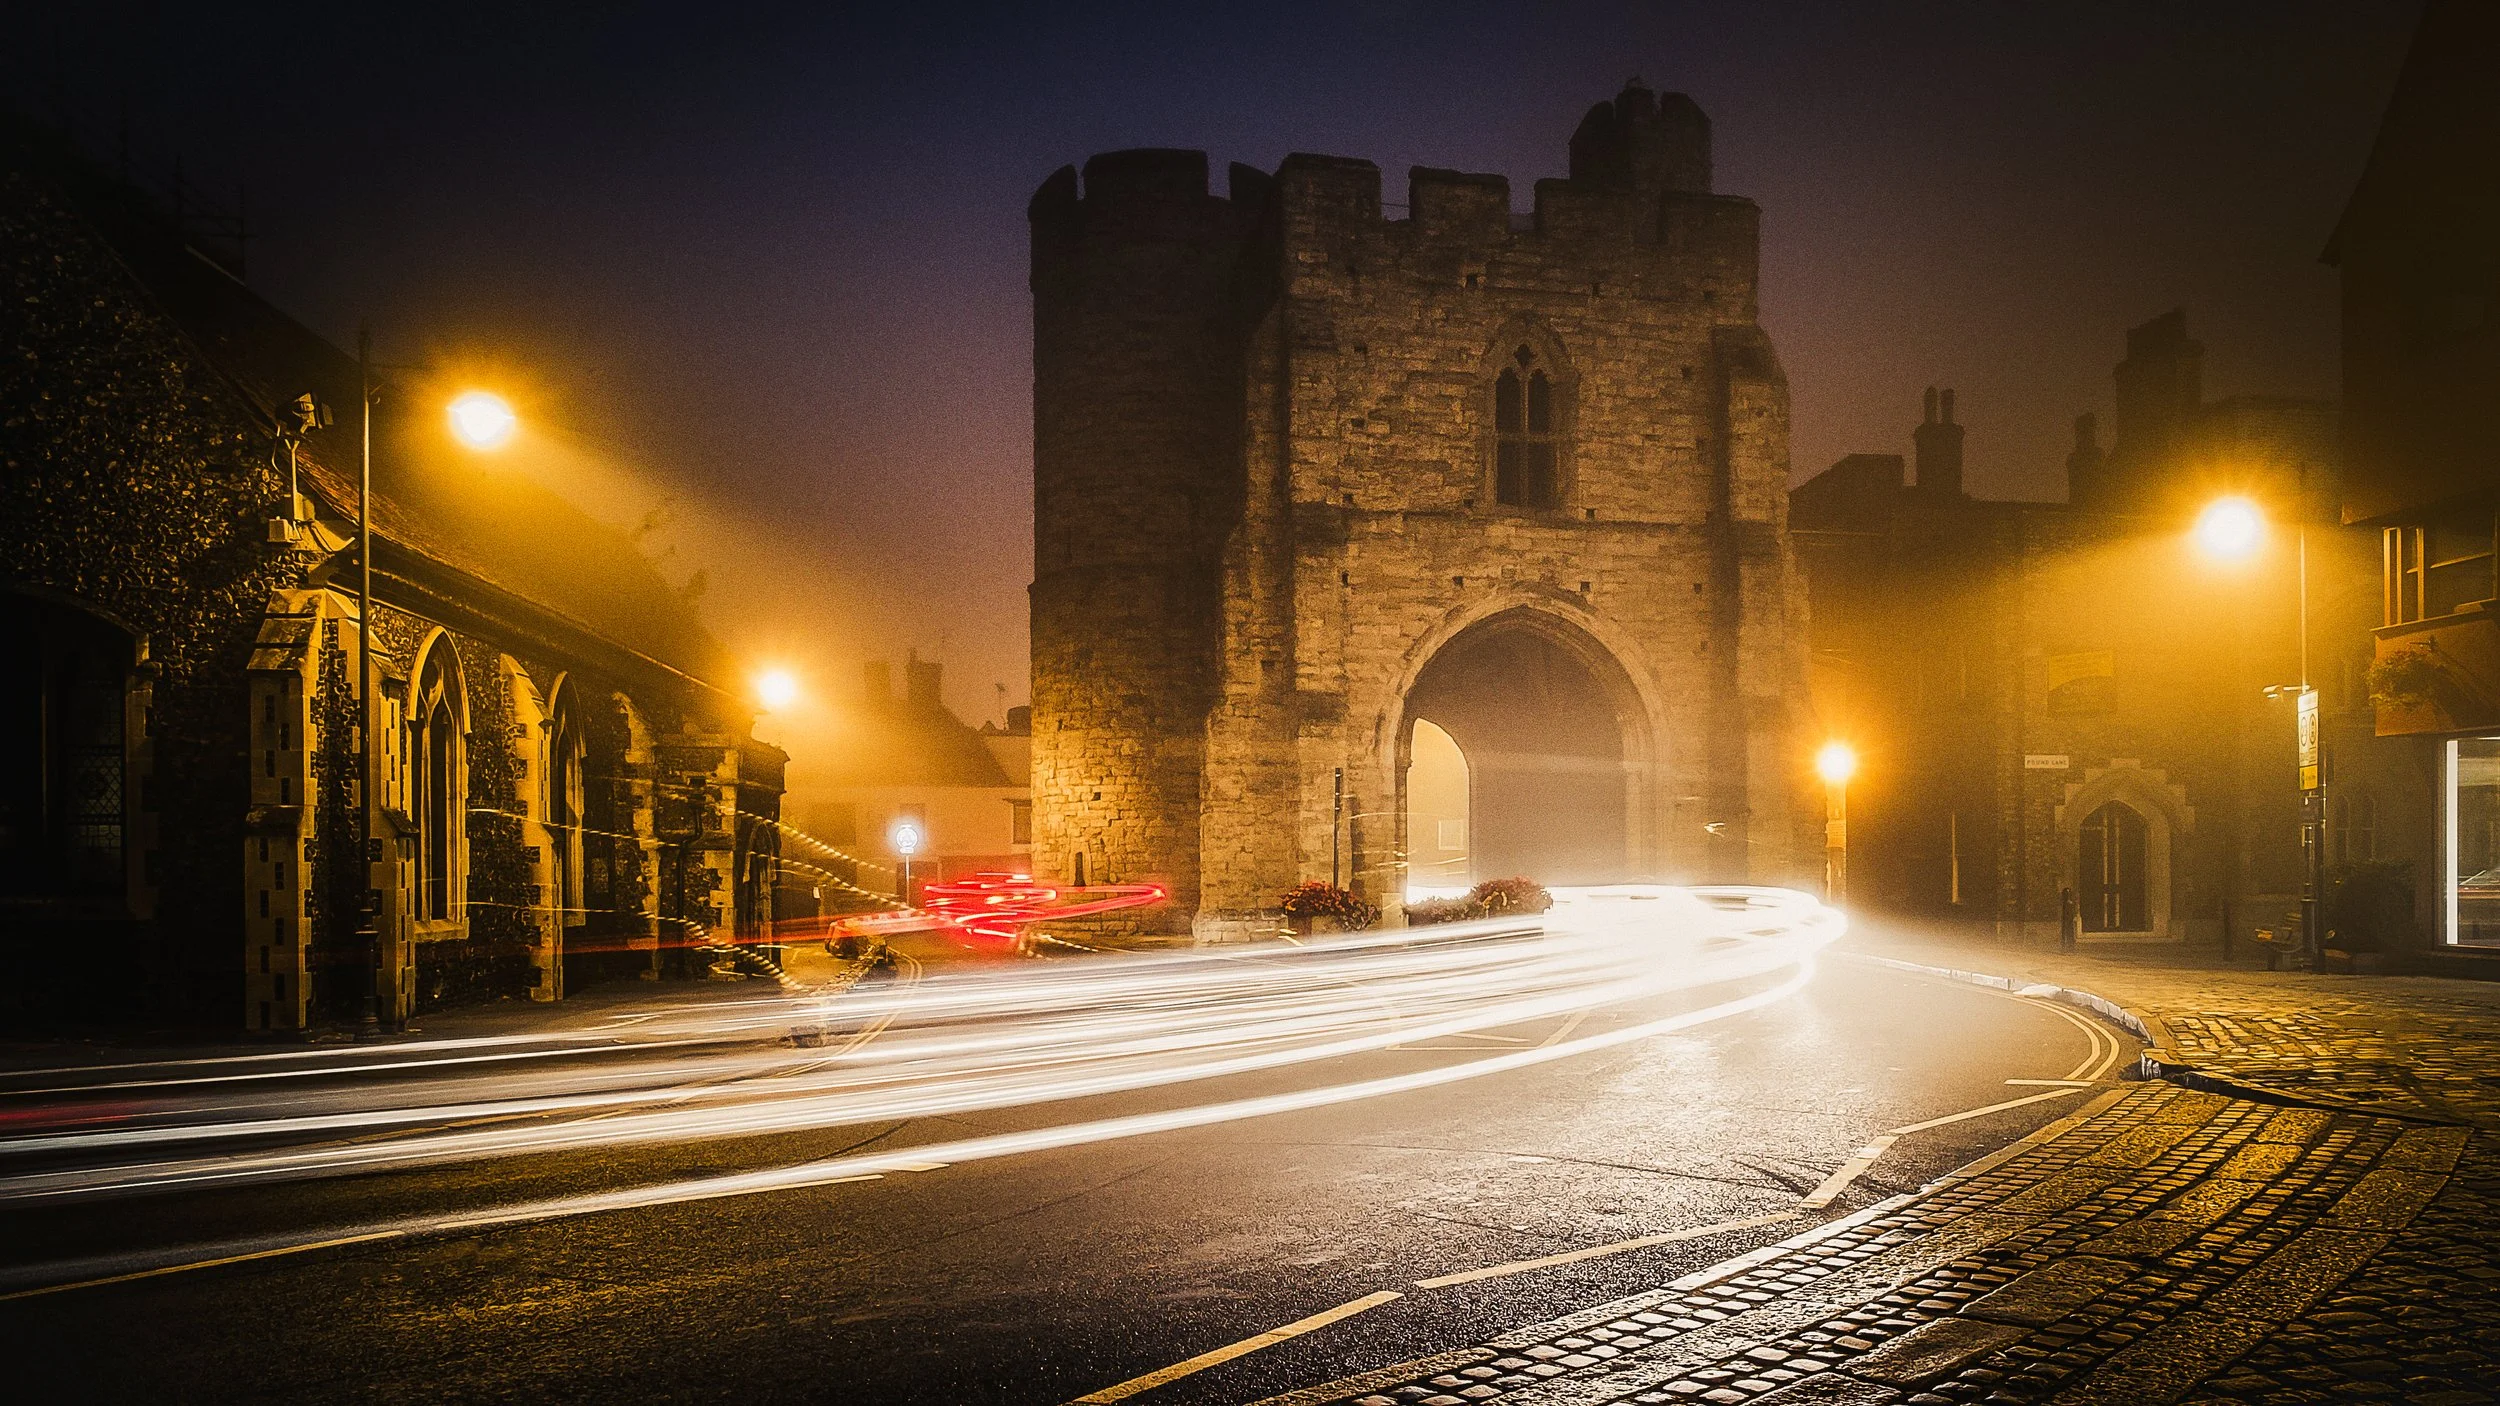
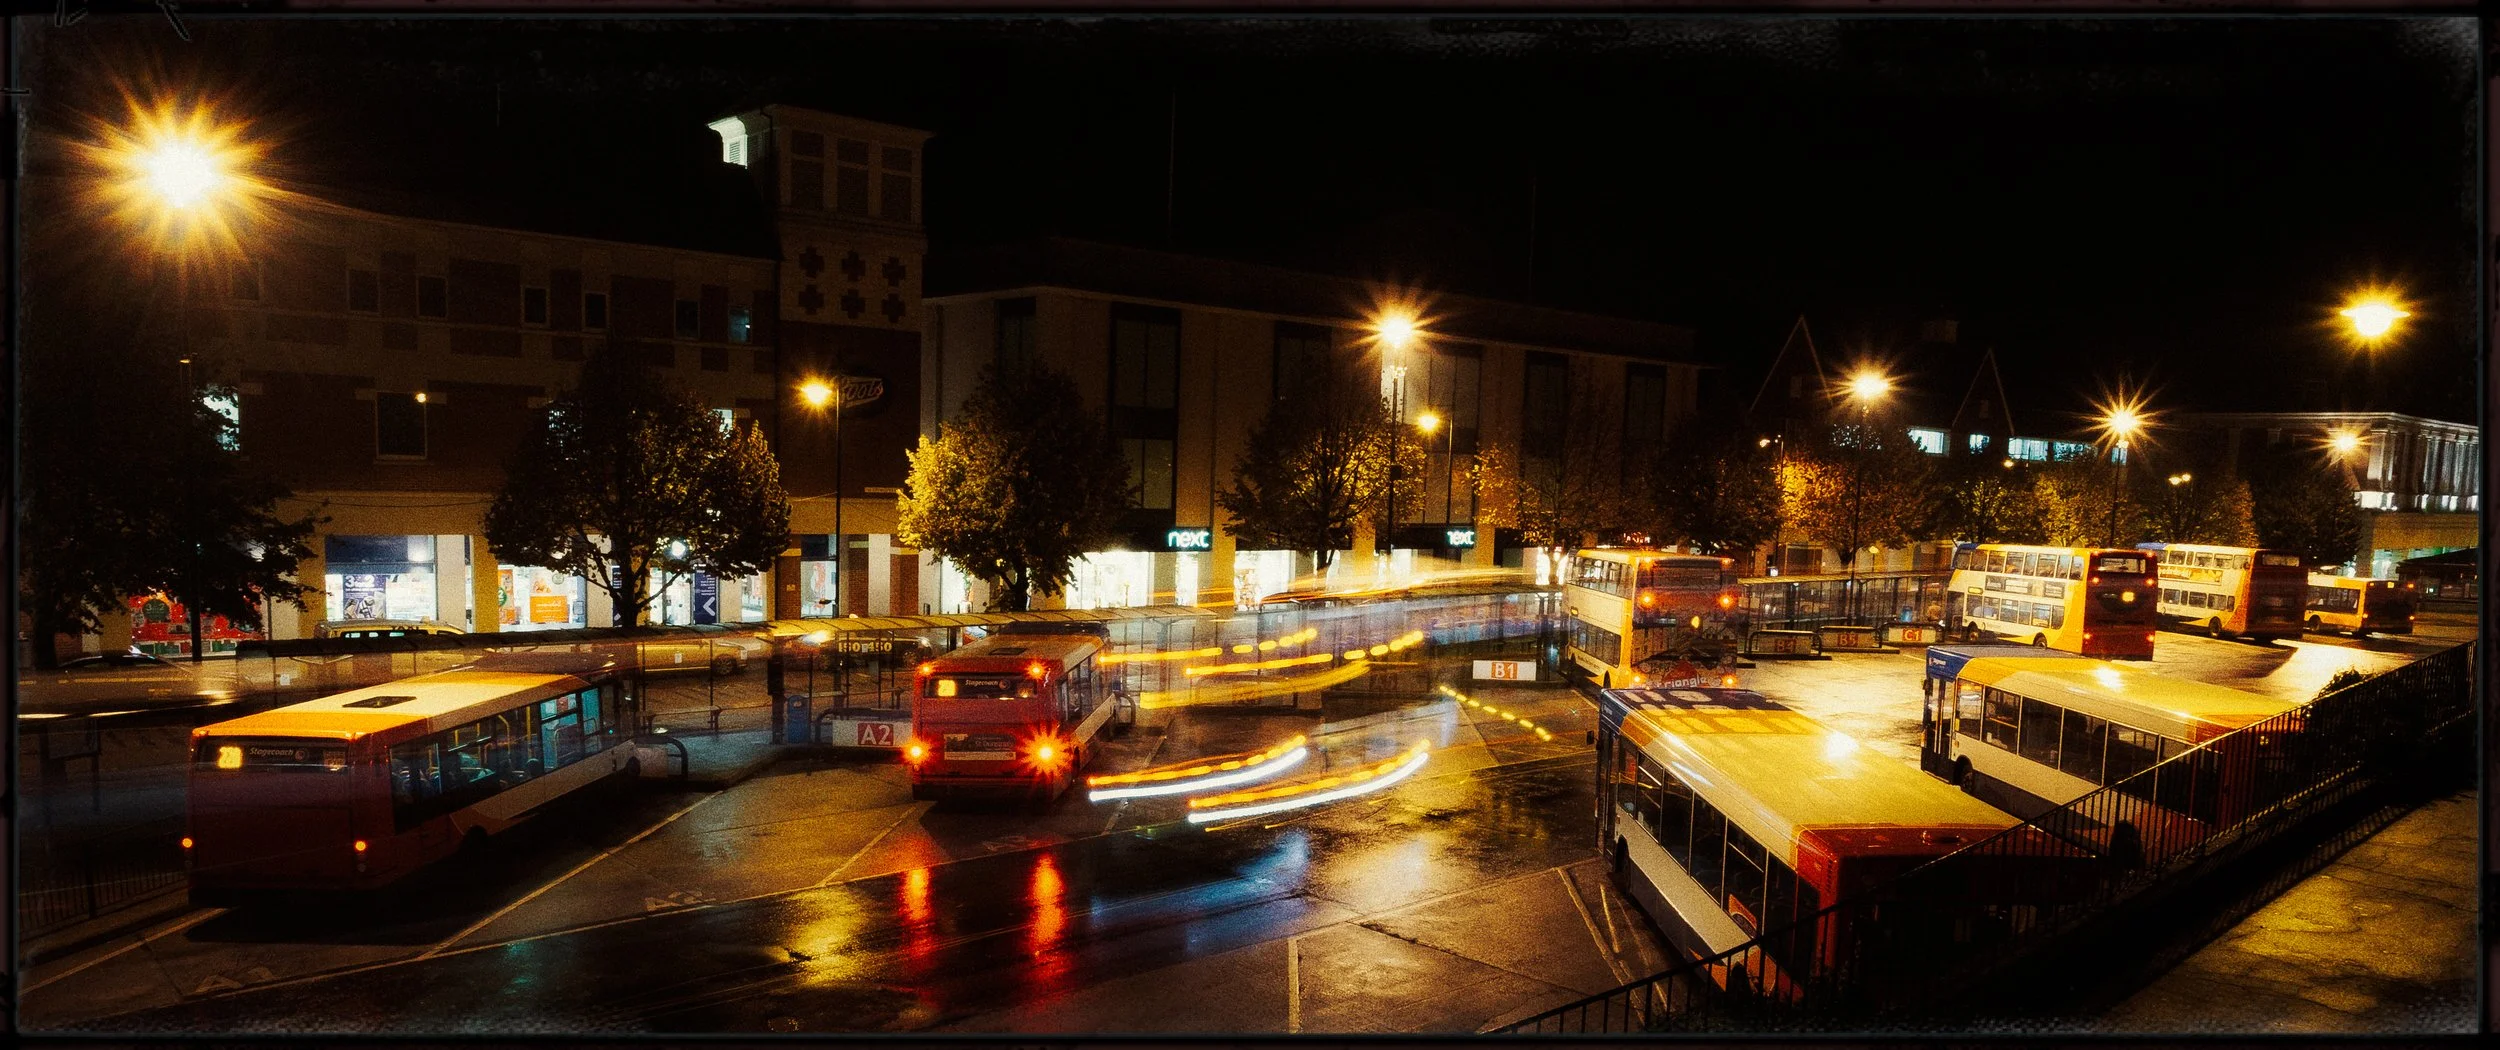
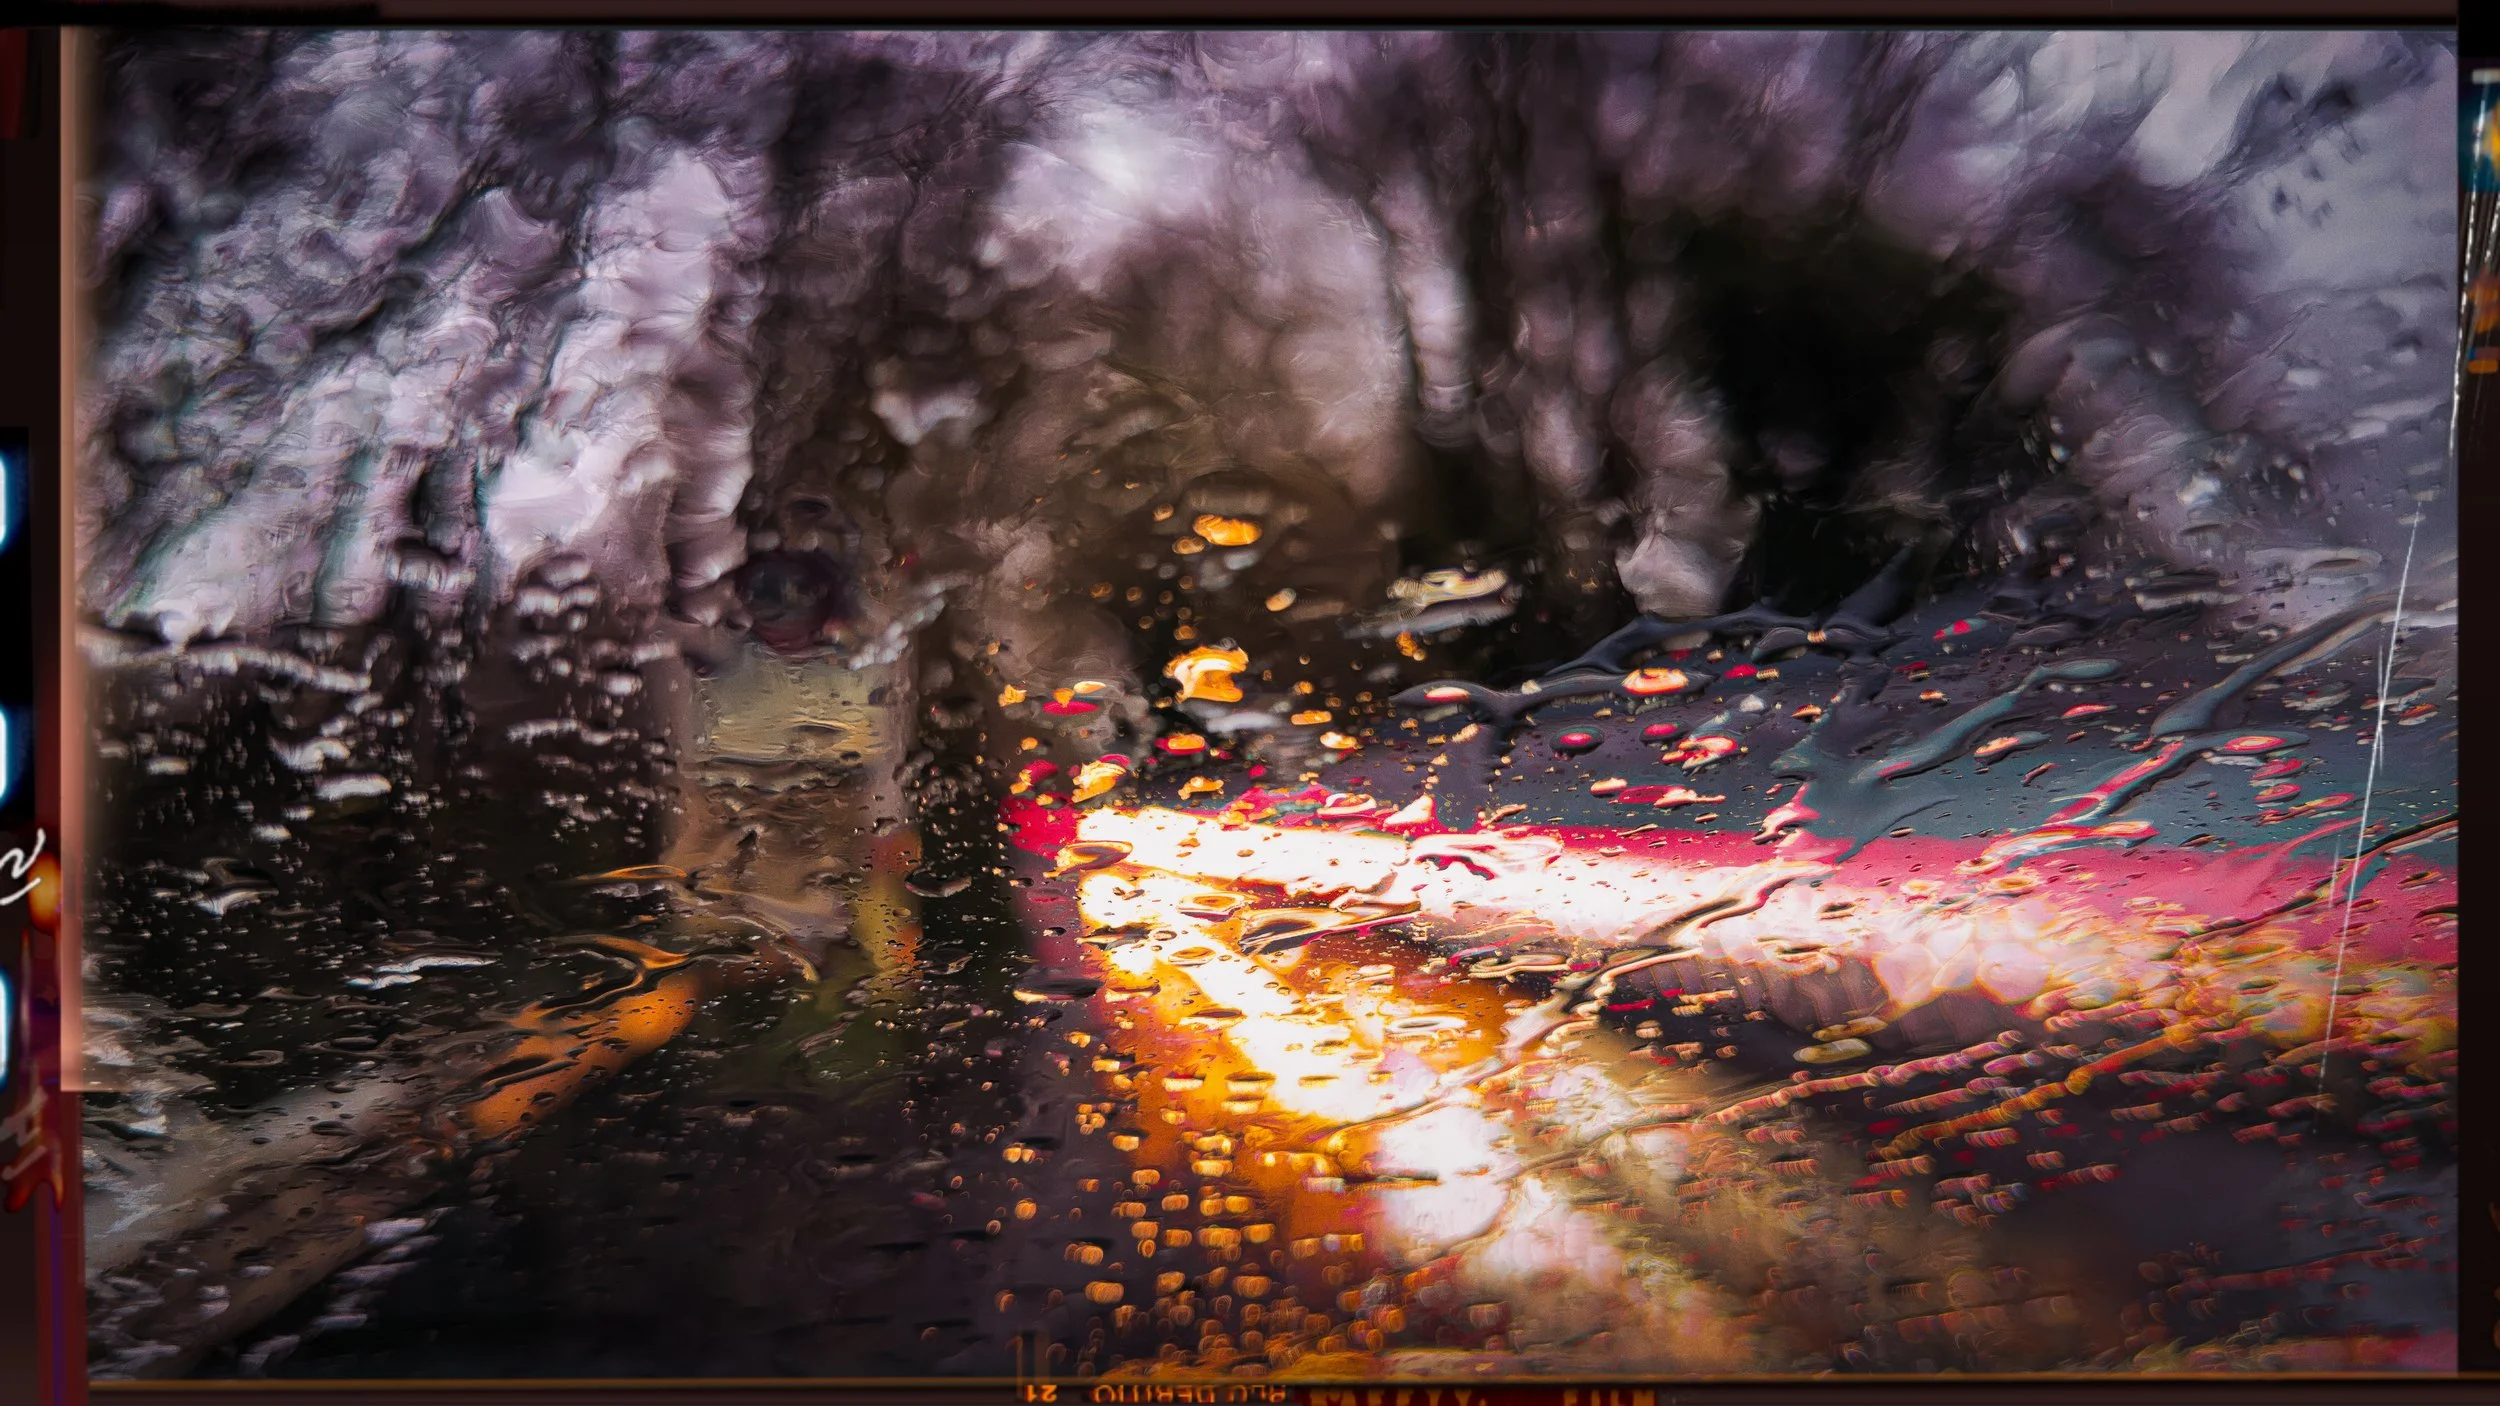
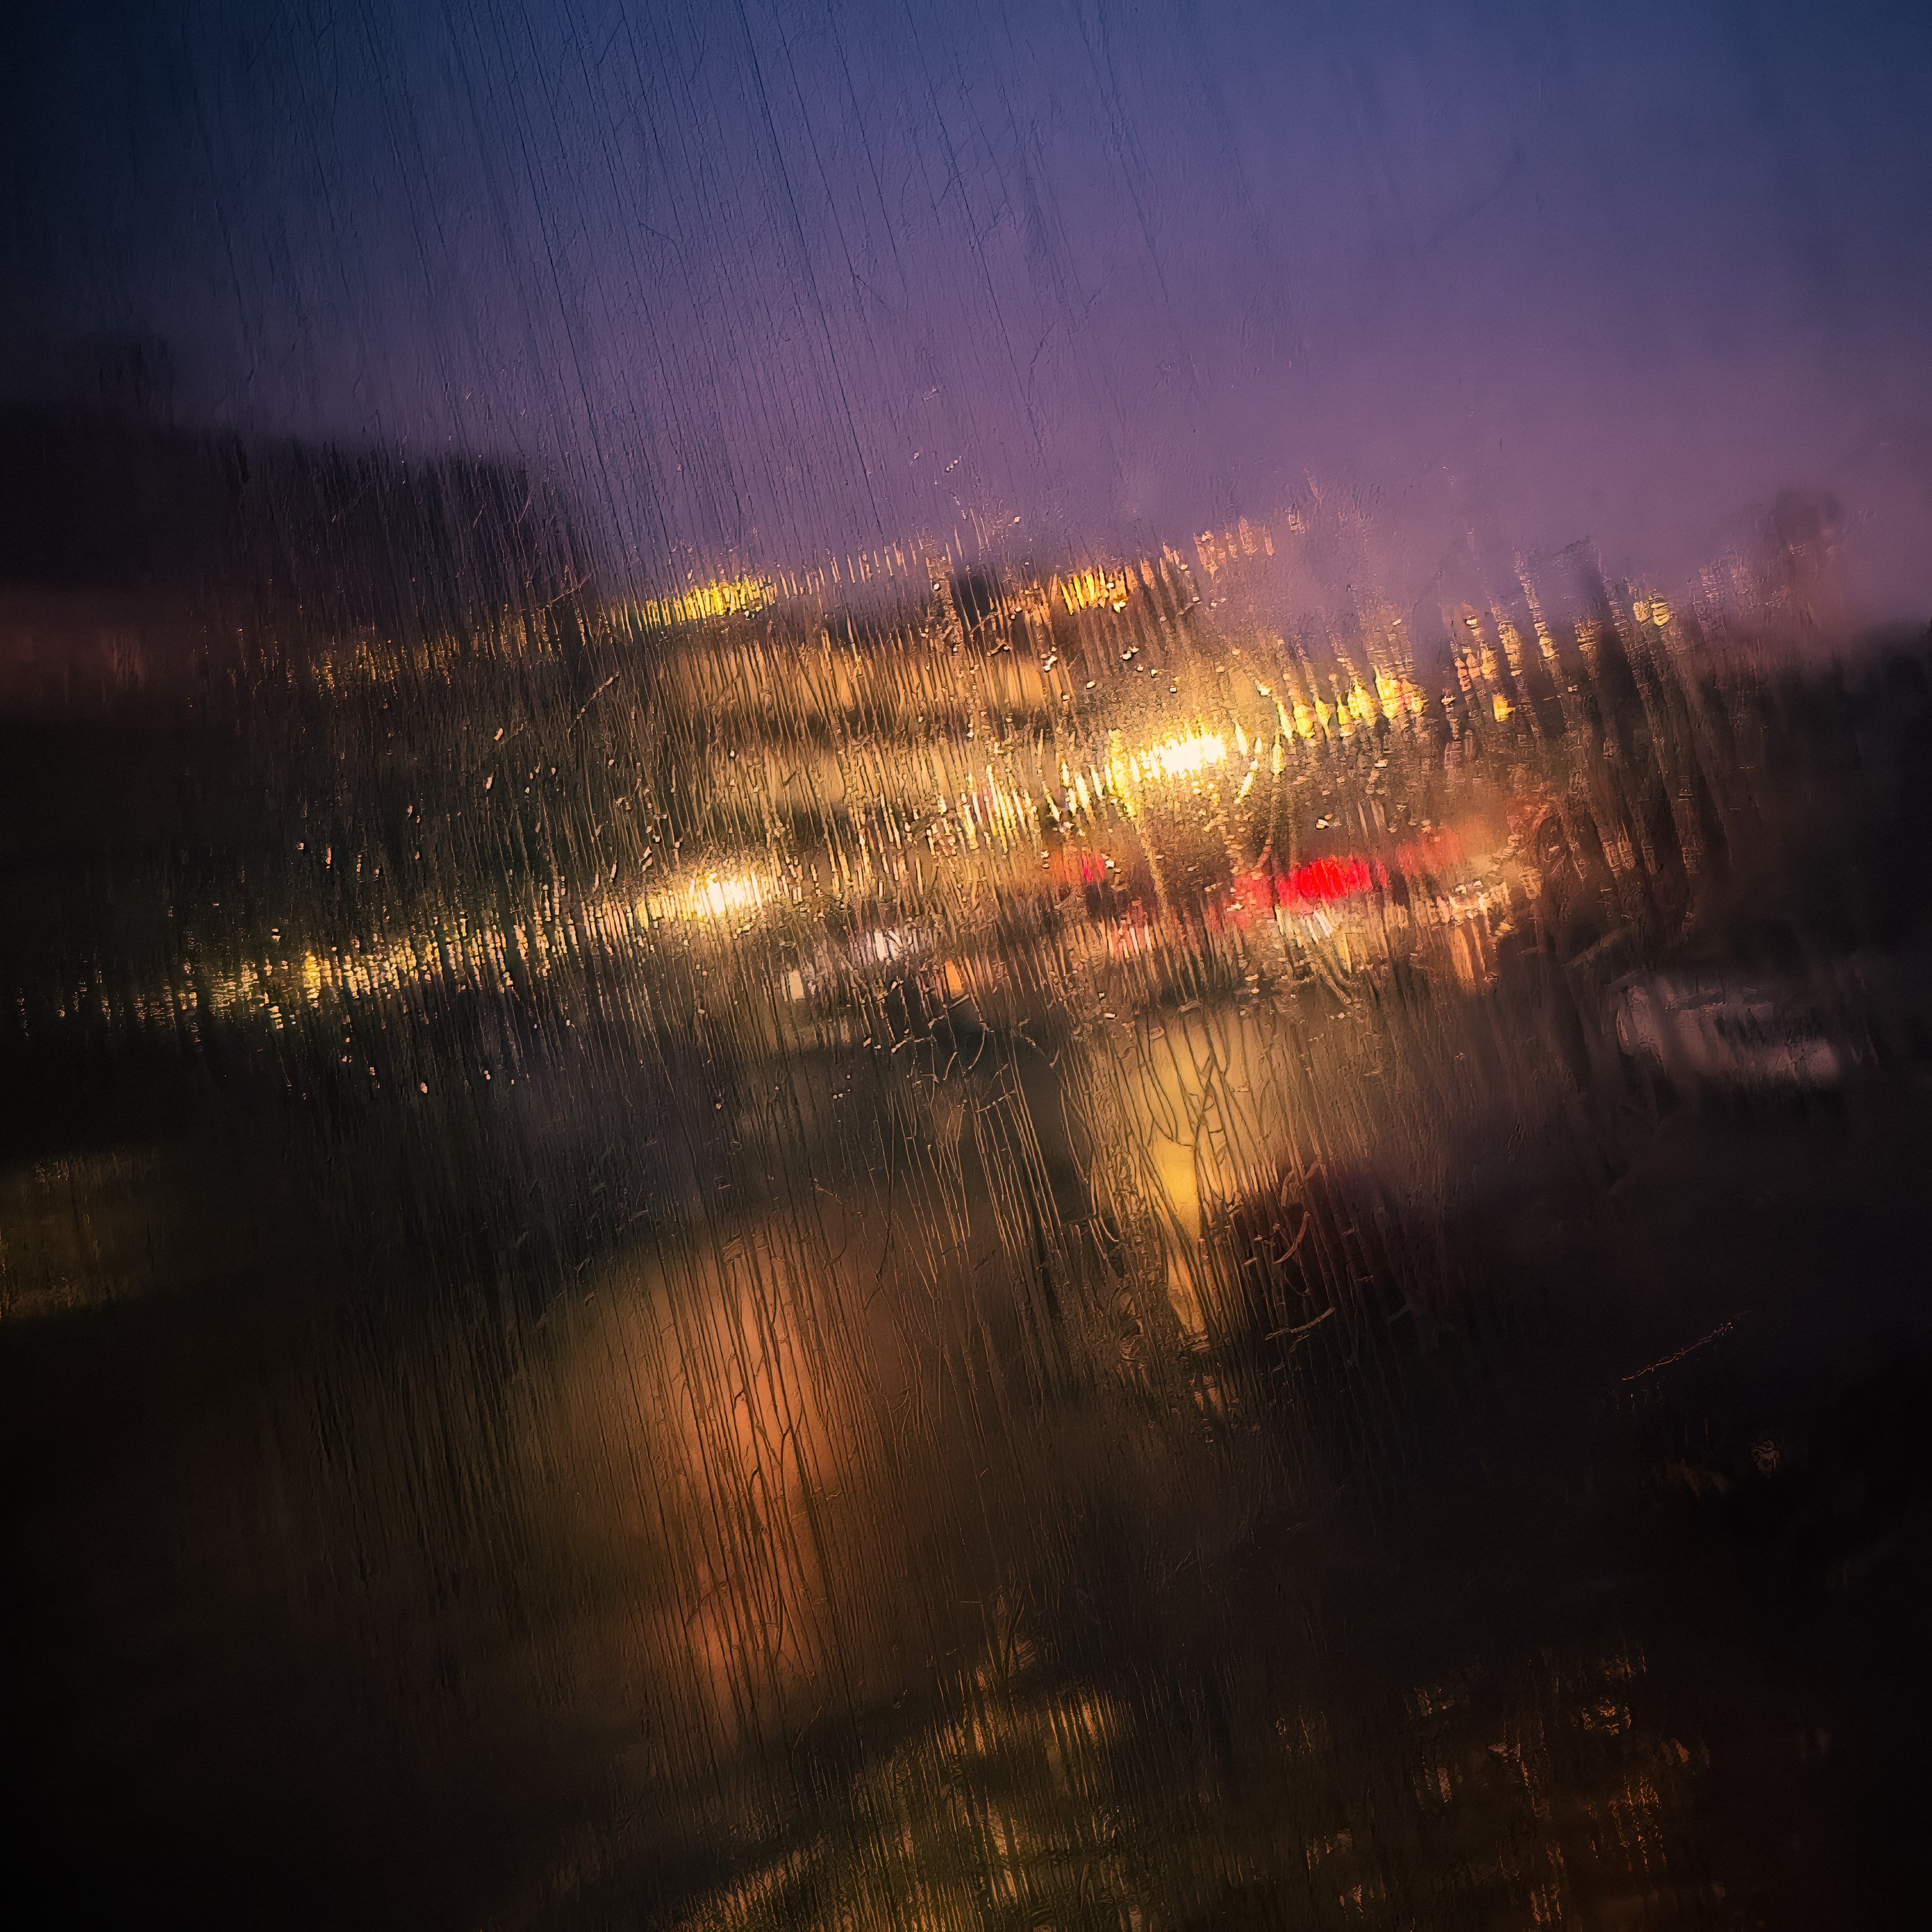
Weather has a significant effect. Clear skies are required for star trails. Rain before a shoot is, counter-intuitively, a gift for urban light-trail work — wet road surfaces reflect the trails below them, doubling them and adding depth. Fog diffuses light sources, creating atmospheric halos and softer trails; it can be beautiful, and worth seeking out. Wind is a problem: even on a tripod, sustained wind can introduce subtle shake into a thirty-second exposure. Weight the tripod down with a bag, or use a heavier one.
Safety. You are working near roads at night. Wear high-visibility clothing. Do not stand in or adjacent to the carriageway. Position yourself on a bridge, a pavement, a raised verge — somewhere physically separated from moving traffic. Let someone know where you are going and when you expect to return. In urban environments, be aware of your surroundings; a photographer staring at a phone screen is not paying attention to anything else.
Smartphone-Specific Techniques
The fundamental limitation of most smartphones in their default mode is that the automatic exposure system will not allow shutter speeds longer than about 1/4 second. It sees a dark scene and raises the ISO rather than lengthening the exposure. For light-trail work, this is useless — 1/4 second will give you a barely visible smudge from a car travelling at 30 mph.
There are several routes around this, depending on which platform you are on.
iPhone: Live Photo method. When you shoot in Live Photo mode, the iPhone captures 1.5 seconds of footage before and after the shutter press — a three-second clip in total. In the Photos app, open the image, tap the "Live" badge in the top-left corner, and select "Long Exposure" from the options. The app composites all the frames from the clip into a single blended image that simulates a three-second exposure. It is not a true long exposure — it is a computational blend of frames — but in good conditions it produces acceptable results. Limitations: the effective exposure is fixed at around three seconds; resolution is capped at approximately 20–24 megapixels regardless of the camera's native resolution; and the compositing algorithm sometimes leaves visible artefacts where frames have not merged cleanly. A tripod makes a significant difference here; handheld results are rarely clean.
iPhone: Night mode. Available on iPhone 11 and later, Night mode automatically engages in low light and uses longer exposures than the standard camera would permit. It offers limited manual control — you can adjust the maximum exposure duration on some models — but the processing pipeline applies sharpening and noise reduction that can work against you for light trails. Use it when nothing else is available; prefer a dedicated app when you have a choice.
iPhone: Manual camera apps. Several third-party apps unlock full manual shutter speed control on iPhone. Slow Shutter Cam is the most widely used dedicated long-exposure app for iOS: it allows exposures from 1/4 second up to several seconds (up to 60 seconds on some models), with manual ISO control and separate modes for light trails, motion blur, and low light. It is straightforward to use and produces good results. ProCamera and Halide offer full professional manual control including extended shutter speeds, RAW capture, and more granular settings — more complex but more capable. NightCap Camera is specifically designed for night and long-exposure work and has a dedicated light-trails mode that handles the blending well.
Android: Pro or Manual mode. Many Android flagships offer a Pro or Manual camera mode that provides direct access to shutter speed, ISO, white balance, and focus. On these devices, a proper long-exposure shot — 5, 15, 30 seconds — is available without any third-party app. To use it: open the camera, select Pro or Manual mode, set ISO to the lowest available value (50 or 100), set shutter speed to your starting point (8–15 seconds is a sensible beginning), set focus manually, and fire via the self-timer. Note that some manufacturers apply computational processing even in Pro mode (particularly in relation to noise reduction), which can smooth out fine trail detail. If this is an issue, Camera FV-5 is a professional manual camera app for Android with full BULB mode support and minimal processing interference.
Keeping the phone warm. Smartphone batteries lose charge rapidly in cold weather, and some devices will shut down mid-exposure if the battery drops below a threshold temperature. Between shots, put the phone in a pocket. Carry a power bank and connect it during shooting if you are out for a long session. A phone that decides to reboot at second seventeen of a thirty-second exposure has wasted both your time and the traffic that obligingly drove through your frame.
Camera Settings in Practice
Once you are set up and on location, the workflow is the same whether you are using a dedicated camera or a smartphone.
Set up the tripod and level it. If the tripod has a built-in bubble level, use it. A tilted horizon in a light-trail image is something you will notice on every subsequent viewing.
Frame the shot and set focus. In low light, autofocus will frequently struggle, hunting fruitlessly or locking onto the wrong element. Use manual focus where available. On a smartphone, tap to focus on a well-lit, distant element — a streetlamp, a lit window — and then lock the focus before the scene changes. On a dedicated camera, use live view and magnify the image to check focus manually. Once focus is set, leave it; refocusing between shots introduces variability.
Set ISO first. Start at the lowest available value — ISO 50 or 100. You will only increase this if you have no other way to achieve adequate exposure, and even then reluctantly.
Start with 8–15 seconds for vehicle light trails. This is a useful starting range for a typical urban road with moderate traffic at reasonable shooting distance. Take a shot, then review the histogram rather than the image preview. The screen preview in darkness, with your eyes adapted to the dark and the phone screen at its bright default, will make the image look lighter than it is. The histogram does not lie.
Adjust from there. If the histogram is heavily left-weighted with no peaks from the trails, the exposure is too short or there was no traffic during the shot — increase the shutter speed or try again. If the right edge of the histogram is clipped, the trails or background are overexposed: reduce the ISO, shorten the shutter speed, or wait for a quieter moment in the traffic.
Use the self-timer or remote shutter. Two seconds minimum. Ten seconds if you want certainty.
Take multiple shots. Traffic is unpredictable. Some shots will have one trail; some will have five; occasionally you will get a perfect arrangement that you could not have planned. Review them on screen later in the warmth. Reviewing in the dark, squinting at a bright phone screen, is not reliable.
Understanding and Using the Histogram
The histogram deserves a section of its own because it is the single most important tool for assessing exposure in night photography, and most photographers do not use it as much as they should.
The screen preview is a liar, or more precisely, it is susceptible to conditions. Your eyes have adapted to the dark. The phone screen is bright. The combination makes a slightly underexposed image look fine on the preview and reveals itself only later, on a properly calibrated monitor, as murky and underexposed. The histogram is objective. It shows a graph of tonal values in the image — shadows on the left, midtones in the middle, highlights on the right — and it looks the same regardless of the ambient light in which you are viewing it.
A well-exposed light-trail image has a very particular histogram shape. Most of the data is pushed hard to the left: the dark background, the deep shadows of buildings and sky, all occupy the low end. There will be a spike or cluster at the extreme left representing true black. On the right side, there are one or more spikes or peaks representing the bright trails themselves. Ideally, those right-side peaks do not quite reach the extreme right edge of the histogram — that edge represents clipping, the point at which the highlights have blown out to pure white and all detail is gone. Some slight clipping on the very brightest parts of the trails (the core of a headlight, for instance) is acceptable. Wholesale clipping of the entire trail is not — you lose the colour, the internal gradient, the sense of the light source itself.
The histogram will tell you things about your image that your eyes, dazzled by the scene in front of you, will cheerfully lie about. Use it after every shot.
RAW vs JPEG for Light Trails
JPEG is a processed, compressed file. The camera (or phone) makes decisions about exposure, colour, contrast, and noise reduction, bakes those decisions into the file, and discards the underlying sensor data. What you get is what you get; there is limited scope for revision.
RAW is the full sensor data — all of it, unprocessed, with no decisions made yet. The advantages for light-trail photography are substantial:
Highlight recovery. If a trail has blown slightly in camera, RAW retains the headroom to pull it back in post. JPEG has already discarded that data.
Noise reduction. Long exposures in low light produce digital noise, particularly in the dark background areas. RAW noise-reduction algorithms have access to the full tonal information and can work more selectively and effectively than in-camera JPEG processing.
White balance. In a scene lit by a mixture of sodium streetlamps, LED headlights, and ambient sky, the colour temperature is complex and variable. In RAW, white balance is set entirely in post, with no quality penalty. In JPEG, what was chosen in camera is baked in.
Editing latitude. RAW files can withstand significantly more aggressive post-processing before degradation becomes visible.
The trade-offs are file size (RAW files typically run 25–50 MB versus 2–4 MB for JPEG) and the requirement to process the file before it looks its best — RAW files straight out of camera appear flat and slightly muted.
For light trails: shoot RAW if your phone or camera supports it. Particularly on an important planned shoot at a good location, the editing latitude is worth having.
iPhone ProRAW is available on iPhone 12 Pro and later (though with resolution limitations when using longer exposures). Most Android flagships support DNG (Digital Negative) RAW format either natively in Pro mode or through apps such as Halide or Camera FV-5.
Composition for Light Trails
Light-trail images succeed or fail on composition more than most people expect. The trails themselves are inherently eye-catching — they are bright, dynamic, and unusual — but eye-catching and well-composed are not the same thing. A straight trail from left to right across an otherwise featureless dark frame is technically competent and compositionally inert. Think about what you want the trails to do within the frame.
Leading lines. Light trails are lines, and lines that lead the eye somewhere are more effective than lines that go nowhere in particular. A road curving towards a lit bridge, a motorway ramp sweeping towards a city skyline, a roundabout generating arcs around a central sculpture — these all give the eye a journey. Find locations where the trails will function as leading lines pointing towards something of interest.
Curves over straight lines. This deserves emphasis. A straight trail tells you a vehicle went from one side of the frame to the other. A curving trail tells you the road bends; it implies the environment, it creates a more dynamic shape, it is simply more satisfying to look at. Seek out bends, roundabouts, junctions, and elevated shots of curved slip roads. The motorway spaghetti junction is maligned as an architectural form but is a gift to the light-trail photographer.
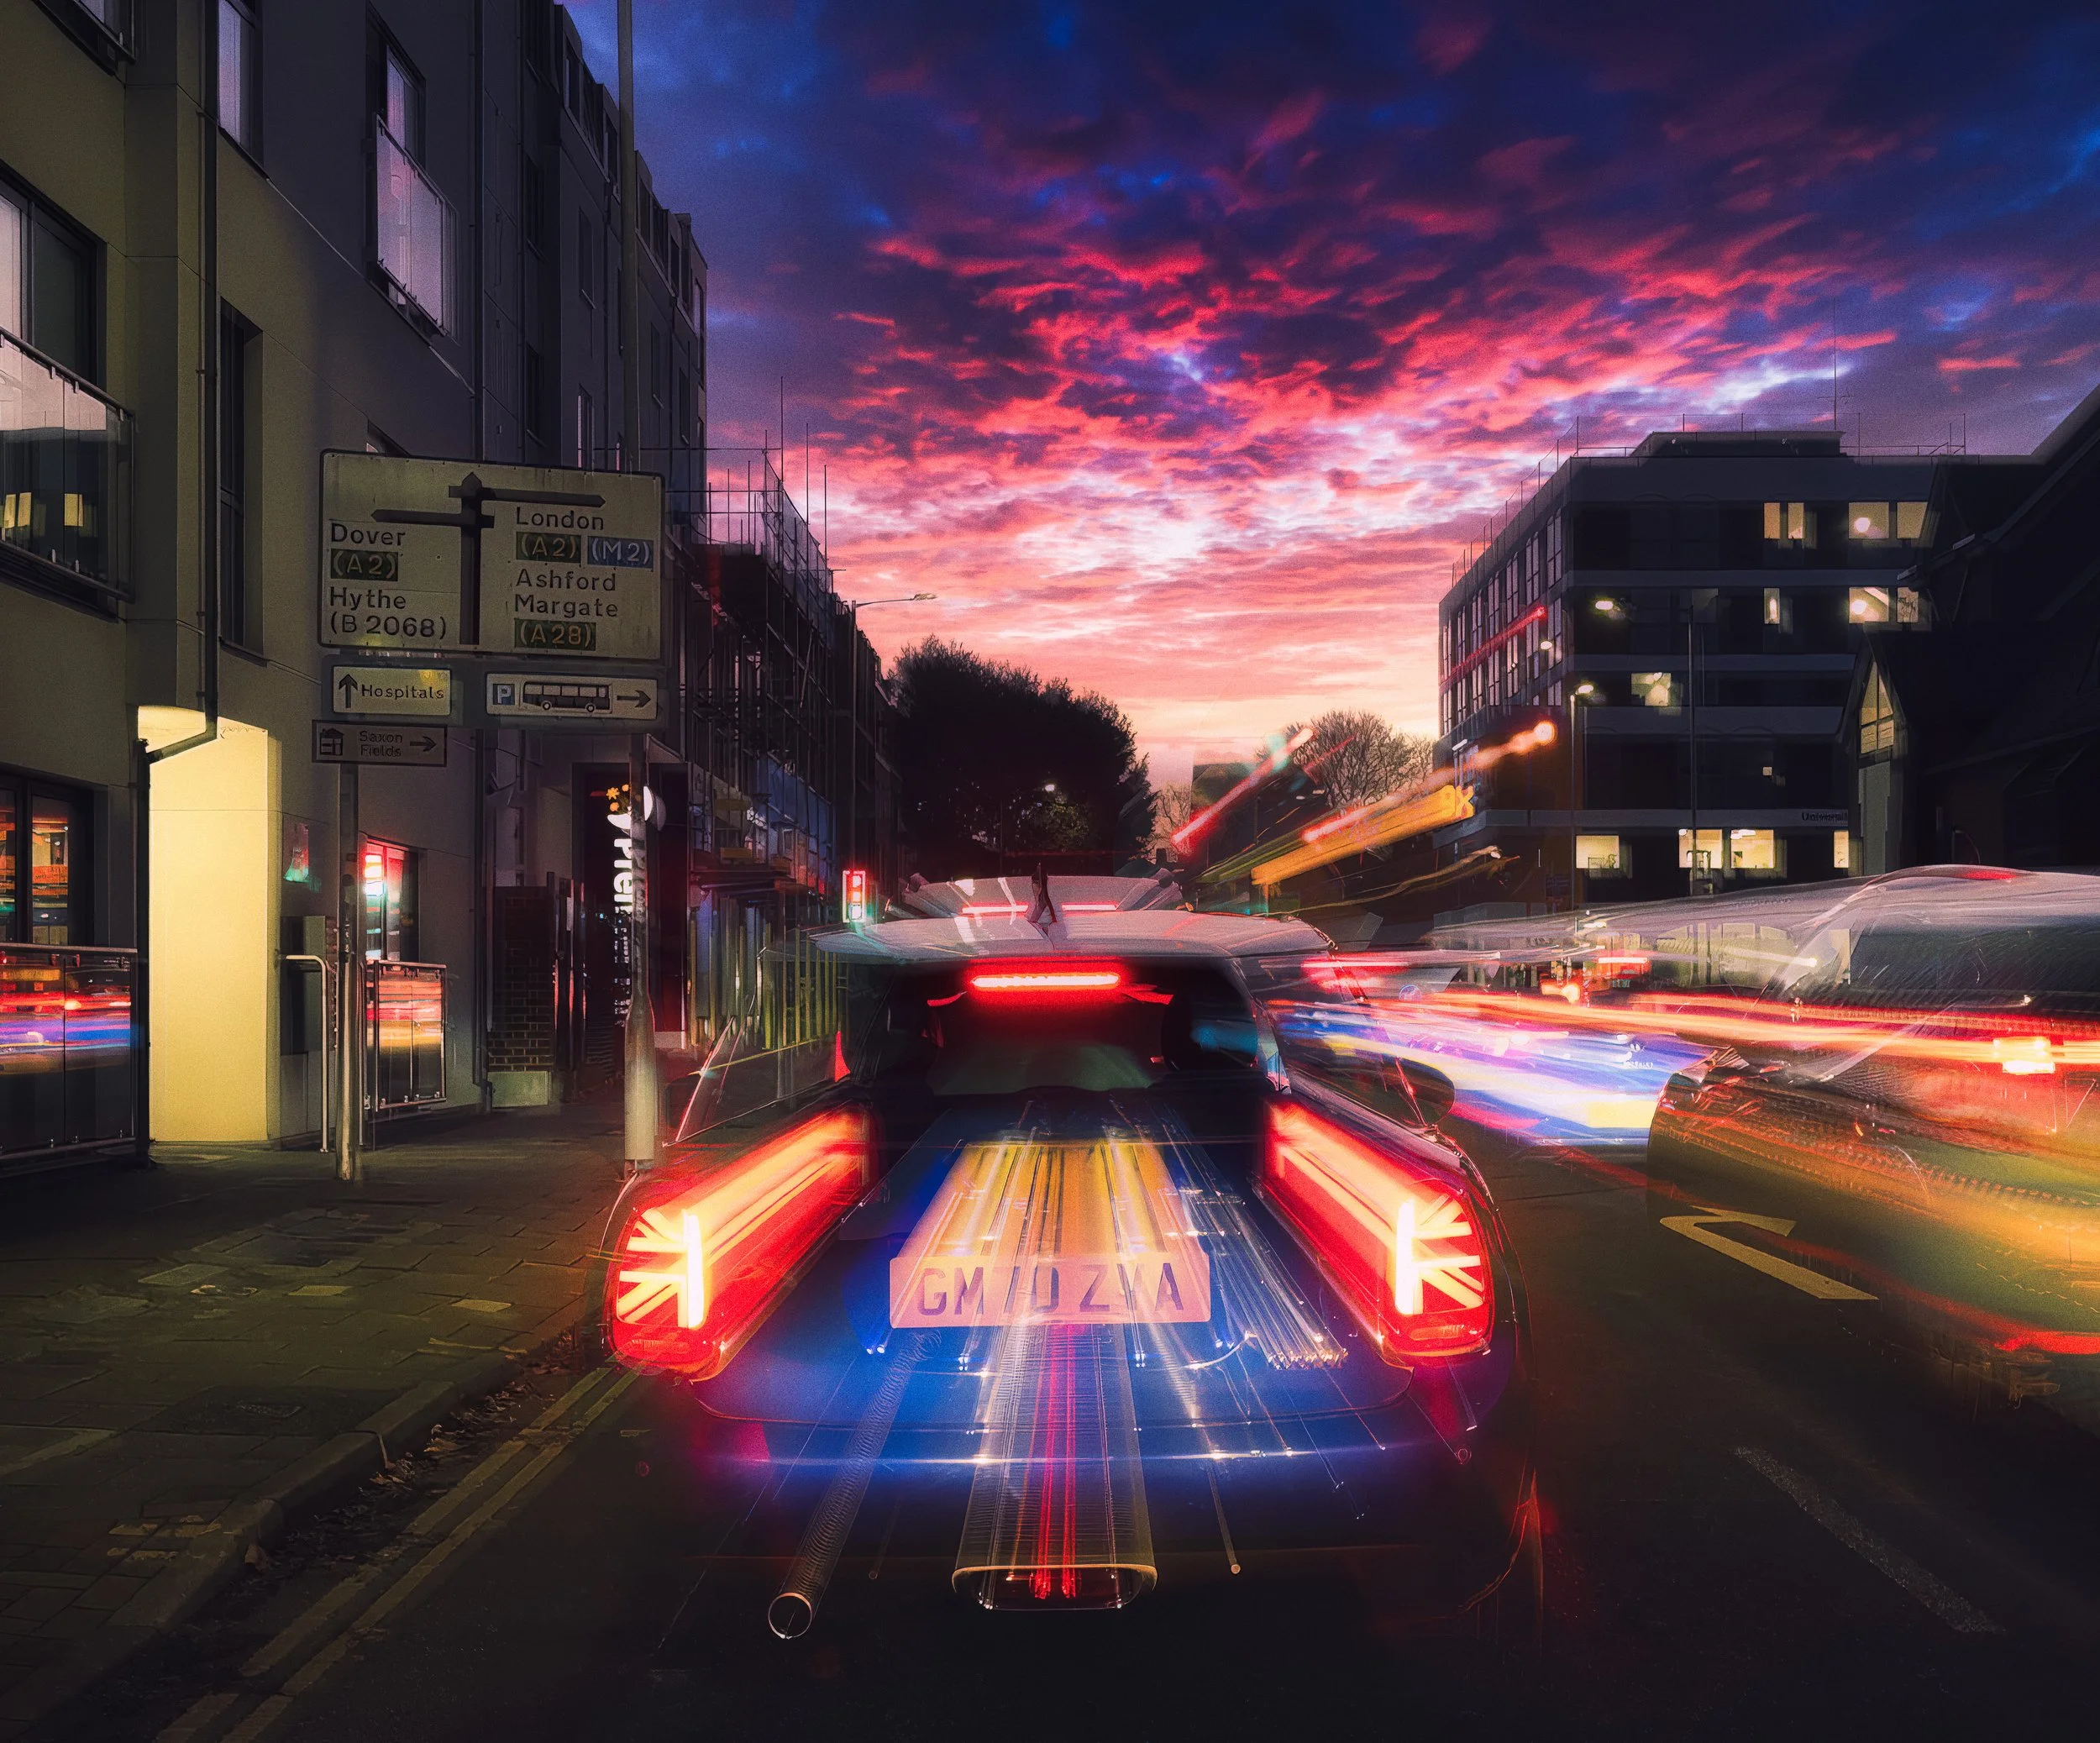
Headlights versus tail lights. Headlights produce white-to-warm-white trails; tail lights produce red. Both in the same image create colour contrast and depth. Shooting towards oncoming traffic (from a safe elevated position) gives you white trails moving towards the camera; shooting with the traffic moving away gives you red. Many locations will give you both simultaneously — opposite carriageways of a dual carriageway, for example. Consider which direction produces better results for your specific composition.
Foreground, midground, background. A light-trail image consisting solely of trails against sky is less interesting than one that incorporates a recognisable element — an identifiable building, a landmark, a bridge, a tree line. The trails supply movement and energy; the static element supplies context and scale. Without context, the viewer is looking at abstract shapes. With it, they are looking at a place, at a particular time, transformed by the camera's accumulation of time.
The rule of thirds, applied thoughtfully. Where the trails enter and exit the frame matters. Where the horizon sits — upper or lower third — changes the relationship between sky and ground. Where the architectural element is positioned determines whether the composition feels balanced or weighted. These are not rules to follow blindly, but a useful framework for evaluating whether a composition has structure.
Reflections. Wet road surfaces, puddles, rivers, harbours, wet paving stones — all will reflect the trails, doubling them and adding depth to the image. If it has rained before your shoot, exploit this. It transforms even an ordinary location.
Light Pollution and Urban Photography
Most light-trail photography happens in cities, and cities have light pollution — the diffuse glow of accumulated artificial lighting that brightens the night sky and reduces contrast between lit subjects and their background. For the purposes of light-trail photography specifically, this is less of a problem than it is for astrophotography, but it is worth understanding.
Light pollution raises the ambient light level of the dark sky, which compresses the tonal contrast between the bright trails and the background. Instead of trails against near-black, you get trails against a murky grey-orange. It also introduces colour casts: the orange-yellow of sodium vapour lamps (still widespread in older street lighting installations) and the harsher blue-white of modern LED streetlights, often mixed in the same scene.
The orange cast from sodium lighting is not necessarily a problem. Many of the best urban night photographs use it deliberately — there is a quality to sodium-lit sky that is specific to a time, a place, and a particular kind of urban experience, and it reads as such. Correcting it to a neutral grey in post can drain the image of character. The more complex mixed-colour casts from scenes where sodium and LED lighting coexist require more careful handling: these do not correct cleanly to a neutral tone, and an imperfect white balance correction can produce unpleasant intermediate colours. Often the better approach is to pick a correction that makes the sky a reasonable tone and accept that the trails will retain their native colours, which is generally what you want anyway.
For darker skies — useful for star trails and more atmospheric urban shots — consult a light pollution map. Light Pollution Map (lightpollutionmap.info) and Dark Sky Finder are both useful for locating lower-pollution sites within reasonable distance of urban areas. A short drive into the countryside can make a significant difference.
Creative Variations
Light painting. The fundamental technique is simple: camera on a tripod, long exposure (ten to thirty seconds), and a hand-held light source moved through the frame by a person who is themselves invisible to the camera (because they are in constant motion and thus register no fixed image). The light source — a torch, an LED wand, a glow stick, a sparkler — draws shapes, writes words in reverse (they will be correct in the photograph), or illuminates a static subject from multiple angles in sequence. The range of effects is wide. Light painting to illuminate a foreground subject — a parked motorbike, a standing stone, a piece of architecture — is a different technique from light painting to create abstract aerial shapes, but the camera setup is identical. If you are using steel wool as a light source (spinning it on a string creates a shower of sparks), observe appropriate safety precautions: do it in a fireproof location, away from dry vegetation, and have water available. The images are dramatic; the insurance implications of a scorched field are less so.
Fairground and Ferris wheel trails. Illuminated fairground rides produce some of the most reliably beautiful light-trail images because the movement is predictable and repeatable. A Ferris wheel rotating through a fifteen-second exposure produces elegant partial arcs; time the exposure to capture a full rotation (Ferris wheels typically rotate at between three and five minutes per rotation — a fifteen-second exposure gives you roughly a 1/12th to 1/20th arc, which looks better than you might expect) and you get a near-complete circle of colour. Faster rides — waltzers, chair-o-planes — produce more chaotic overlapping arcs that suit a more energetic composition. A fairground photographed at blue hour, with the deep sky above and the blazing trails of the rides, is one of the easier light-trail images to get right quickly.
Star trails. The same physics as vehicle light trails, but operating on a longer timescale: the Earth's rotation causes the stars to appear to move across the sky, and a sufficiently long exposure records this motion as arcs centred on the celestial pole. In the northern hemisphere, Polaris sits close to the pole and barely moves; stars further from the pole describe larger arcs. A six-hour single exposure at a dark location on a clear night will produce dramatic concentric circles centred on Polaris. In practice, single exposures of this length are impractical for most cameras and are vulnerable to any interruption (cloud, aircraft, a battery dying at hour five). The standard approach is to shoot a sequence of shorter exposures — sixty-second or two-minute individual frames — and stack them in post-processing using dedicated software (Sequator or StarStax on desktop, or stacking apps on mobile). The stacking process combines only the bright pixels from each frame, accumulating the star trails while keeping the sky background dark. Planning apps — Stellarium for star-position planning, PhotoPills for composition and timing — are very useful for this. You need a genuinely dark location: somewhere with a Bortle scale rating of 4 or below, well away from city glow.
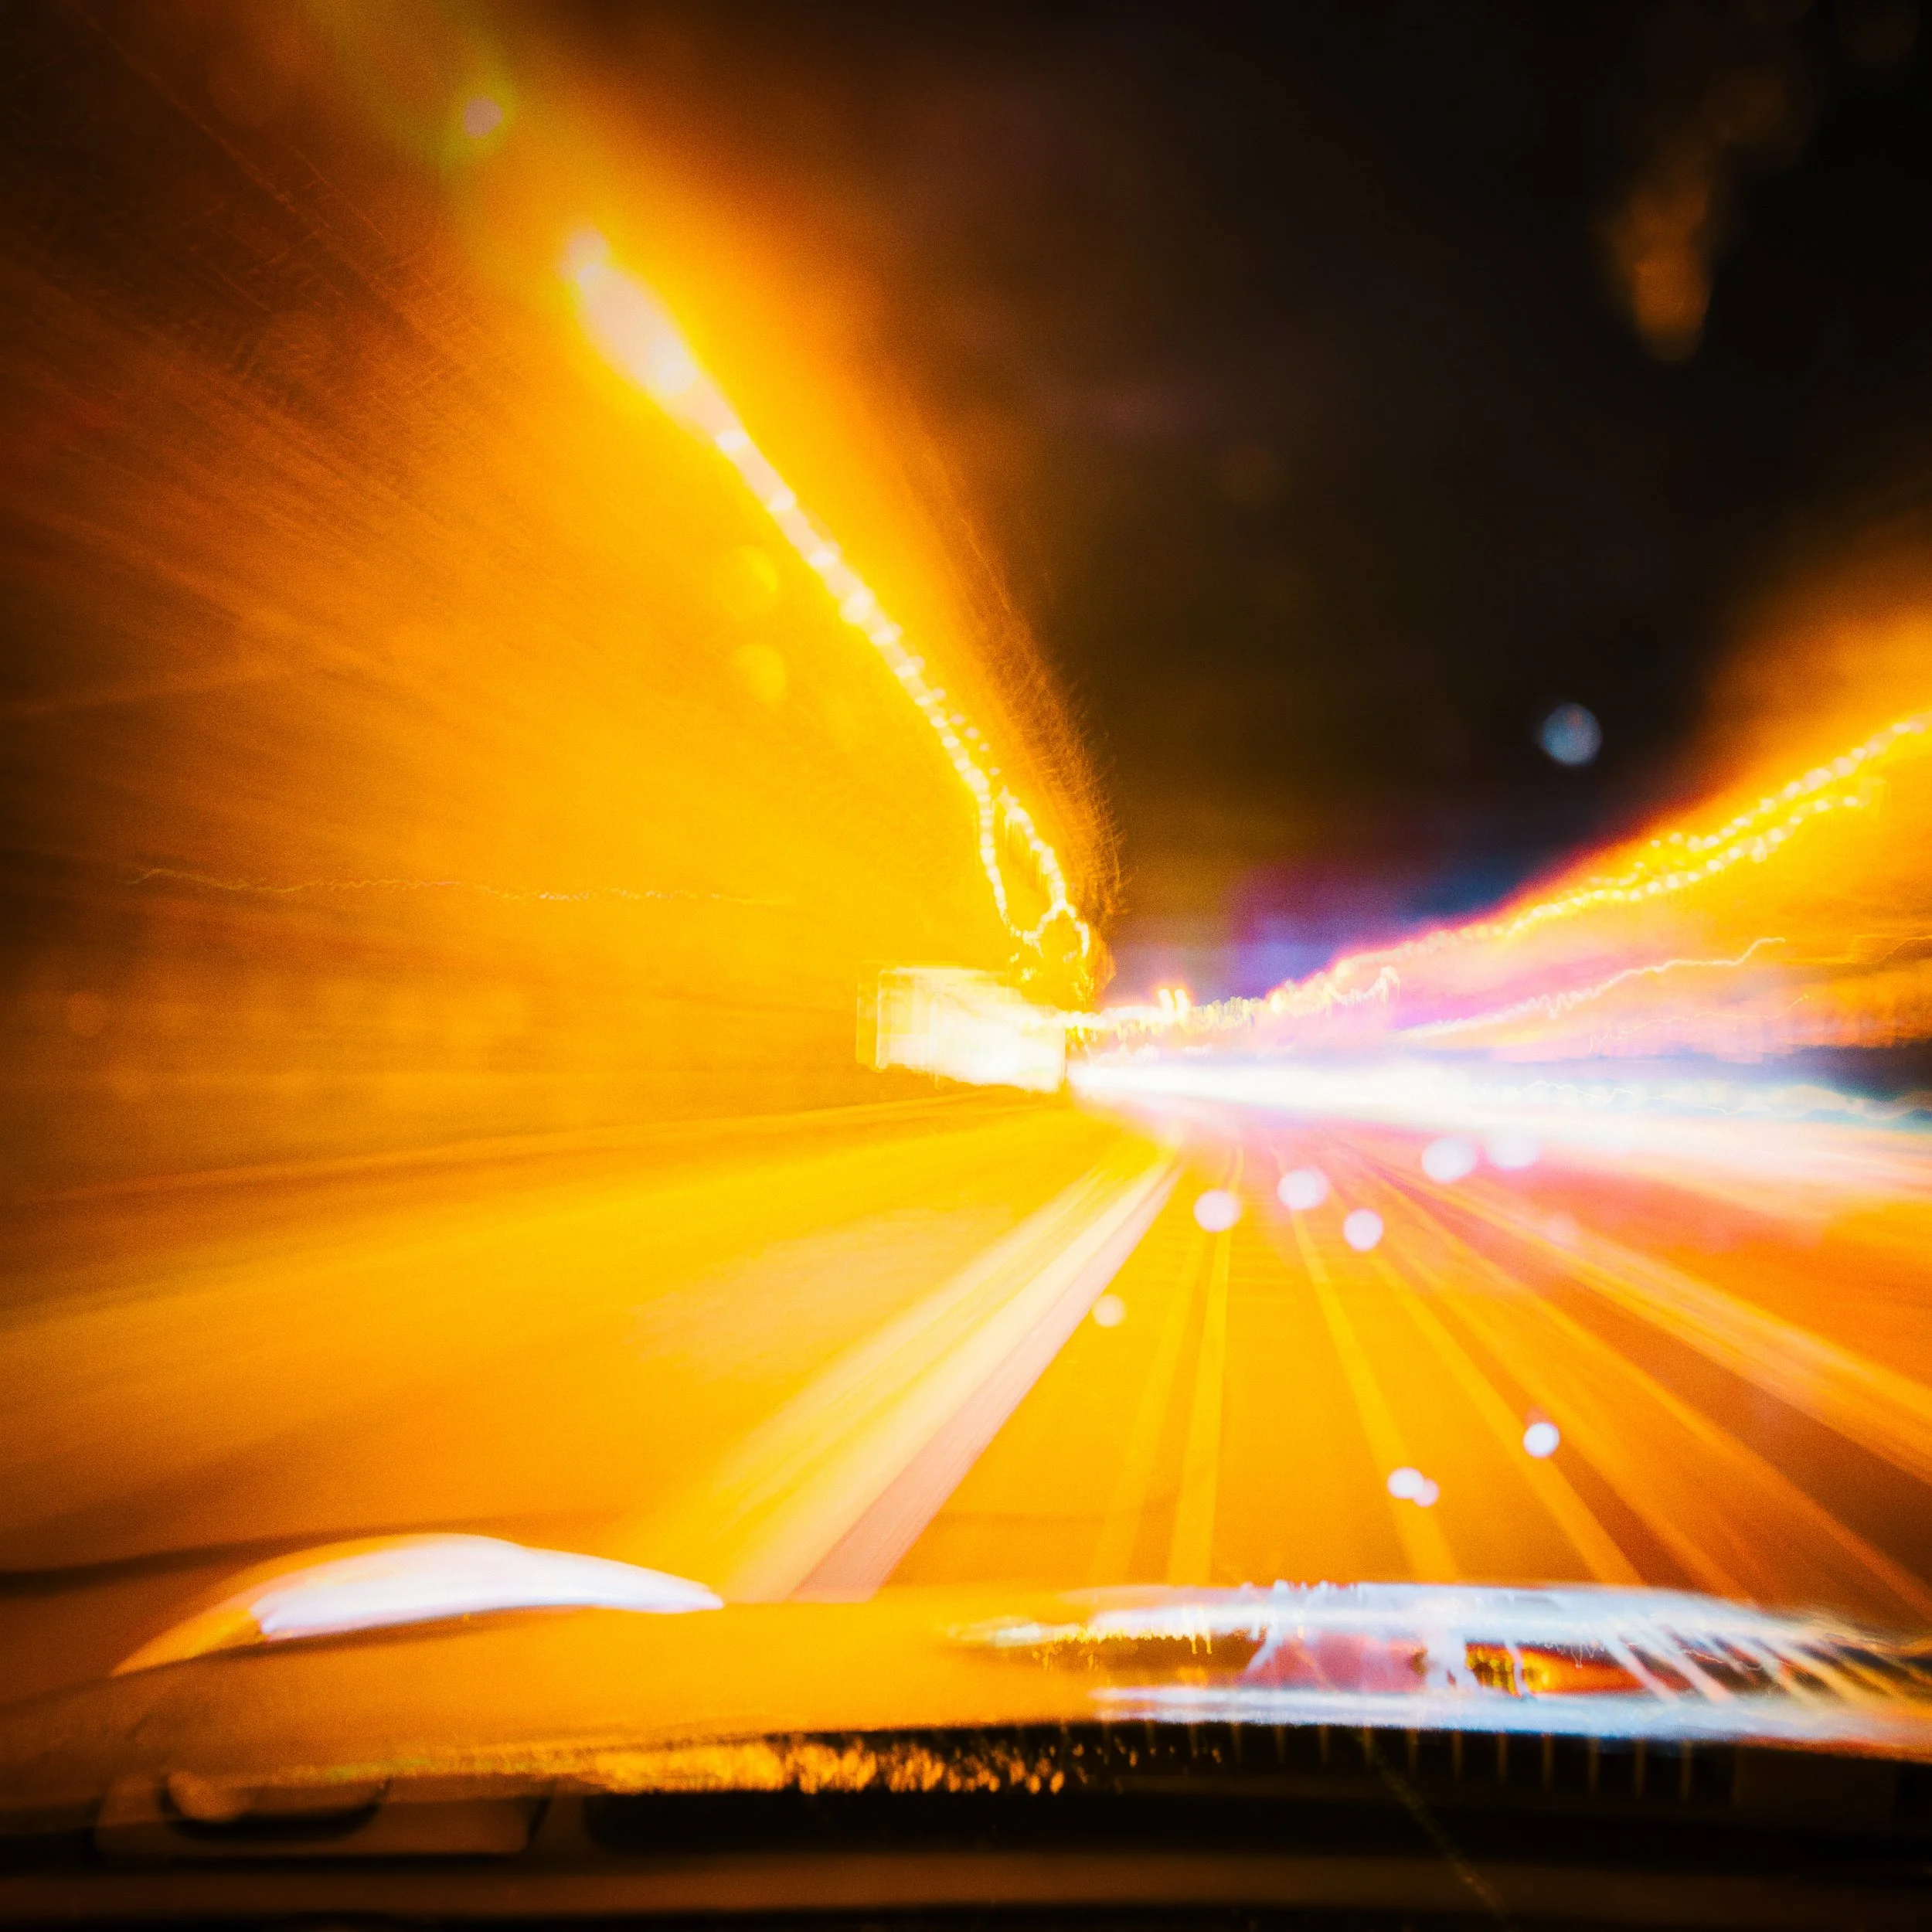
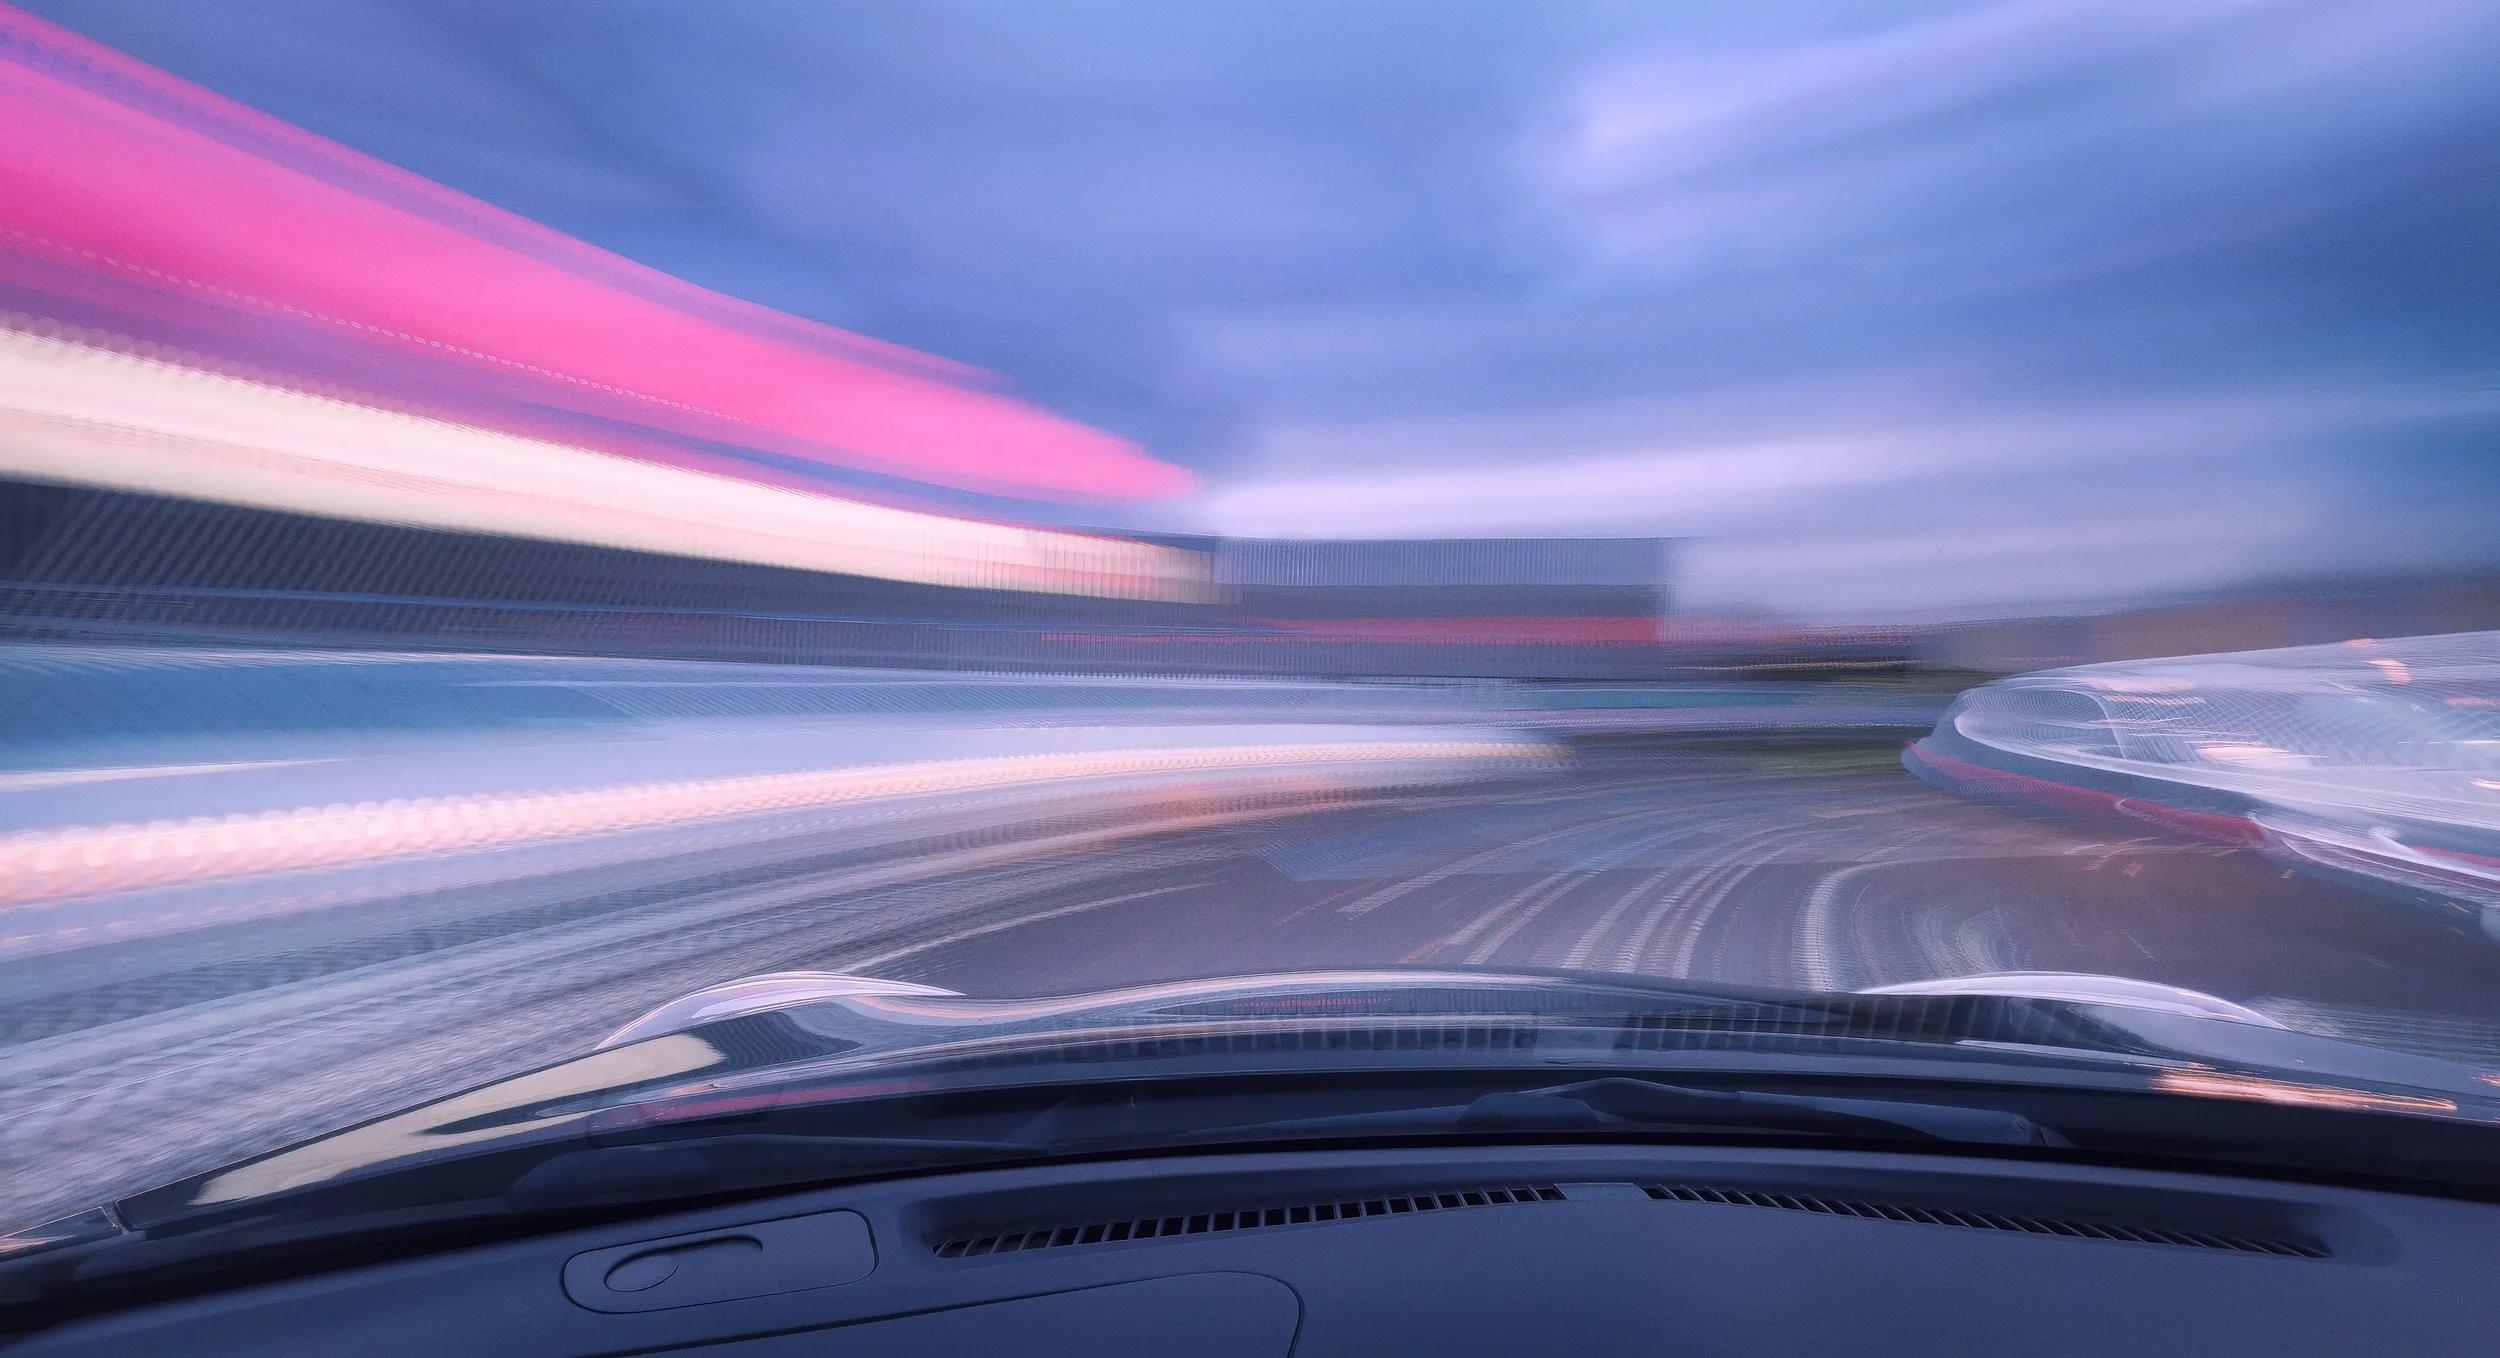
Zoom burst. During a long exposure on a zoom lens, changing the focal length during the exposure creates radial streaking emanating from the centre of the frame — a zoom burst. The effect is energetic and somewhat retro. On a smartphone without optical zoom, the technique in its pure form is unavailable, though some camera apps allow digital zoom changes during an exposure, producing similar (if lower-fidelity) results.
Post-Processing Light Trails
Light-trail images shot in RAW will need processing before they look their best; even JPEG images benefit from post-processing attention. The good news is that the adjustments are not complex.
Basic adjustments. Reduce the exposure slightly if the image is bright overall — deepening the background improves the sense of depth. Bring highlights down to recover any trail areas that have blown slightly (possible only in RAW). Push blacks downward to make the background a richer, deeper dark. Contrast — moderate increases work well. Avoid over-processing: the background should look like night, not like a grey gradient.
Colour. Light trails are inherently colourful, and the colour is often the best thing about them. Resist the temptation to over-saturate — the colours of headlights and tail lights are already vivid, and excessive saturation makes them look unnatural. Work with white balance to make the background sky a pleasing tone: a deep blue, a blue-grey, or an intentional warm amber. If the sky has the orange cast of sodium lighting and you want to retain it, leave the white balance alone. If you want to shift it towards blue, cool the temperature slider. Do not attempt to produce a clinically neutral grey background — it will look wrong.
Noise reduction. Long exposures in low light produce noise, particularly in the dark, even-toned background areas where noise is most visible. Apply noise-reduction before sharpening — this is standard practice. Lightroom's Denoise AI is extremely effective on RAW files and handles low-light shadow areas well. Snapseed's Detail tool works adequately for mobile post-processing.
Stacking. The stacking technique — compositing multiple exposures of the same scene in post — allows you to accumulate more trail content than any single exposure could capture, without extending any individual exposure to an impractical length. The method: import exposures as layers in Photoshop (or a stacking app); set the blend mode of upper layers to Screen or Lighten. These blend modes work on the principle that only the brightest pixels from each frame are included in the composite — so the bright trails accumulate across frames, but the dark background, being similar in each frame, does not. The result is denser, more complex trail patterns than any single shot could provide. Ensure the frames are aligned (use Photoshop's Auto-Align Layers function if the tripod shifted slightly between shots) and mask out any unwanted elements — a poorly timed truck, a pedestrian who wandered into frame.
Selective adjustments. Use local adjustments — Lightroom's brush tool, Snapseed's Selective tool, graduated or radial filters — to darken the background whilst keeping the trails bright, to add local contrast to architectural elements, or to lift the shadows on a foreground element that has gone too dark. Light-trail images frequently benefit from having the background darkened and the trails slightly brightened relative to the global exposure.
Black and white conversion. Removing the colour from a light-trail image is almost always a mistake. Colour — the warm white of headlights, the deep red of tail lights, the blue-purple of a sodium-lit sky — is typically the strongest quality these images possess. A black-and-white conversion reduces the trails to tonal shapes that compete with the background rather than standing out from it. It is worth considering only for architectural light-trail work where geometry and tonal contrast carry the image by themselves, and even then, cautiously.
Common Challenges and Solutions
Overexposed trails. The trails blow out to pure white with no colour or detail. First, reduce ISO to the minimum available. Second, shorten the shutter speed. Third, wait for slightly lighter traffic — fewer vehicles per exposure means less accumulated light. On a dedicated camera, a narrower aperture (f/11 or f/16) will also help. On a smartphone, aperture is fixed; ISO and shutter speed are your only levers.
Camera shake and blurred background. The static elements of the image — buildings, road surface, sky — are blurred or soft. Check that the tripod is stable on level ground. Use the self-timer or a remote shutter. In windy conditions, weigh the tripod down with a bag. Consider whether the camera's built-in image stabilisation is working against you: on a firmly mounted tripod, stabilisation that is searching for movement it cannot find can sometimes introduce subtle micro-movements; disabling it when tripod-mounted is good practice on dedicated cameras.
Not enough trails. You took a thirty-second exposure and there was only one car. This is primarily a location and timing problem — try a busier road, or return during evening rush hour. Longer exposures help on a lightly trafficked road, but only if the traffic is actually using the road. In post, stacking multiple exposures can accumulate trails from a sequence of shots.
Battery drain. Charge fully before you go. Carry a power bank. Reduce screen brightness. In cold weather, keep the phone in a pocket between shots; a cold battery drains faster and is more likely to trigger a low-temperature shutdown.
Autofocus failing in low light. The camera hunts and cannot lock. Switch to manual focus and focus on the nearest reliably lit element. On a smartphone, tap to focus on a lit distant element, then lock the focus (long-press on iOS; the AF/AE lock icon appears). Pre-focus in daylight before the light fades, if possible, and do not change lenses or reset the camera.
Trails blowing out specifically at the centre. The core of a headlight or streetlamp is pure white whilst the outer edge of the trail retains colour. This is normal to a degree — the centre of a light source is brighter than its edges. If it is excessive, reduce ISO or shorten exposure. It is not recoverable in post from JPEG; in RAW there may be a small amount of headroom in the highlights slider.
Resources
Here’s an interesting video from Emil Pakarklis of the iPhone Photography School. “Long exposure photography is one of the most exciting things you can do with the iPhone! But for truly great results, you have to know what you’re doing. That’s why I’m sharing these advanced long exposure techniques. Once you start using these techniques, you’ll be blown away by the kind of images you can create… including stunning light trail photos. 💫 So watch this video, and discover how to capture incredible long exposures that nobody will believe were shot with an iPhone.”
Here’s a great video from Mark McGee on shooting great Light Trails with a smartphone: “In this video, I do long exposure photography using ReeXpose for the iPhone. Creating motion blur and light trails with really long shutter speeds and capture times for those dreamy smooth fine art photos.”
Here’s a really entertaining, informative (and long) video on Light Painting from Eric Paré: “We made this 80-minute video for those who want to see and know everything: Our setup, our workflow as of 2024, what goes through our minds as we make decisions, and most importantly, OUR FAILS. Grab a seat and take some popcorn, there’s a lot to unfold in this one.”
If you're interested in photographing star trails, it's hard to think of a better guide than Alyn Wallace. An award-winning Welsh astrophotographer, author and educator, Alyn inspired countless photographers through his generous teaching style, infectious enthusiasm and beautifully crafted YouTube videos. His untimely death in 2024 was a huge loss to the photography community, but his knowledge and passion live on through the remarkable body of work he left behind. This star-trail tutorial remains one of the finest introductions to the subject.
Give It a Try!
Three exercises to get started, in order of difficulty.
1. The blue-hour traffic trail. Identify a road with regular traffic flow — a busy A-road or urban dual carriageway — with a viewpoint that gives you a safe, elevated position looking along it. Arrive fifteen to twenty minutes before sunset. Set up on a tripod, frame the shot to include some sky, and take a sequence of exposures at different shutter speeds: 4 seconds, 8 seconds, 15 seconds, 30 seconds. Photograph the same frame at each setting, timing shots to include traffic. Compare results: notice how trail length and density change with exposure time; notice how the sky changes colour as the light fades; notice how the balance between sky and artificial light shifts across the sequence. The 4-second and 30-second versions of the same scene may look like different photographs.
2. The roundabout circle. Find a roundabout with a clear elevated viewpoint — a footbridge over it, a car park roof nearby, a natural slope above it. A roundabout with a central feature (sculpture, planting, a bollard arrangement) is better than a bare one. Shoot during the evening rush hour, when traffic flow is consistent, using a 15–25-second exposure. The circular movement of vehicles around the island should produce curved arcs converging on the centre. Look for the point where the traffic flow is dense enough to produce overlapping arcs without the trails merging into a solid ring. If the arcs are too sparse, try a longer exposure; if they are merging completely, try a shorter one or shoot at a quieter time.
3. Light painting indoors. In a darkened room, set a camera or phone on a tripod and frame a clear, uncluttered space with a dark background. Set a 20-second exposure. Use a small torch or your phone screen (facing towards the camera) as your light source and draw a shape or write a word in the air in front of the lens — the letters must be written in mirror image so that they read correctly in the photograph. Review the result. Repeat, drawing the same shape at different speeds: a faster movement produces a thinner, dimmer line; a slower movement produces a thicker, brighter one. This is the same physics as vehicle light trails — the only difference is that you are holding the light source.